Flyway
Last modified: 20 March 2024tip
This functionality relies on the Flyway plugin, which is bundled in IntelliJ IDEA Ultimate. Prior to 2024.1, support for some of its features was available in the JPA Buddy plugin only.
To enable corresponding features, make sure that the project contains the Flyway dependency.
<dependency>
    <groupId>org.flywaydb</groupId>
    <artifactId>flyway-core</artifactId>
</dependency>
dependencies {
implementation 'org.flywaydb:flyway-core'
}dependencies {
implementation("org.flywaydb:flyway-core")
}The Create Flyway Versioned Migration action is available even without Flyway dependencies.
Initialize schema
With IntelliJ IDEA, you can initialize your database schema based on the mappings provided in your JPA entities.
Press CtrlShift0A and start typing Flyway Init Migration.
To generate the DDL script based on the data model, select Model and specify the corresponding persistence unit.
If you want to compare two databases, select DB and choose one of the existing connections for both of them.

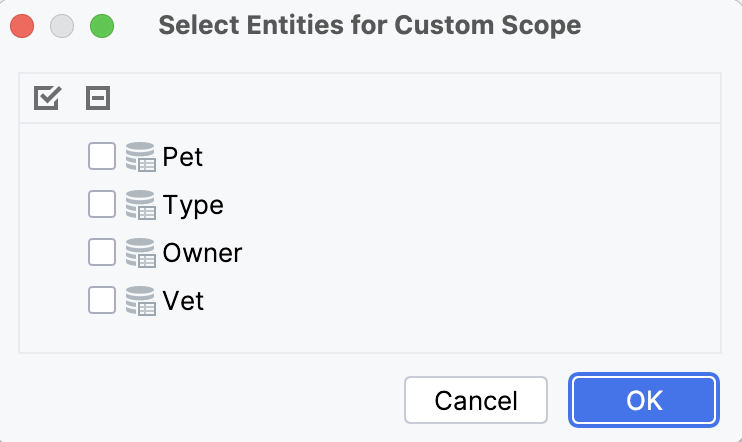
IntelliJ IDEA provides an option to create migration scripts specifically for changes in selected entity changes. In the Scope list, click Selected Entities and, in the Select Entities for Custom Scope window, choose entities.

Generate migration script
If a database connection is not established, create one.
note
In Spring and Micronaut projects, you can quickly create a database connection right from your application.properties or application.yml file by clicking
in the gutter.
In the Database tool window, right-click a database and select Create Flyway Versioned Migration.
In the dialog that opens, select a source (the desired state of the data model) and target (the old state of the data model).
You can choose between the following source options:
DB: should be used in case you have an up-to-date database and would like to generate migration scripts for updating another DB to the same state.
Model: use it to generate migration scripts representing the difference between the current state of the entity relationship model (JPA entities) and the old (target) state.
The target can be set to:
DB: target DB with an older version of the schema.
Snapshot: use this option in case you have the desired state stored in a data model snapshot. It can be generated by IntelliJ IDEA as well.

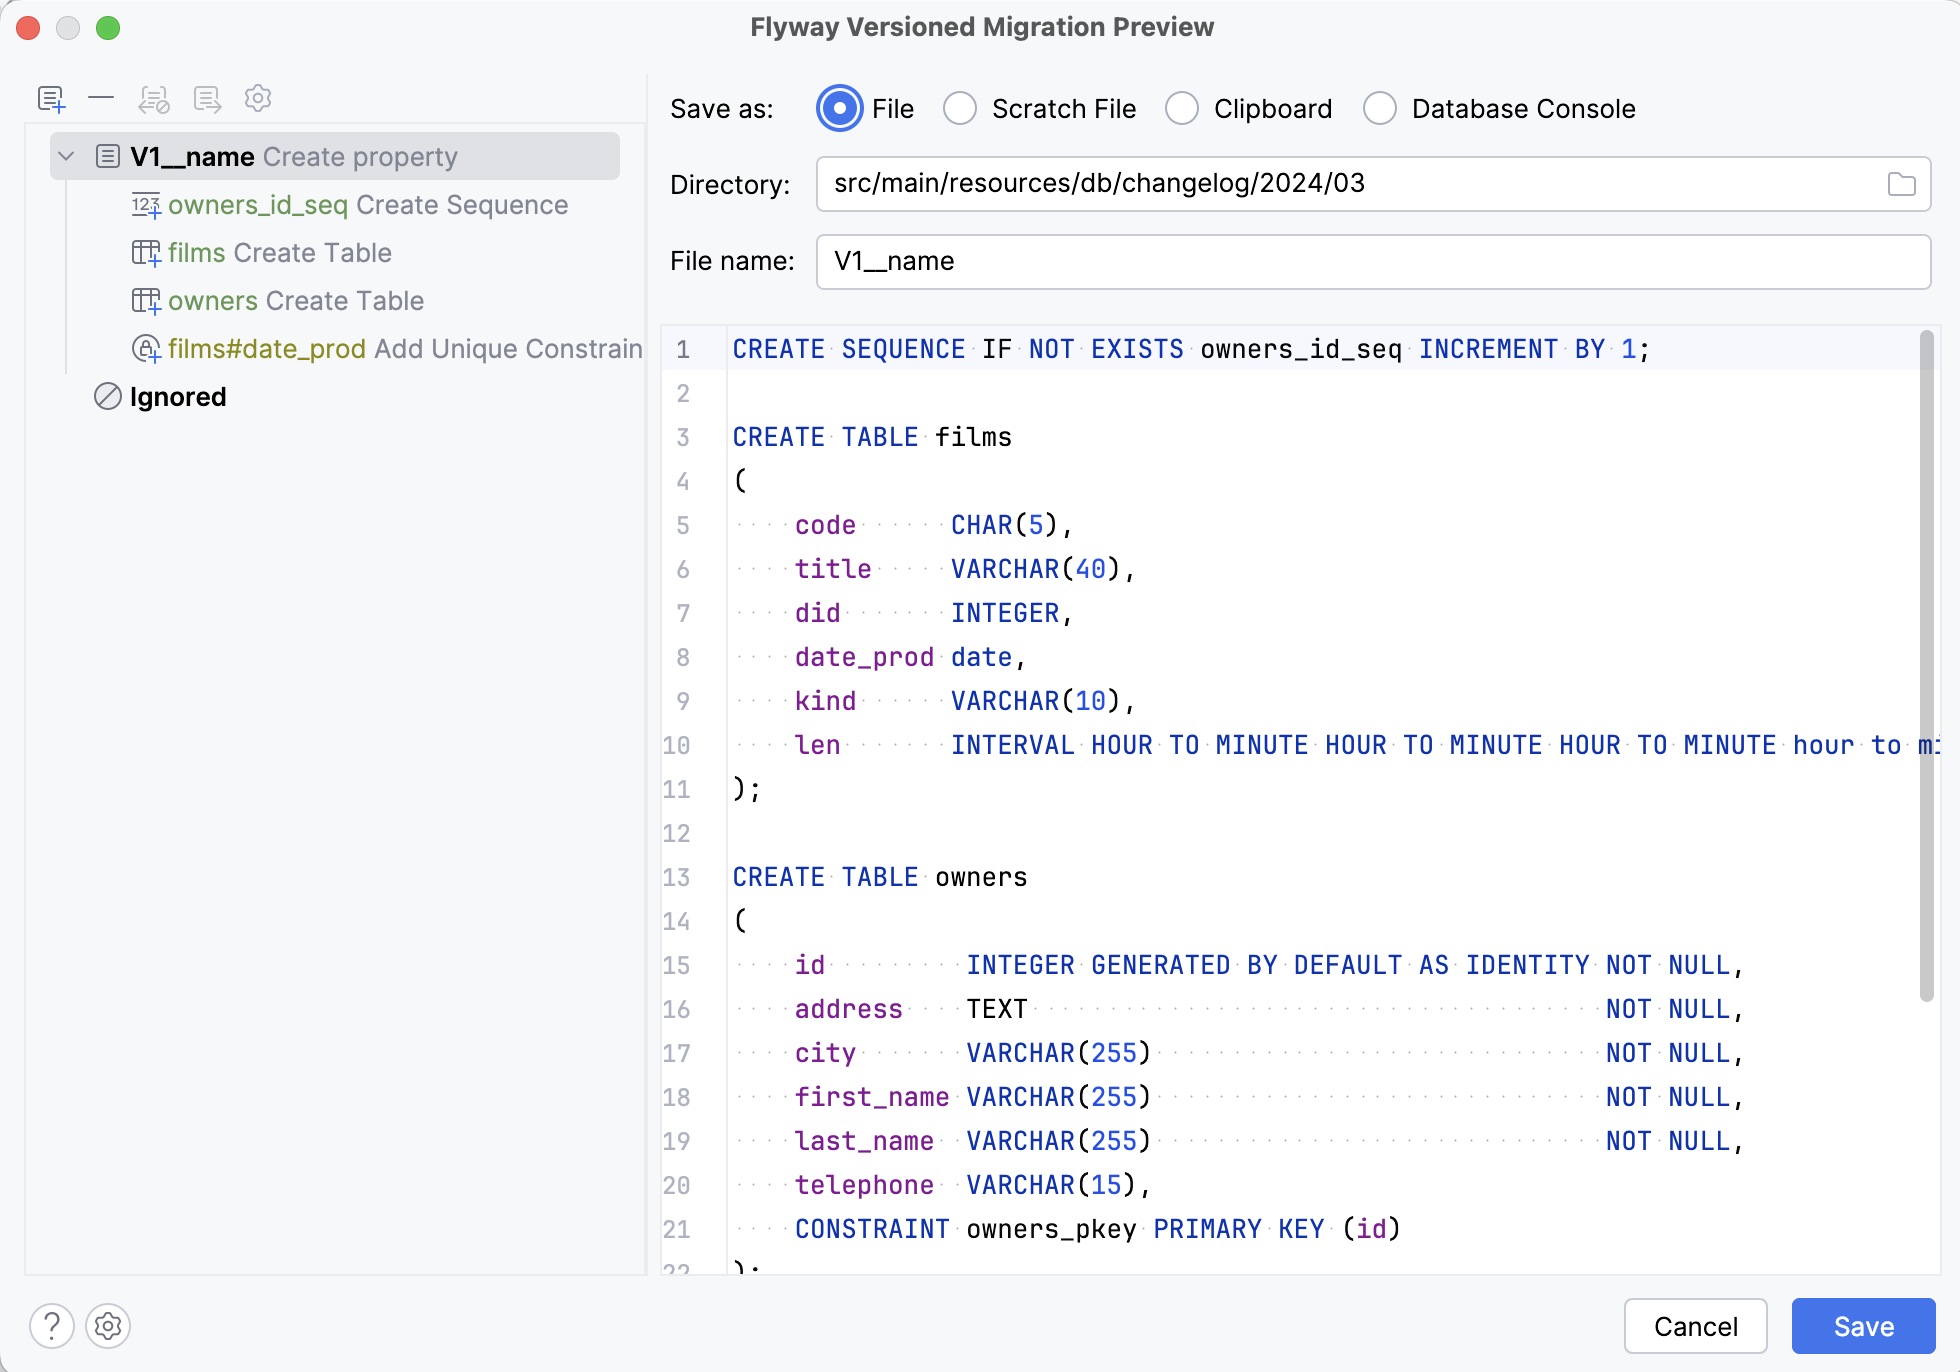
Click OK. IntelliJ IDEA will analyze the difference between Source and Target and show the Flyway Versioned Migration Preview dialog.
Specify the file name and location and click Save.
Flyway Versioned Migration Preview Window

IntelliJ IDEA allows you to select the place where to store the generated script: you can choose a file, scratch file in the IDE or clipboard.
Directory and File name fields are responsible for configuring the location of the generated migration. If a migration with the specified name already exists, you will be prompted with a warning, after which the changes will be appended to that migration.
On the left of the window, there is a preview of the actual changes to be generated. You can see what each change is going to look like by clicking on them.
Above the list of changes, you can use the following buttons:
Add Versioned Migration
Create a secondary versioned migration.
Remove from Versioned Migration
Remove the changes and add them to the Ignored section, so they are excluded from future migrations.
Restore from Ignored
Move the changes from Ignored to the migration.
Move to Another Versioned Migration
By default, a single migration script is created on each diff generation with all the changes. This action lets you move a change to another migration file.
Show Other Actions
Interact with a large number of changes in the migration files: Select all, Expand all, and Collapse all.
To combine several changes into one migration file or to ignore them, drag them around.
Java Migration
Java-based migrations are a great fit for all changes that can not easily be expressed using SQL. These migrations represent Java classes that implement the JavaMigration interface or inherit from the BaseJavaMigration class. IntelliJ IDEA follows the second option and generates the class name according to Flyway's default naming convention. This enables Flyway to automatically extract the version and the description from the class name.
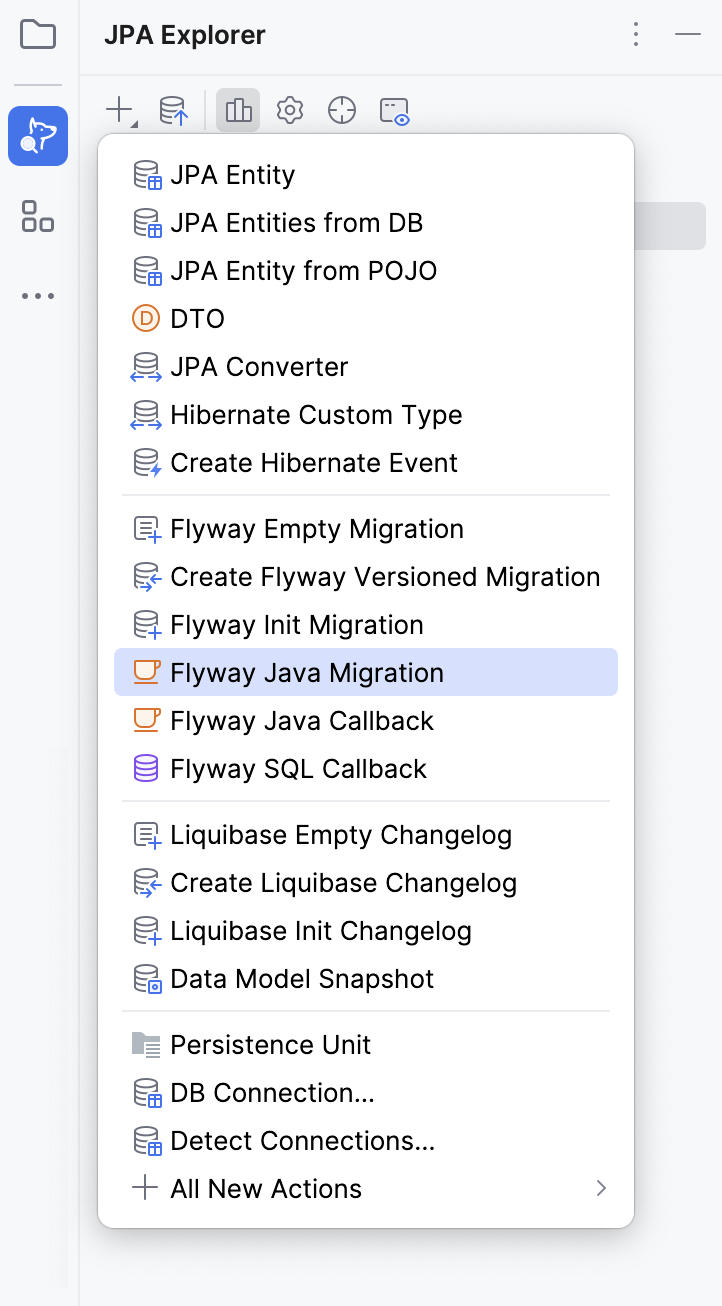
To generate java migration, press the plus button in the JPA Structure tab and choose the corresponding item.
Generate Java migration
Open a Java file in the editor.
Press CtrlShift0A and start typing Flyway Java Migration.
In the window that opens, set class name, source root and package name.

The following Java class will be generated:
public class V1__ extends BaseJavaMigration {

    @Override
    public void migrate(Context context) throws Exception {
        try (PreparedStatement statement = context.getConnection()
                .prepareStatement("")) {
            statement.execute();
        }

    }
}
If you have installed and enabled the JPA Buddy plugin, you can also use the JPA Explorer tool window to access actions described on this page.

Flyway Callbacks
While migrations are sufficient for most needs, certain situations require you to execute the same action over and over again. With the help of IntelliJ IDEA, you can generate all events that Flyway supports.
Generate SQL Callback
Press CtrlShift0A and start typing Flyway SQL Callback.
In the window that opens, select the source root and directory for the generated file.

In the Callback event field, select one of the events that Flyway supports.

Optionally, the callbacks may also include a description. The value of the Description filed will be appended to the callback name.
Generate Java Callback
Open a Java file in the editor.
Press CtrlShift0A and start typing Flyway Java Callback.
In the window that opens, enter a class name and a callback name and select a callback event. Select the class source root and package.
Use the Can handle in transaction checkbox to specify whether the
canHandleInTransactionoverridden method should return true of false.
Flyway Settings
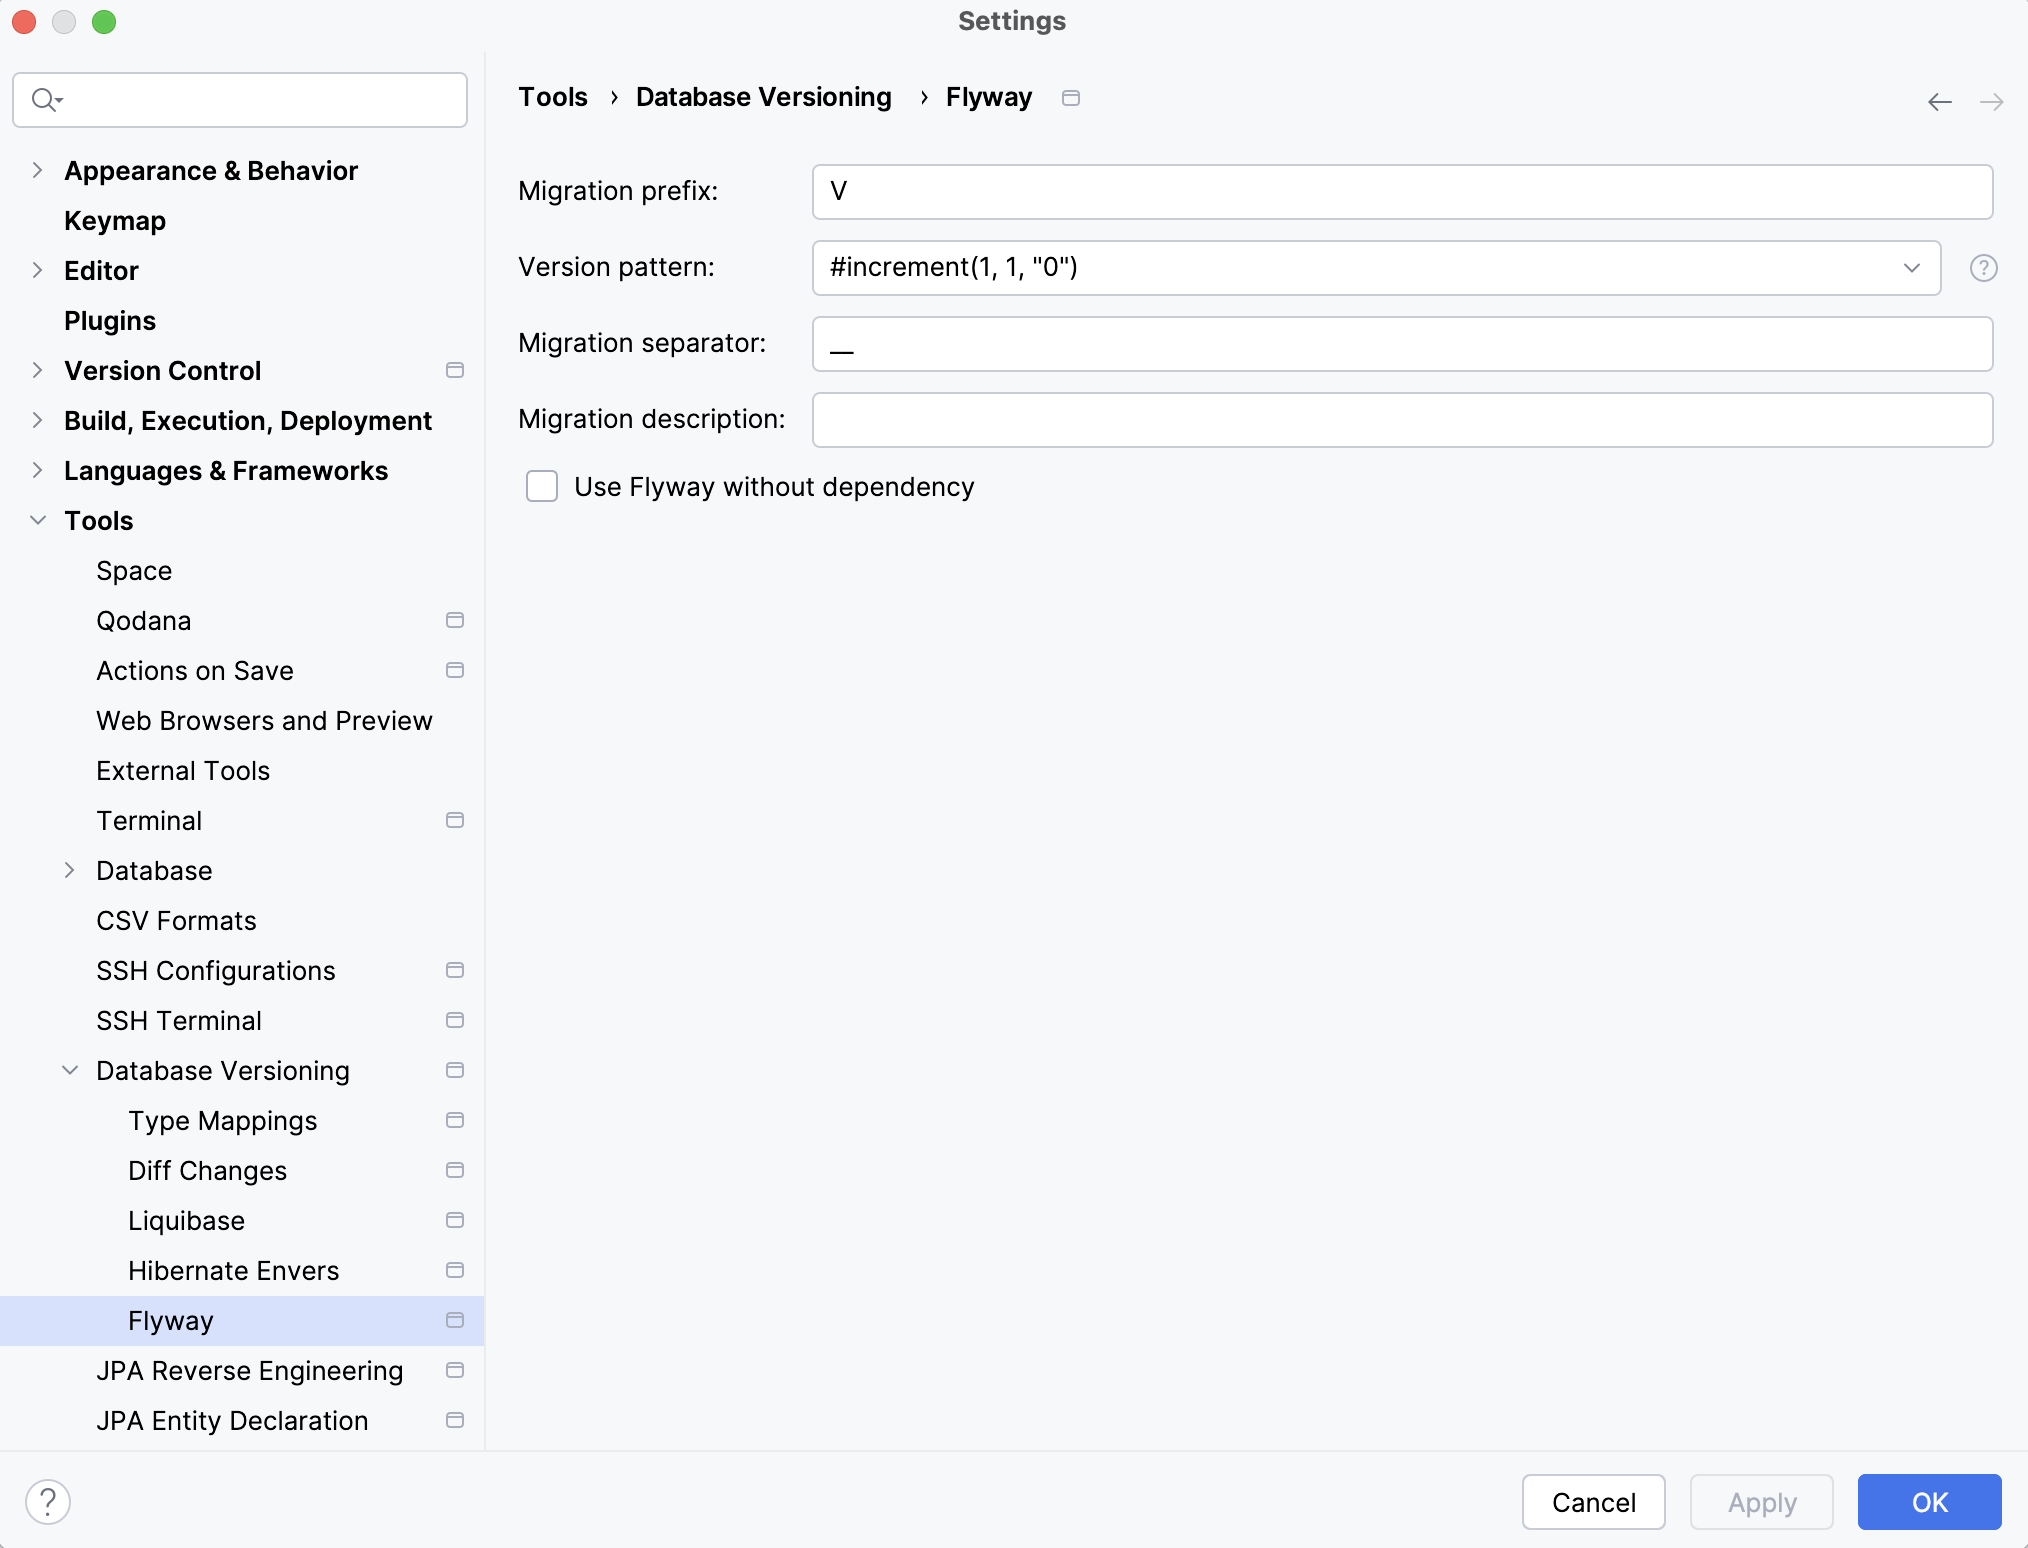
Whenever an empty or differential Flyway migration is created, IntelliJ IDEA generates the file name based on the flyway naming pattern. In the IDE settings (CtrlAlt0S), you can configure values for name generation.

Migration prefix. The default value is
V.Version pattern. After the hyphen, an example of the generated sequence is presented.
Migration separator. The default value is "_".
Migration description.
The following variables and macros are available in the templates:
#date([format])– the current system date in the specified SimpleDateFormat. For example,#date(\"yyyy-MM-dd\")returns the date formatted as 2020-12-31.#increment([start], [step], [decimalFormat])— a number that is used to keep the name unique.startvalue is used for the first file and is incremented by step for each next file.decimalFormatparameter specifies the DecimalFormat of the number. For example,#increment(1.0, 0.1, \"#.0\")returns the value formatted as 1.1, 1.2, 1.3, etc.semVer— semantic version of the project (aka SemVer) is a widely adopted version scheme that uses a sequence of three digits (Major.Minor.Patch), an optional pre-release tag and optional build meta tag. The object contains the following methods (the full version in the examples is 1.2.3-SNAPSHOT+meta):${semVer.getRawVersion()}: 1.2.3-SNAPSHOT${semVer.getMajor()}: 1${semVer.getMinor()}: 2${semVer.getPatch()}: 3${semVer.getPreRelease()}: SNAPSHOT${semVer.getMeta()}: meta
Thanks for your feedback!