Configuring project structure
In WebStorm, content is a collection of files with which you are currently working, possibly organized in a hierarchy of subfolders. The top-level folder of a project is its content root.
You can add any folder as a part of your project. To do that, just add this folder as a new content root on the Directories page as described in Working with multiple content roots.
Within a content root, WebStorm can distinguish between the folders with the source code your edit and the folders with other types of content. By default, any folder is treated as Source and is indicated with unless you mark it as another type:
Tests
folders let you keep code related to testing separately from production code.
Resource Root
folders: files in Resource Root folders can be referenced relative to these folders instead of specifying full paths. For example, when you start typing within the
srcattribute of the HTMLimgtag, auto-completion will suggest images from the Resource Root folder.Excluded
folders are ignored by code completion, navigation, and inspections. Exclude folders and specific files that you don't need at the moment, this helps you increase the WebStorm performance.
Right-click the folder in the Project tool window, select Mark Directory as from the context menu, and then select the necessary category.

Alternatively, open the Settings dialog (CtrlAlt0S) , go to Directories, and configure the categories of folders.
Right-click the folder in the Project tool window, select Mark Directory as from the context menu, and then select Unmark as <current category>. For Excluded folders, select Cancel Exclusion.
If you don't need a file right now but you don't want to completely remove it, you can temporarily exclude the file from the project. Excluded files are ignored by code completion, navigation, and inspections.
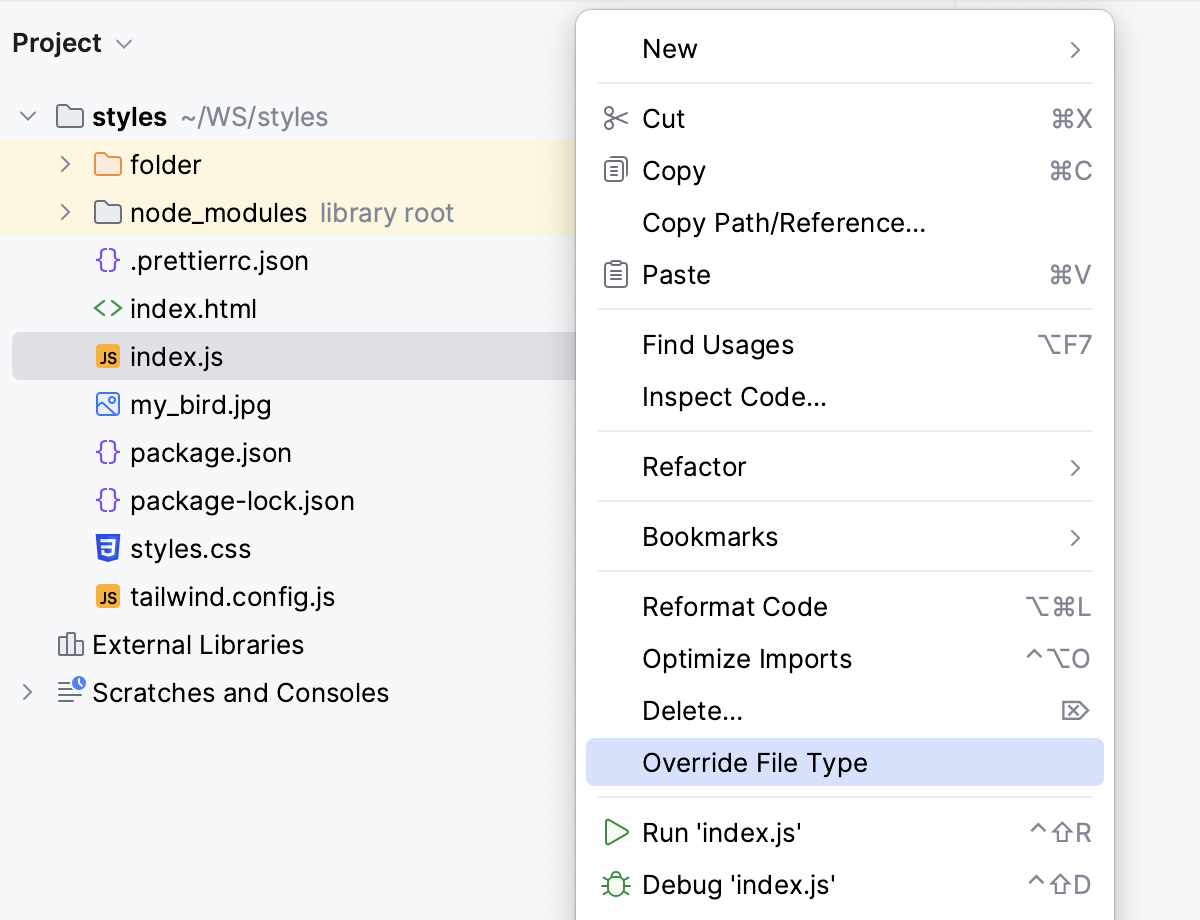
To exclude a file, right-click it in the Project tool window and select Override File Type from the menu.
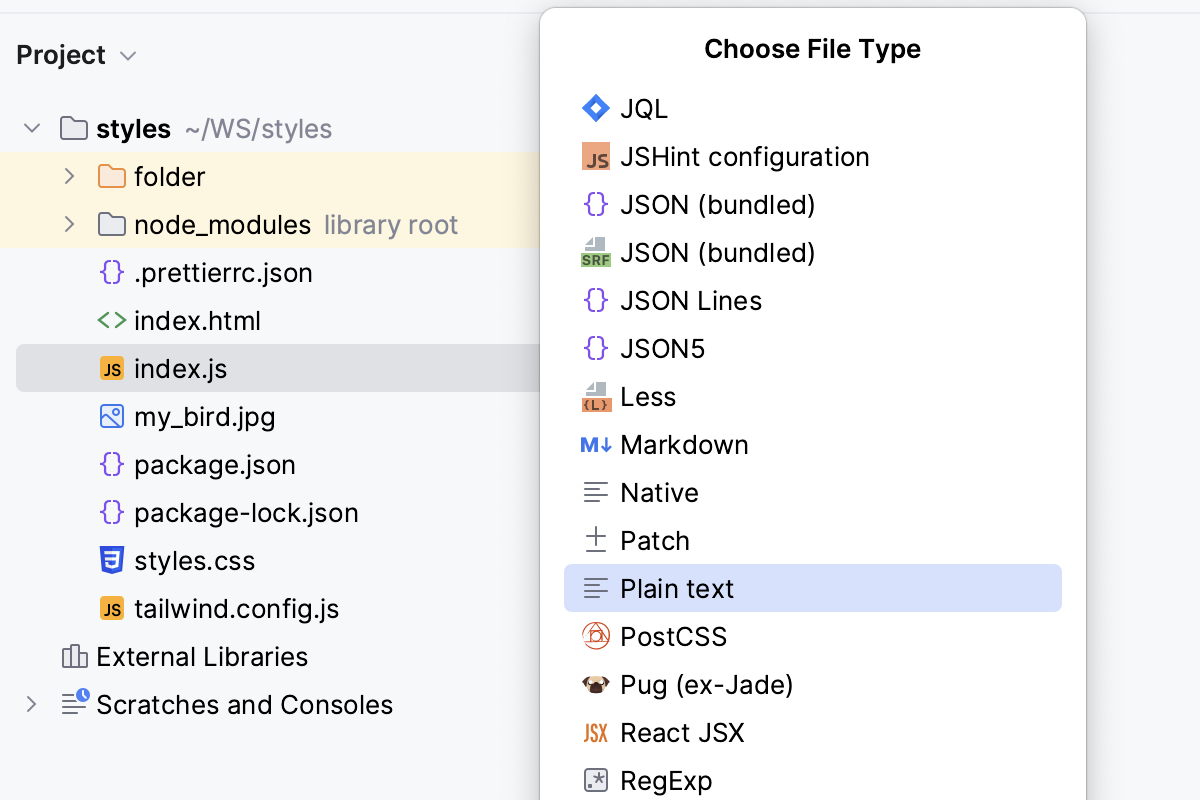
From the Choose File Type list, select Plain text.
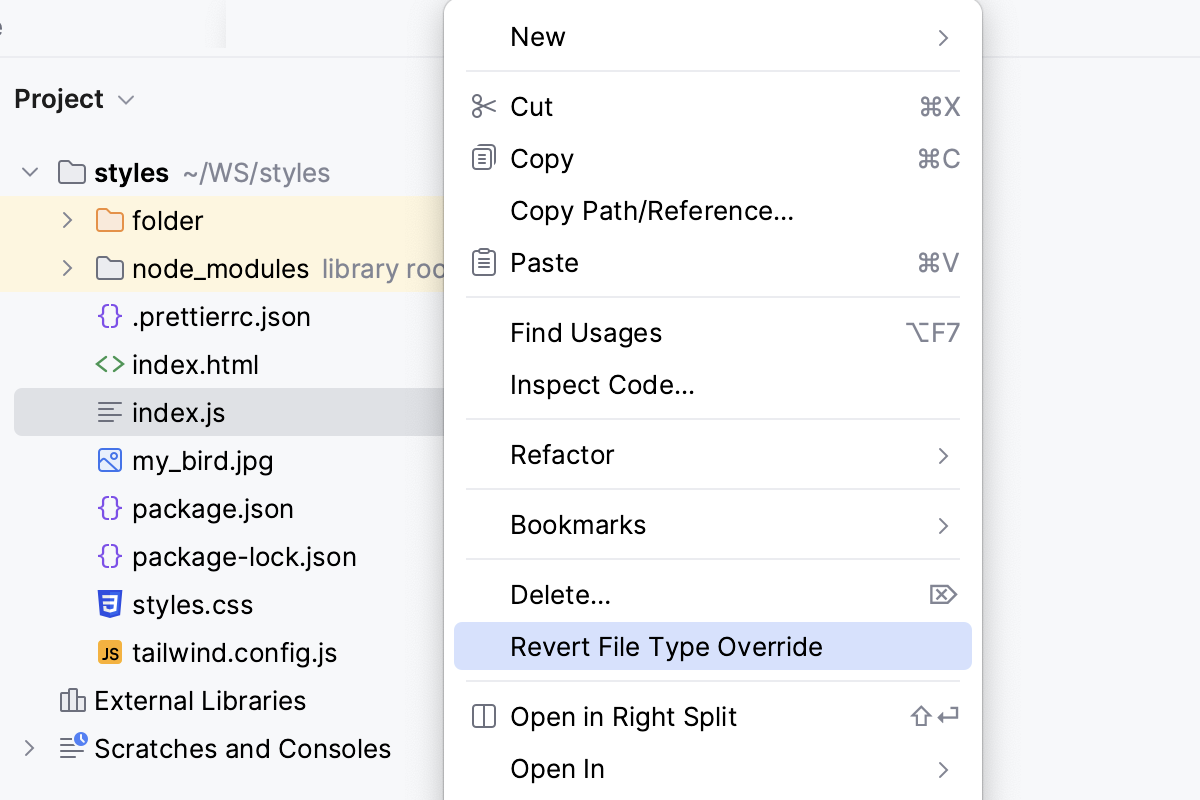
The file is marked with the
icon in the directory tree.
To revert the changes, right-click the file and select Revert File Type Override from the menu.
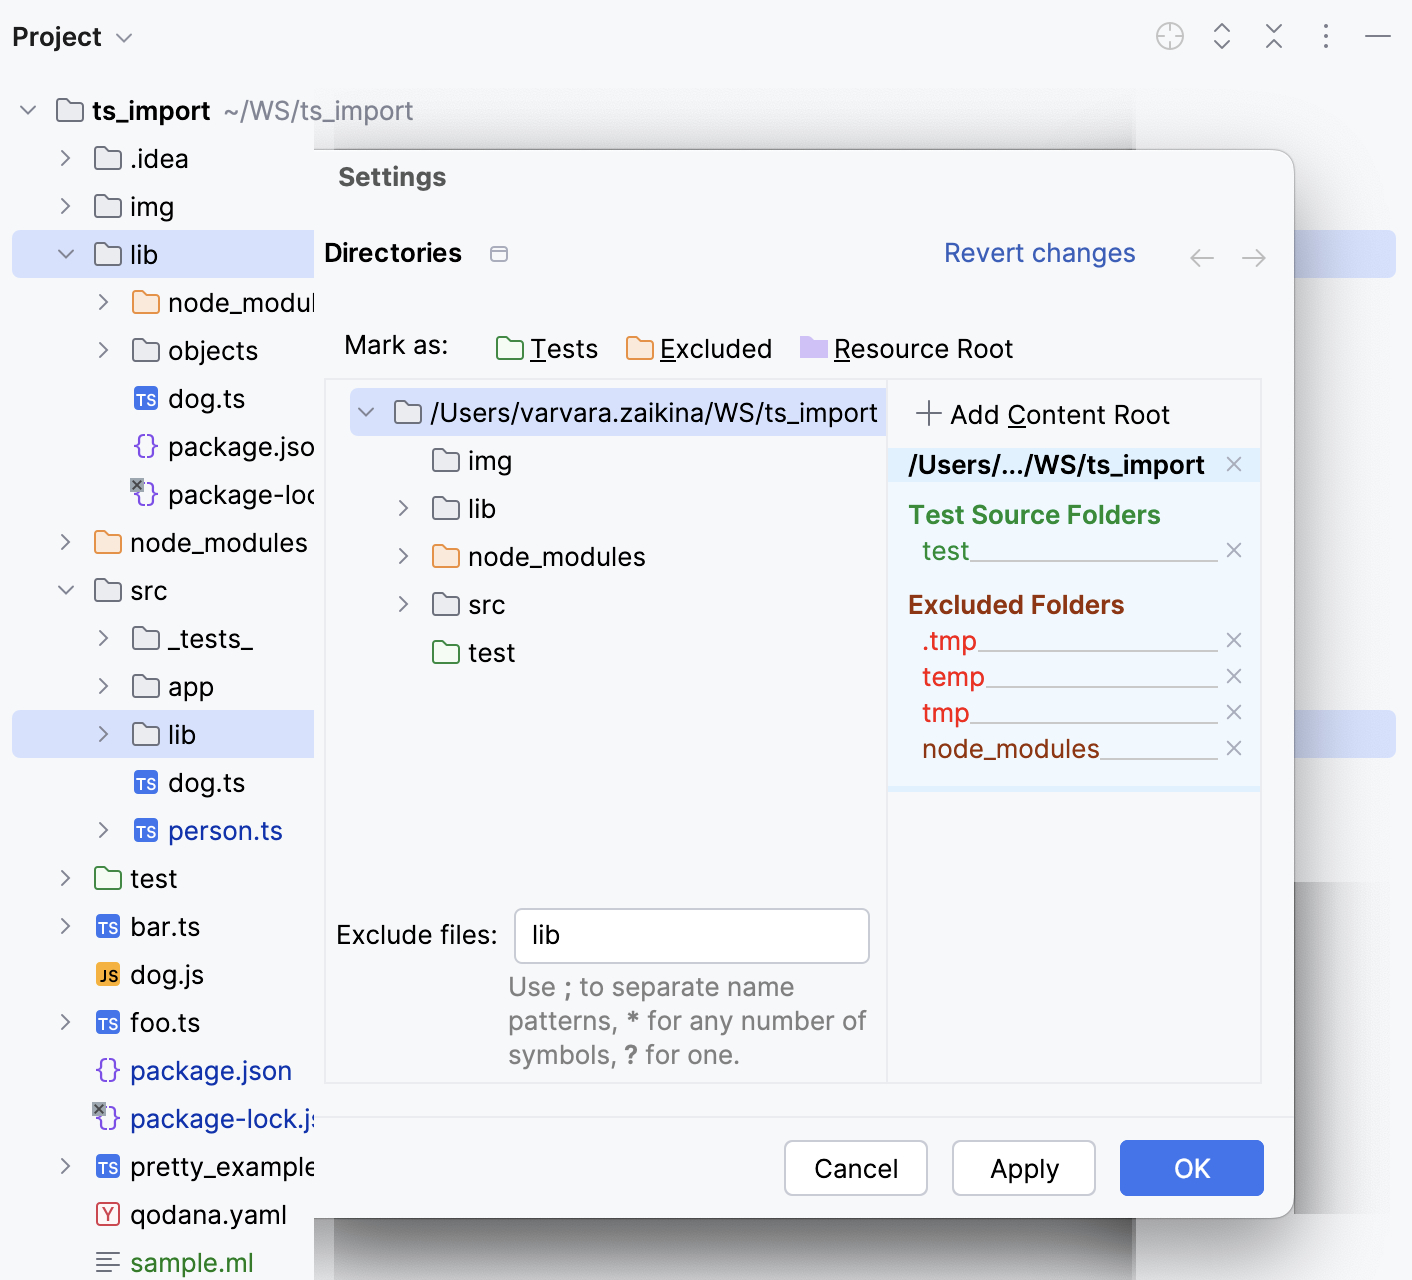
In the Settings dialog (CtrlAlt0S) , go to Directories.
In the Exclude files field, type the masks that define the names of files and folders to be excluded, for example,
*.min.jsorlib. Use semicolons as separators.If the name of a file matches any of these patterns, the file is treated as excluded.
If the name of a folder matches a pattern, all the files in this folder and in its subfolders are excluded.
Note that folders excluded by name patterns are marked as excluded in the Project tool window but they are not added to the Excluded Folders list.
As shown in the image below, the pattern *mal.ts makes the files mammal.ts and animal.ts excluded.
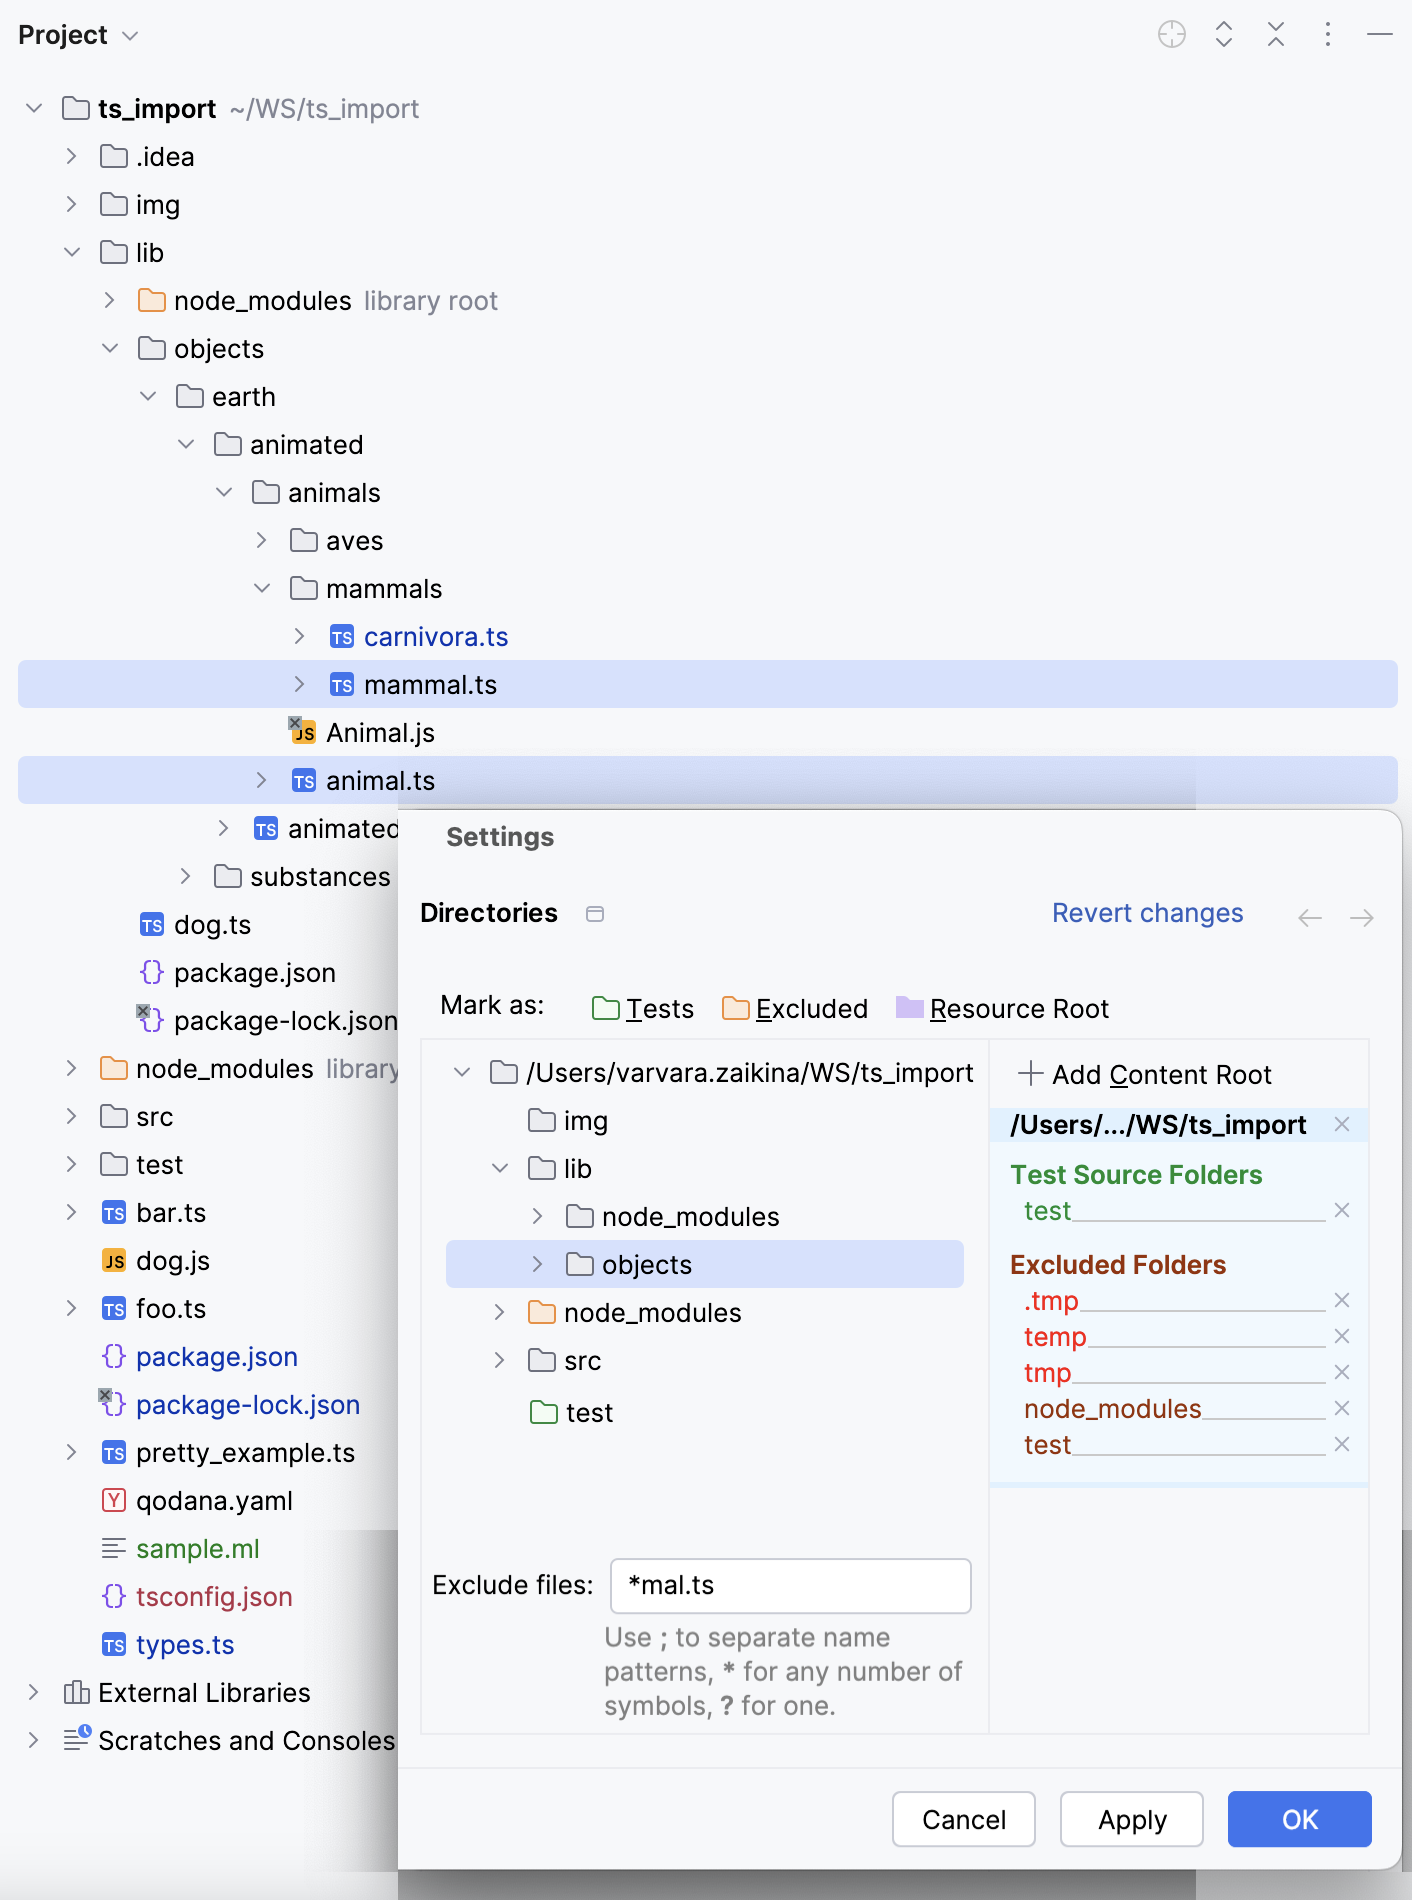
The pattern lib excludes two folders - lib and src/lib.
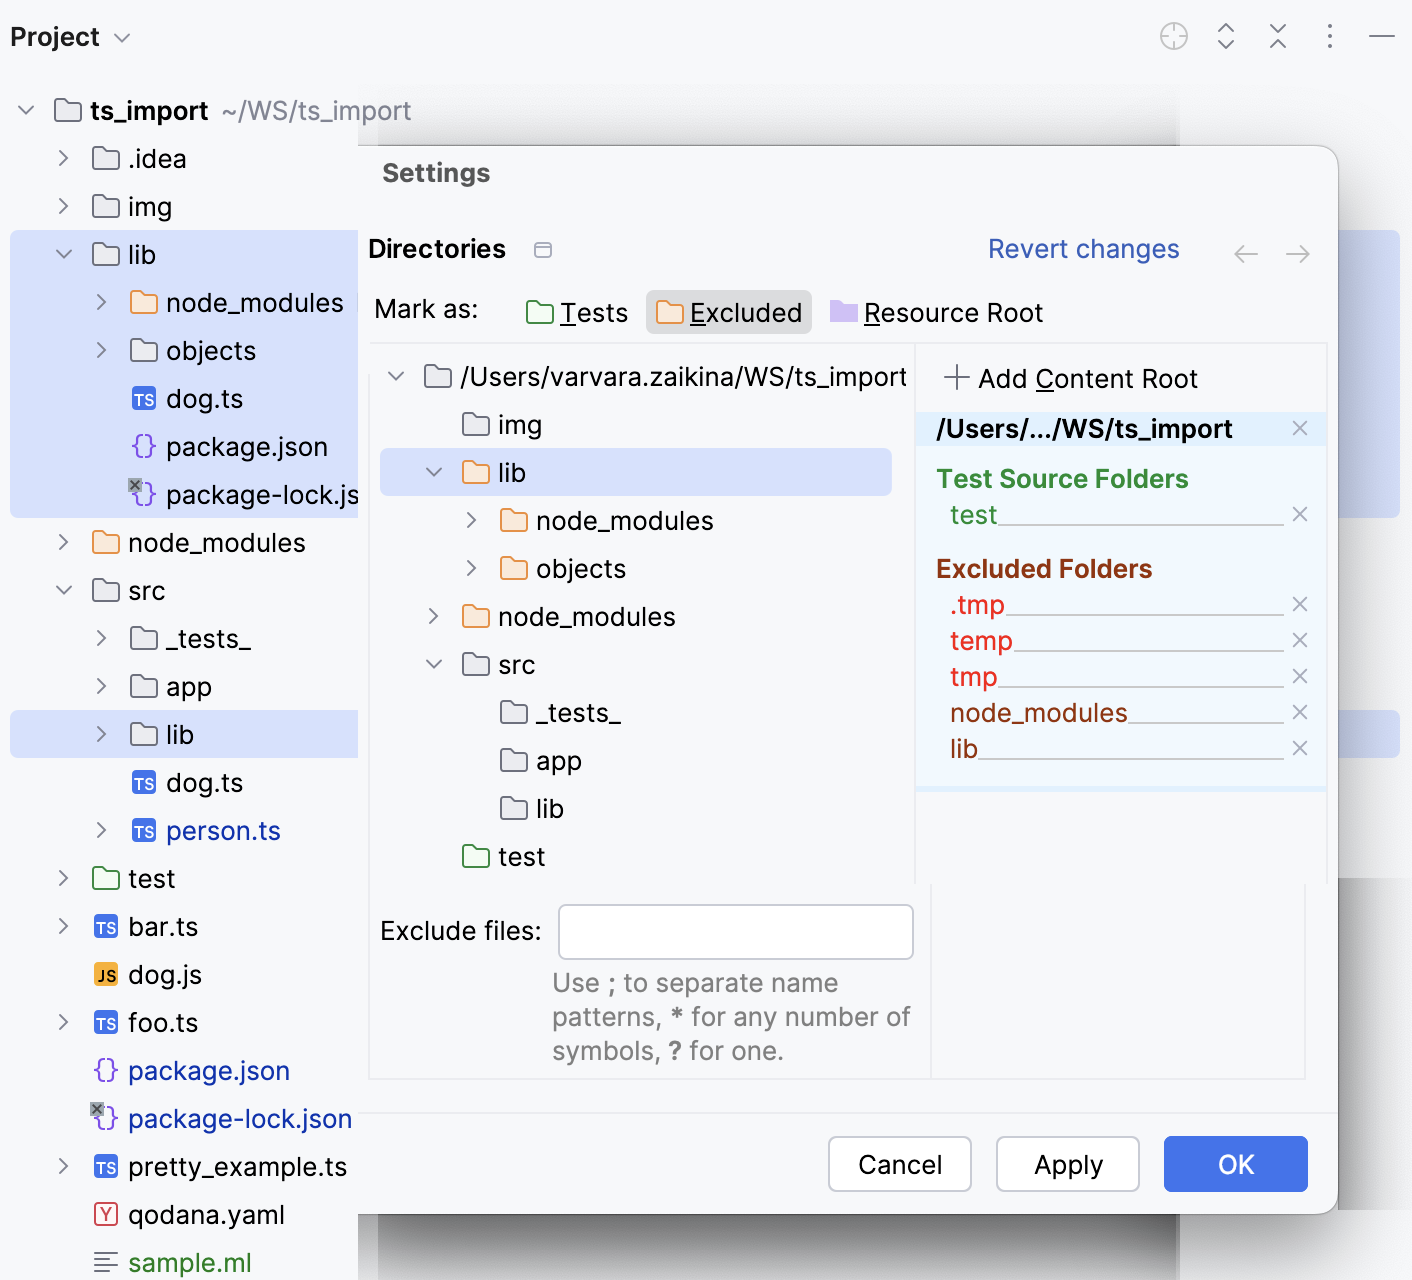
To exclude only the lib folder, select it on the Directories page and click Excluded.
You can have several content roots in your projects. This lets you work with files from several directories that do not have a common immediate parent. This is helpful when you use static contents, for example, icons. You can just save them all in a folder and then add this folder as a content root in several projects.
In the Settings dialog (CtrlAlt0S) , click Directories.
To add a content root, click Add Content Root in the right-hand pane and then select the required folder in the dialog that opens.

To remove a content root, select it in the right-hand pane and then click
next to it. Confirm the deletion. Note that the corresponding folder won't be physically deleted.
Thanks for your feedback!