Create an Issue
Create an issue when you need to report a problem or request a change in your project.
Open your project.
On the Projects sidebar, click Issues:
The issue list displays existing issues associated with this project.
Click the New issue button on top of the list or
 on the sidebar:
A New issue dialog will be displayed:

Outline your problem or request in the issue Summary; it will appear as the issue title on the issue list. For a lengthy explanation use the optional Description field.
If you know who should take care of the issue, assign it to that person:

The assignee will get a notification with a link to this issue.
You can optionally:
add a tag to the issue to associate it with some other related issues
set the due date for resolving the issue
attach a file or add a checklist
add this issue to an issue board
specify values for custom fields if any (e.g. Priority).
Or skip these options for now. You can always add or edit them later on.
When you're done, click Create.
note
You can also create issues on the spot, from your To-Do list items, chat messages, and code fragments.
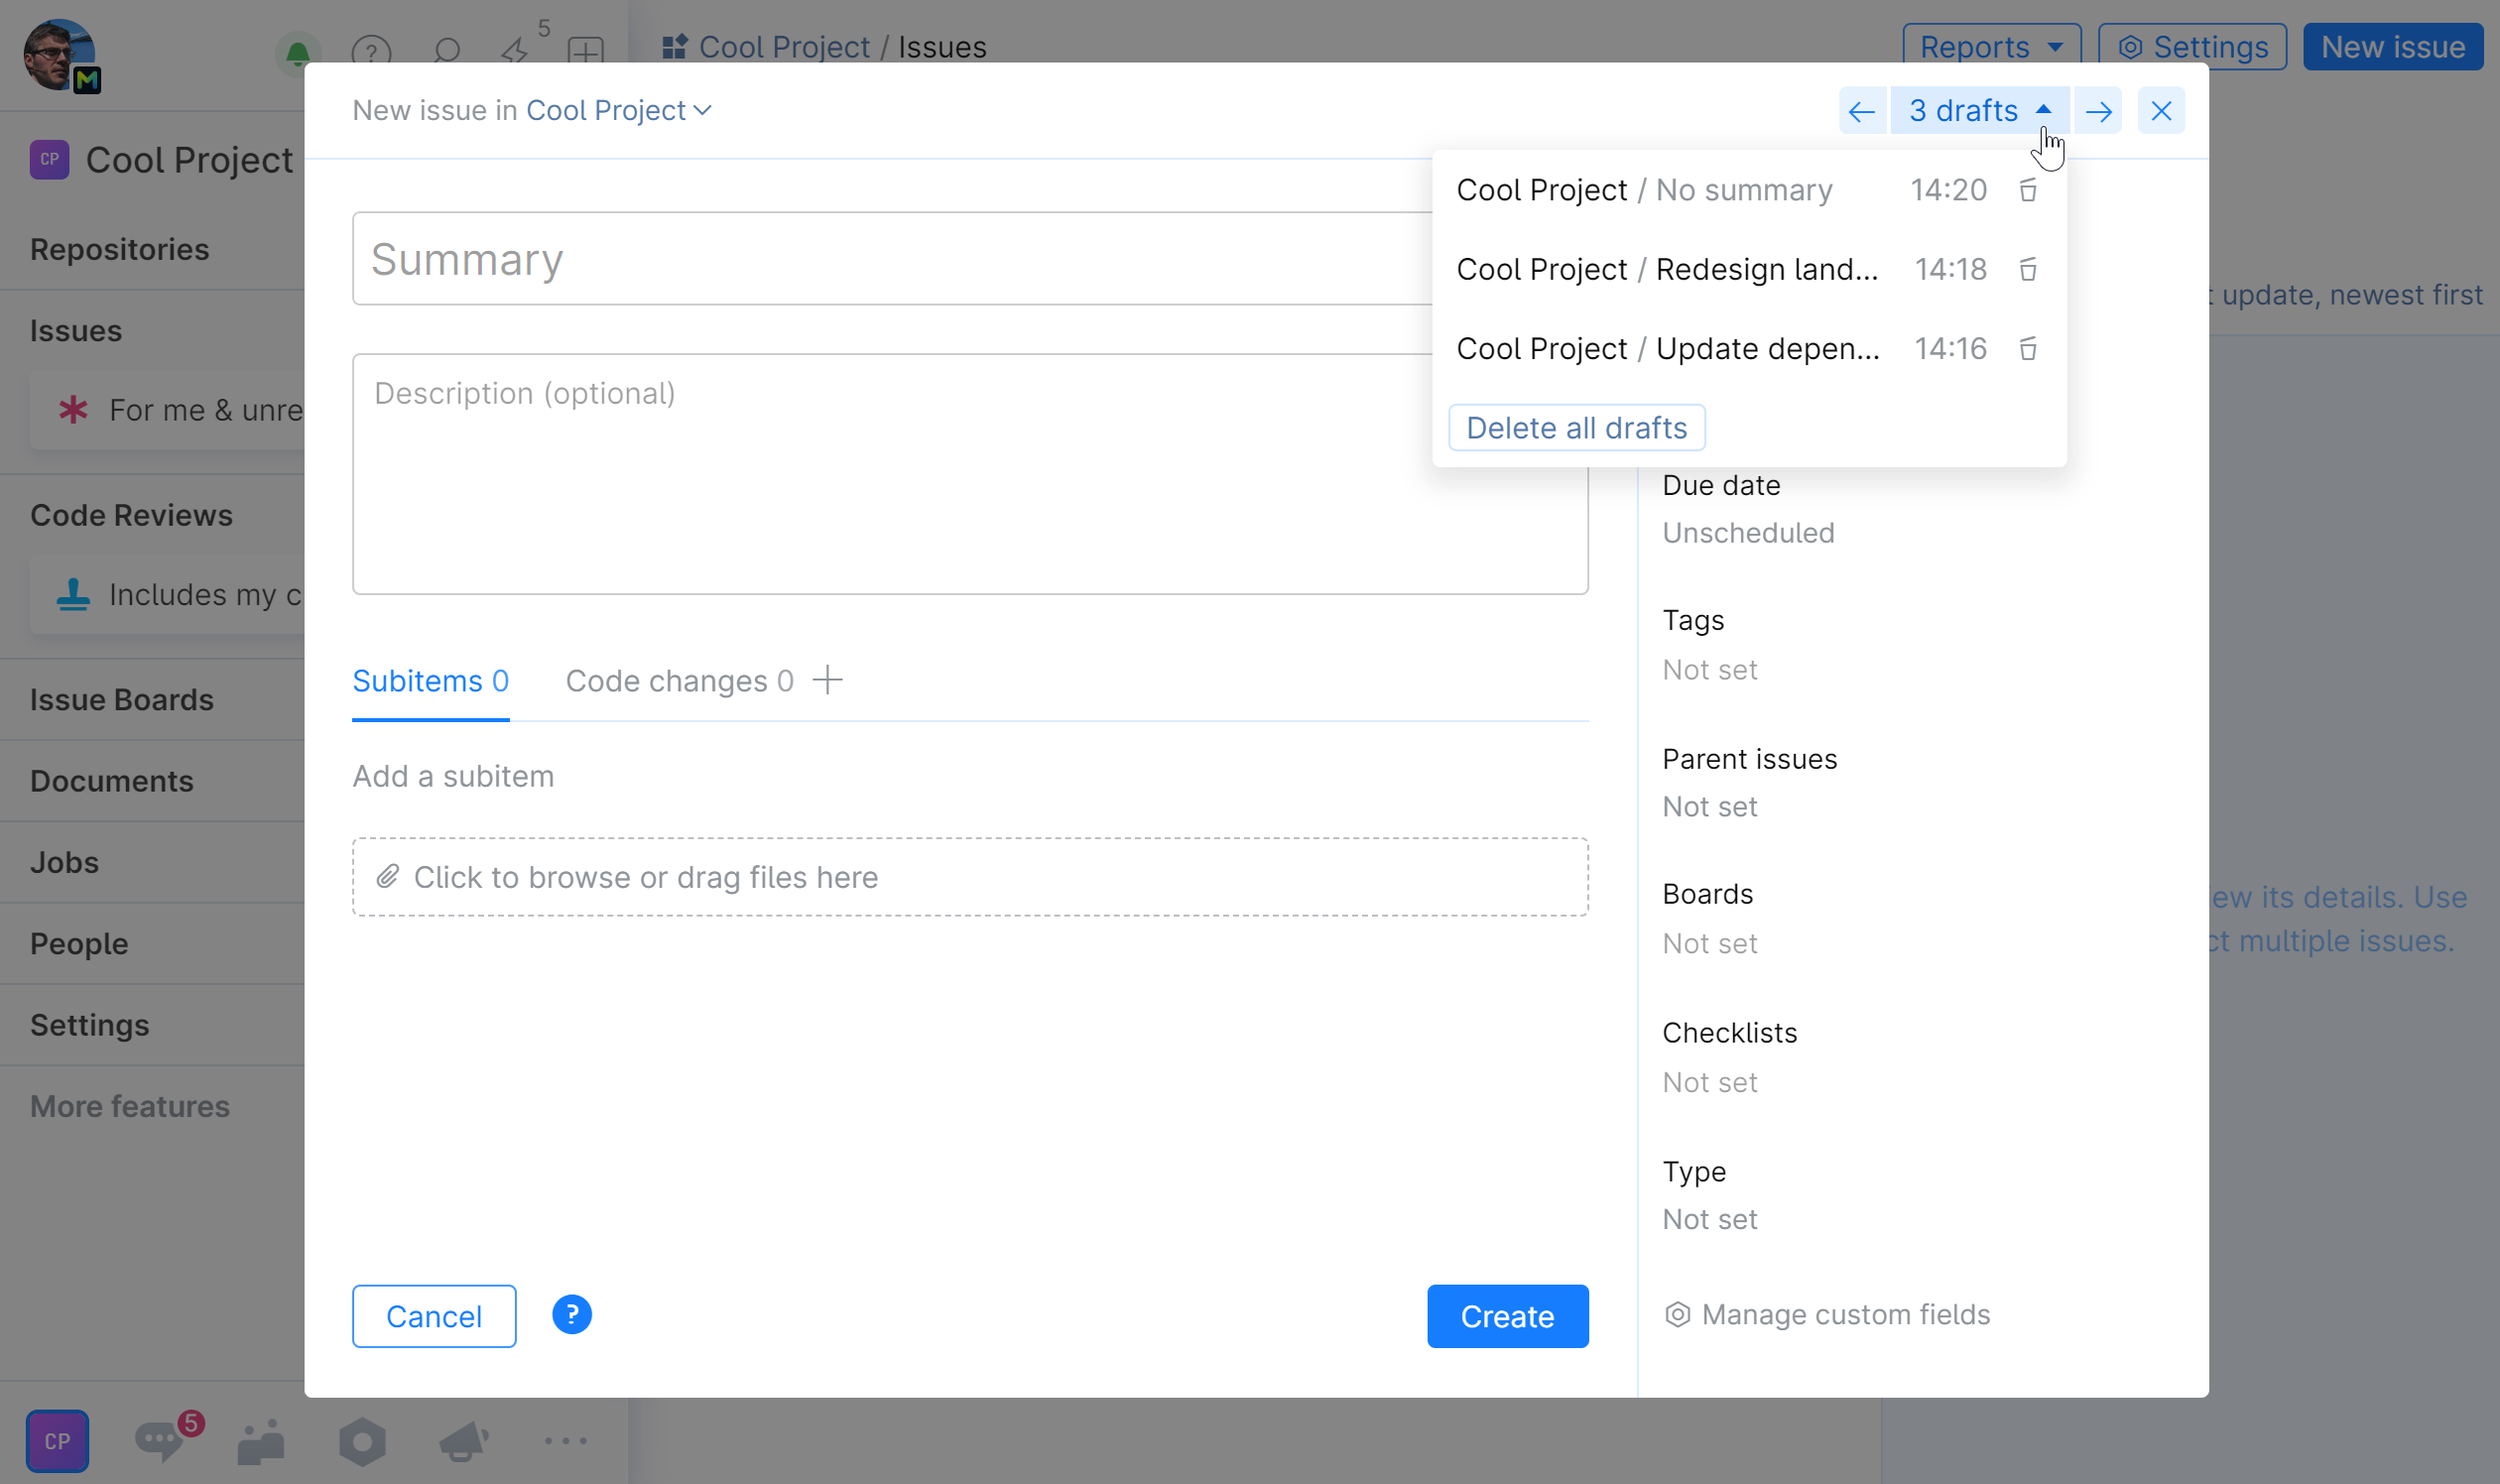
If you've started creating a new issue, entered some information such as summary, set or changed some properties, but never got to the final step of clicking Create and left the page, your work won't be lost. It will be saved as a draft, allowing you to continue where you left off at any time, even if you log out of Space.
If you have any drafts saved, next time you click New issue, a draft counter will be displayed in the top right corner of the dialog window:

To complete your draft, choose it from the list, specify necessary parameters, and click Create. An issue will be created out of the draft and added to the issue list.
You can delete unwanted drafts as well.
note
Issue drafts are always private — only you can see your drafts.
Drafts do not appear anywhere and won't be added to the referenced issue boards, parent and linked issues until you turn them into issues.