Use auto-properties
Auto-implemented properties (also known as auto-properties) allow declaring type properties that do not have additional logic in a simpler way. By default, ReSharper encourages using of auto-properties when possible, but this behavior is configurable.
By default, ReSharper highlights most of the properties that could be converted to auto-properties and suggests the corresponding quick-fix or fix in scope:

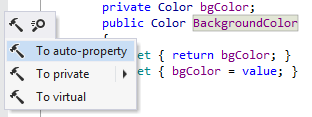
If you do not want ReSharper to suggest this, you can disable the code inspection that detects it (Convert property to auto-property). In this case, properties with backing fields are not highlighted and quick-fixes are not suggested, but you can still apply the conversion with the context action or with the corresponding refactoring:

The reverse functionality of converting existing auto-properties to properties with backing field is also available with the corresponding context action. You can also generate default bodies for property accessors using the To computed property context action:

Another option to convert properties to auto-properties in a bulk mode is code cleanup. You can either run code cleanup with the Built-in: Full Cleanup profile or create and run a custom profile solely targeted at your specific task as described below.
Convert properties to auto-properties with custom Code Cleanup profile
Select from the main menu or press Alt+R O.
Go to the cleanup profiles settings page: .
Create a new profile as described in the Create a new custom cleanup profile section. In the profile preferences on the right, make sure that the checkbox is selected. Optionally, you can enable other code cleanup tasks in this profile.
Click Save in the Options dialog to apply the modifications and let ReSharper choose where to save them, or save the modifications to a specific settings layer by choosing this layer from the Save To selector. For more information, see manage and share resharper settings.
Select the scope where you want to use auto-properties:
Place the caret anywhere in the file to use auto-properties to the file.
Select one or more items in the Solution Explorer to use auto-properties in the files under these nodes and their child items.
Do one of the following:
Press Control+Alt+F or choose from the main menu.
Right-click anywhere in the text editor or right-click the selection and choose Cleanup Code in the context menu.
In the Code Cleanup dialog that opens, select the newly created profile .
Click Run. ReSharper will use auto-properties in the selected scope.
If you want to convert properties to auto-properties without opening the Code Cleanup dialog to choose a profile, you can bind the created profile to the silent cleanup and run it by pressing Control+Shift+Alt+F. You can also create a custom cleanup profile that would combine converting to auto-properties with other code style tasks.
You can convert properties to auto-properties every time you save changes in a file to make sure that your edits always comply with your code style.
Automatically convert properties to auto-properties on saving changes
Select from the main menu or press Alt+R O.
Go to the cleanup profiles settings page: .
Select your custom Code Cleanup profile and click Set as default (the default profile is also used for silent cleanup).
Go to the options page and select Automatically run cleanup when saving a file.
Optionally, you can restrict automatic cleanup to specific files by a file mask.
You can also select Only changed parts of file to make sure that cleanup is applied to the code affected by your changes, and the rest of the code in the file is not modified.
If you choose to clean up only the changed parts of files, you can fine-tune this behavior with the following options:
Perform full cleanup if partial cleanup is not possible — depending on this option, ReSharper will either clean up the whole file or skip the file if it is not possible to restrict the cleanup to the modified parts of the file.
Allow cleanup on save for shared files — use this option to enable or disable partial cleanup in files that are included in the solution several times, such as files from shared projects.
Click Save in the dialog to apply the modifications and let ReSharper choose where to save them, or save the modifications to a specific settings layer by choosing this layer from the Save To selector. For more information, see manage and share resharper settings.
The next time you finish editing and save the file (Ctrl+S) or all files (Ctrl+Shift+S) , ReSharper will clean up the affected files using the selected profile. If the default cleanup profile is not selected, ReSharper will prompt you to choose one of the profiles.
This feature is supported in the following languages and technologies: