Create a new project
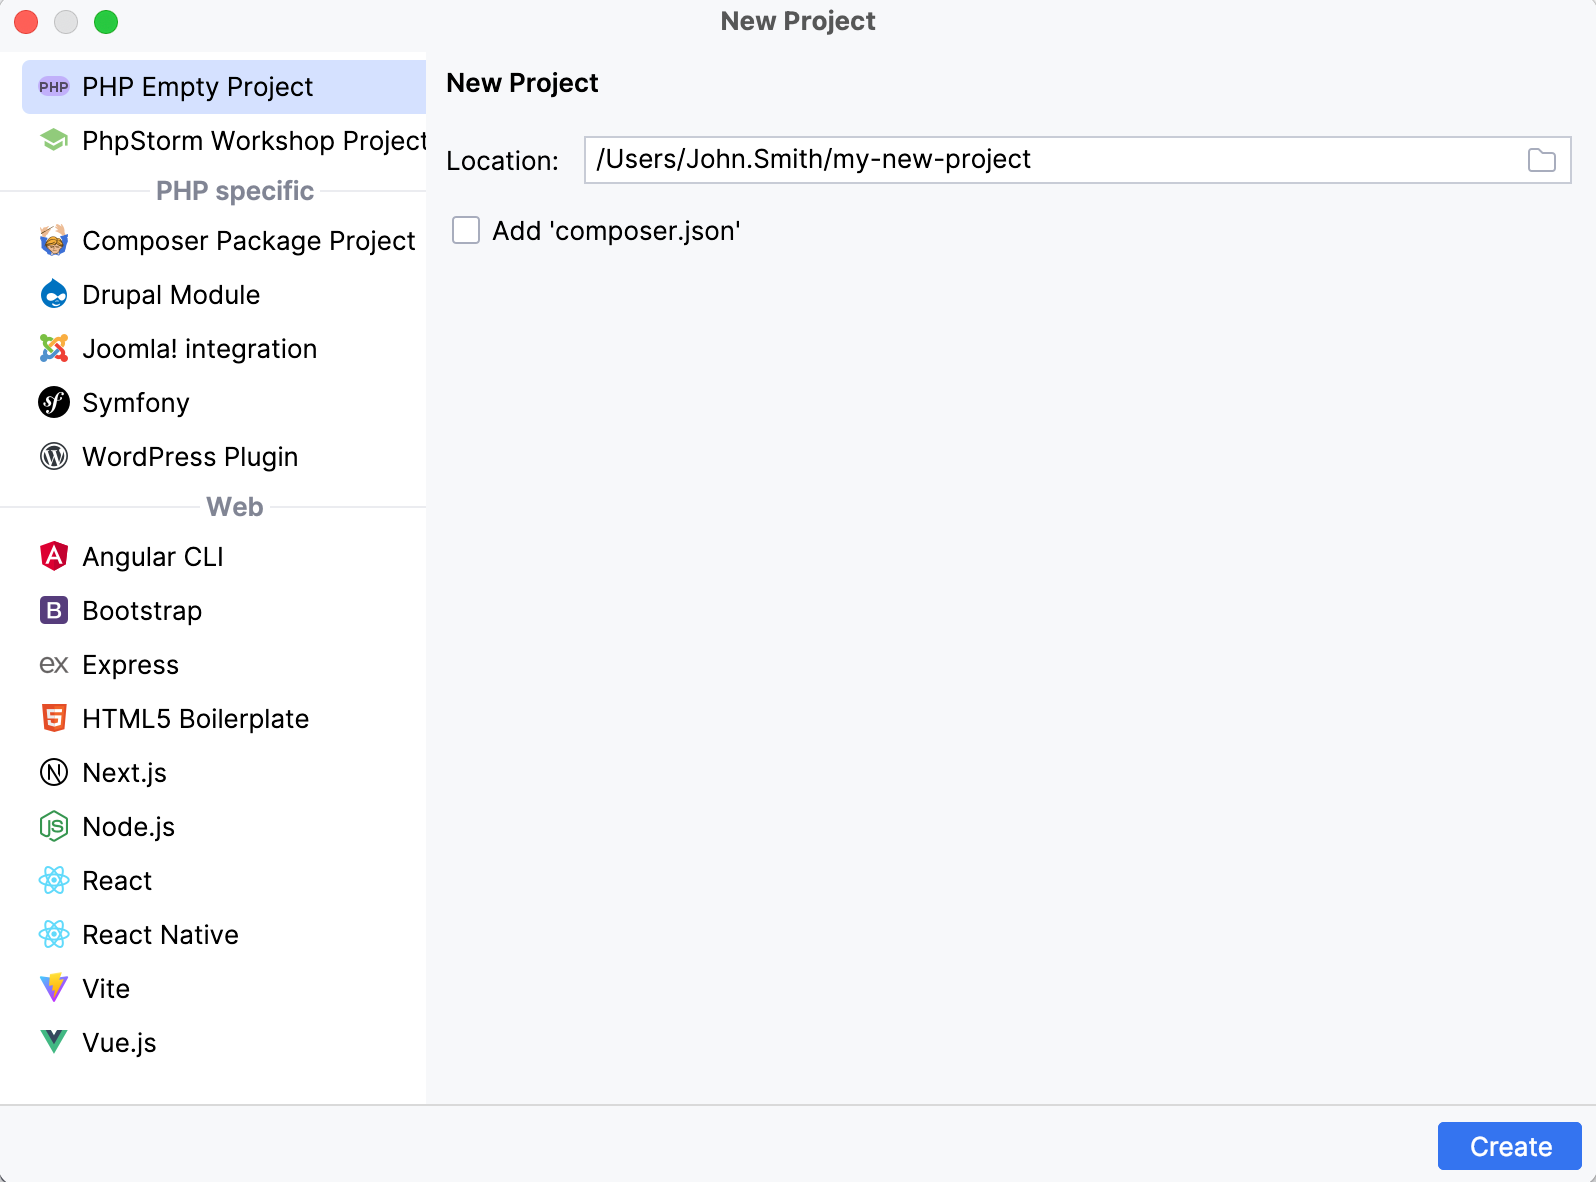
From the New Project dialog (File | New Project in the main menu, or Welcome to PhpStorm dialog | New Project), you can create:
A PhpStorm Workshop project with the onboarding tips in it.
A framework-based project, for which PhpStorm generates the application scaffold and installs the packages required for a respective PHP or Web framework.

tip
Besides the pre-defined framework-specific templates, you can add your own projects as user-defined templates to the list. For more information, refer to Save projects as templates.
File | New Project | PHP Empty Project
This is a general-purpose PHP project without specific frameworks. You will be able to add the necessary frameworks and technologies later at any time.
From the New Project dialog, select PHP Empty Project.
Name the new project and change its location if necessary in the Location field.
Select the Add 'composer.json' checkbox if you want to add a
composer.jsonfile template to the empty project.
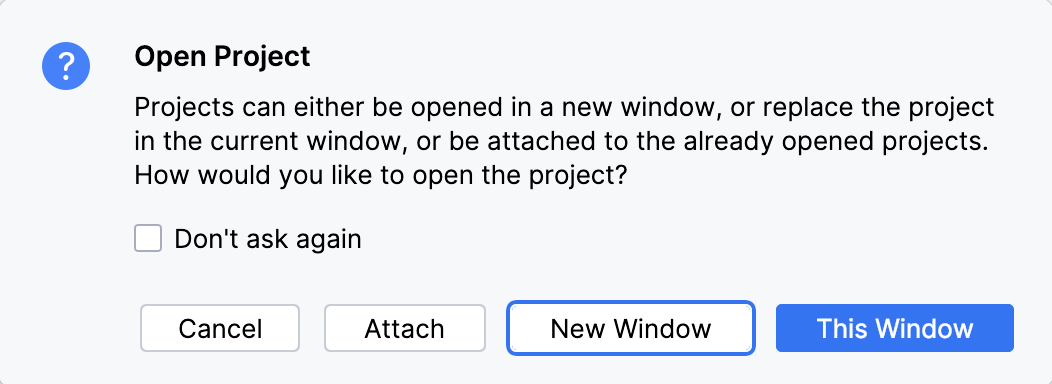
When you click Create, PhpStorm generates a project stub and opens it either in the current window or in a new one depending on your choice in the information dialog that opens:

tip
For more information, refer to Open projects in a new or the same window.
File | New Project | PhpStorm Workshop Project
PhpStorm Workshop is a project in which every file is a new exercise that may contain code and tips to get things done. There are exercises on navigation, editing, inspections, live templates, refactoring, tools like Composer and HTTP client, and other areas. For more information, see a 5-minute screencast outlining the Workshop materials.
For a framework-based project, PhpStorm creates the project directory, downloads the required dependencies into it, and generates the project structure with directories and files you need to get started.
You can generate a project stub from an existing package using Composer. In this case, Composer will be initialized and one package will be installed during the project stub creation. After that you can use Composer from the command line or through the user interface.
note
Creating a project is possible only when Composer is run via the configured local PHP interpreter.
Location | Specify the path to the folder where the project-related files will be stored. |
'composer' executable | To run commands via a globally installed composer executable, choose 'composer' executable and specify its location in the field. |
composer.phar | To run commands via the local composer.phar archive, choose composer.phar. Then, either specify the location of the existing composer.phar file in the field or select the Download composer.phar from getcomposer.org checkbox to download a new instance of the file. The downloaded composer.phar file will be saved under the project root folder. Then, choose one of the configured local PHP interpreters from the PHP interpreter list. For more information, refer to Configure local PHP interpreters. Optionally, in the Command line parameters field, type the additional command line parameters. |
Package | Select the Composer package to install from the list. To use code completion, press CtrlSpace. |
Version to install | Select the package version from the list. The contents of the list depend on the specific package. |
As you click Create, the create-project Composer command is invoked with the selected package. As a result, a Composer project whose configuration and structure depend on the selected package is created and opened.
Location | Specify the path to the folder where the project-related files will be stored. |
Drupal installation path | Specify the path to the root directory that contains the installed Drupal core. |
Set up PHP | Include paths | Select the Set up PHP | Include paths checkbox to have PhpStorm automatically add Drupal core directories to the project's include paths. To configure the paths manually, open Settings (CtrlAlt0S) | PHP and edit the list of direectories on the Include path tab. 
|
Version | Choose the version of Drupal to use, the supported versions are 6, 7, 8, and 9.
|
tip
Later you can change the Drupal installation and re-configure the include paths on the Frameworks page as described in Changing the Drupal settings.
PhpStorm generates a project stub in accordance with the selected Drupal version. For Drupal 8, a module_name.info.yml file is generated where information about the module is provided.
PhpStorm creates a stub Joomla! project that contains a PHP class <project name>.php and <project name>.xml manifest file. For more information, refer to Joomla! and Joomla! site.
Location | Specify the path to the folder where the project-related files will be stored. |
Joomla installation path | Specify the root folder of the Joomla! installation. |
Path to JConfig | Specify the path to the |
Project type | Select one of the Joomla! project types (component, module or plugin) from the list. |
PhpStorm shows balloons with notifications about the missing Joomla! code styles, namespaces, and so on. These elements can be installed straight away by clicking the corresponding links. The notifications are duplicated in the Status bar, and in the Notifications tool window.
Location | Specify the path to the folder where the project-related files will be stored. |
Project Type | Select the type of the new Symfony application to create. The difference between Web and Console is the number of packages installed by default. The Web option installs all the packages that you usually need to build web applications, so the installation size will be bigger. The Demo option creates a Symfony demo application. |
Version | Select the Symfony version you want to use. |
Create Git repository | Select the checkbox to place the new project under version control. |
Location | Specify the path to the folder where the project-related files will be stored. |
WordPress installation path | In this field, in the WordPress installation path field, specify the path to the folder with the WordPress core. This folder should contain the wp-admin and wp-includes subdirectories. Click OK to start the project stub generation. |
note
Out of the box, the list of Web frameworks contains only the technologies whose plugins are bundled with PhpStorm and enabled by default. You can install other web technology plugins, such as Cypress, Playwright, Cordova, Dart, or Meteor, to PhpStorm on the Settings | Plugins page as described in Managing plugins.
Location | Specify the path to the folder where the project-related files will be stored. |
Node interpreter | Specify the Node.js interpreter that you want to use in this project. You can select a configured interpreter from the list or click Add to configure a new one. If you have no Node.js on your computer, select Download Node.js from the list. |
Angular CLI | Select Alternatively, for npm version 5.1 and earlier, install the |
Additional parameters | (Optional) Specify the extra ng new options to pass to Angular CLI. |
tip
For more information, refer to Node.js.
Location | Specify the path to the folder where the project-related files will be stored. |
Node interpreter | Specify the Node.js interpreter that you want to use in this project. You can select a configured interpreter from the list or click Add to configure a new one. If you have no Node.js on your computer, select Download Node.js from the list. |
express-generator | Select the application generator tool with the version to quickly create an application skeleton. |
View Engine | Select the template engine that you want to use. |
Stylesheet Engine | Select the CSS preprocessor for your project. |
note
Learn how to create a Next.js project in PhpStorm: Next.js.
Location | Specify the path to the folder where the project-related files will be stored. |
Node interpreter | Specify the Node.js interpreter that you want to use in this project. You can select a configured interpreter from the list or click Add to configure a new one. If you have no Node.js on your computer, select Download Node.js from the list. |
create-react-app | Select npx create-react-app. Alternatively, for npm version 5.1 and earlier, install the |
Create TypeScript project | Optionally: To use TSX instead of JSX, select the Create TypeScript project checkbox. PhpStorm will generate .tsx files for your application and a tsconfig.json configuration file. |
note
Learn how to create a Node.js project in PhpStorm: Node.js.
Location | Specify the path to the folder where the project-related files will be stored. |
Node interpreter | Specify the Node.js interpreter that you want to use in this project. You can select a configured interpreter from the list or click Add to configure a new one. If you have no Node.js on your computer, select Download Node.js from the list. |
Package manager | Select the package manager to use in your project (npm, pnpm, or Yarn. For more information, refer to npm, pnpm, and Yarn). |
note
The recommended way to start a new React single page application is the create-vite package, which PhpStorm downloads and runs for you using npx. As a result, your development environment is preconfigured to use Vite with React and TypeScript, learn more from the Vite official website.
Location | Specify the path to the folder where the project-related files will be stored. |
Node interpreter | Specify the Node.js interpreter that you want to use in this project. You can select a configured interpreter from the list or click Add to configure a new one. If you have no Node.js on your computer, select Download Node.js from the list. |
create-react-app | Select npx create-react-app. Alternatively, for npm version 5.1 and earlier, install the |
Create TypeScript project | Optionally: To use TSX instead of JSX, select the Create TypeScript project checkbox. PhpStorm will generate .tsx files for your application and a tsconfig.json configuration file. |
note
Learn how to create a React Native project in PhpStorm: React Native.
Location | Specify the path to the folder where the project-related files will be stored. |
Node interpreter | Specify the Node.js interpreter that you want to use in this project. You can select a configured interpreter from the list or click Add to configure a new one. If you have no Node.js on your computer, select Download Node.js from the list. |
React Native | From the React Native list, select npx --package react-native-cli react-native. Alternatively, for npm version 5.1 and earlier, install the |
note
Learn how to create a Vite project in PhpStorm: Vite.
Location | Specify the path to the folder where the project-related files will be stored. |
Node interpreter | Specify the Node.js interpreter that you want to use in this project. You can select a configured interpreter from the list or click Add to configure a new one. If you have no Node.js on your computer, select Download Node.js from the list. |
Vite | From the Vite list, select npx create-vite. Alternatively, for npm version 5.1 and earlier, install the |
Template | Select the community maintained Vite template that targets the framework you are going to use in your application. |
note
Learn how to create a Vue.js project in PhpStorm: Vue.js.
Location | Specify the path to the folder where the project-related files will be stored. |
Node interpreter | Specify the Node.js interpreter that you want to use in this project. You can select a configured interpreter from the list or click Add to configure a new one. If you have no Node.js on your computer, select Download Node.js from the list. |
Vue CLI | From the Vue CLI list, select npx --package @vue/cli vue. Alternatively, for npm version 5.1 and earlier, install the |
Use the default project setup (babel, elint) | To bootstrap your application with babel and ESLint, select the Use the default project setup checkbox. |
Thanks for your feedback!