DataGrip 2023.2 Help

Columns

A column is a piece of data that is stored by a table. This data belongs to a particular type. A column may include text, numbers, or pointers to files in the operating system. Some relational database systems allow columns to include more complex data types like whole documents, images, or video clips.

Columns can be seen in the Database Explorer. You can see a reference on node and object icons in the Data sources and their elements chapter of Database Explorer topic.

For the table column icons, refer to Possible icon combinations for columns.

Add a column

  1. In the Database Explorer ( View | Tool Windows | Database Explorer) , expand the data source tree until the nodes of tables.

  2. Right-click the table node and select New | Column.

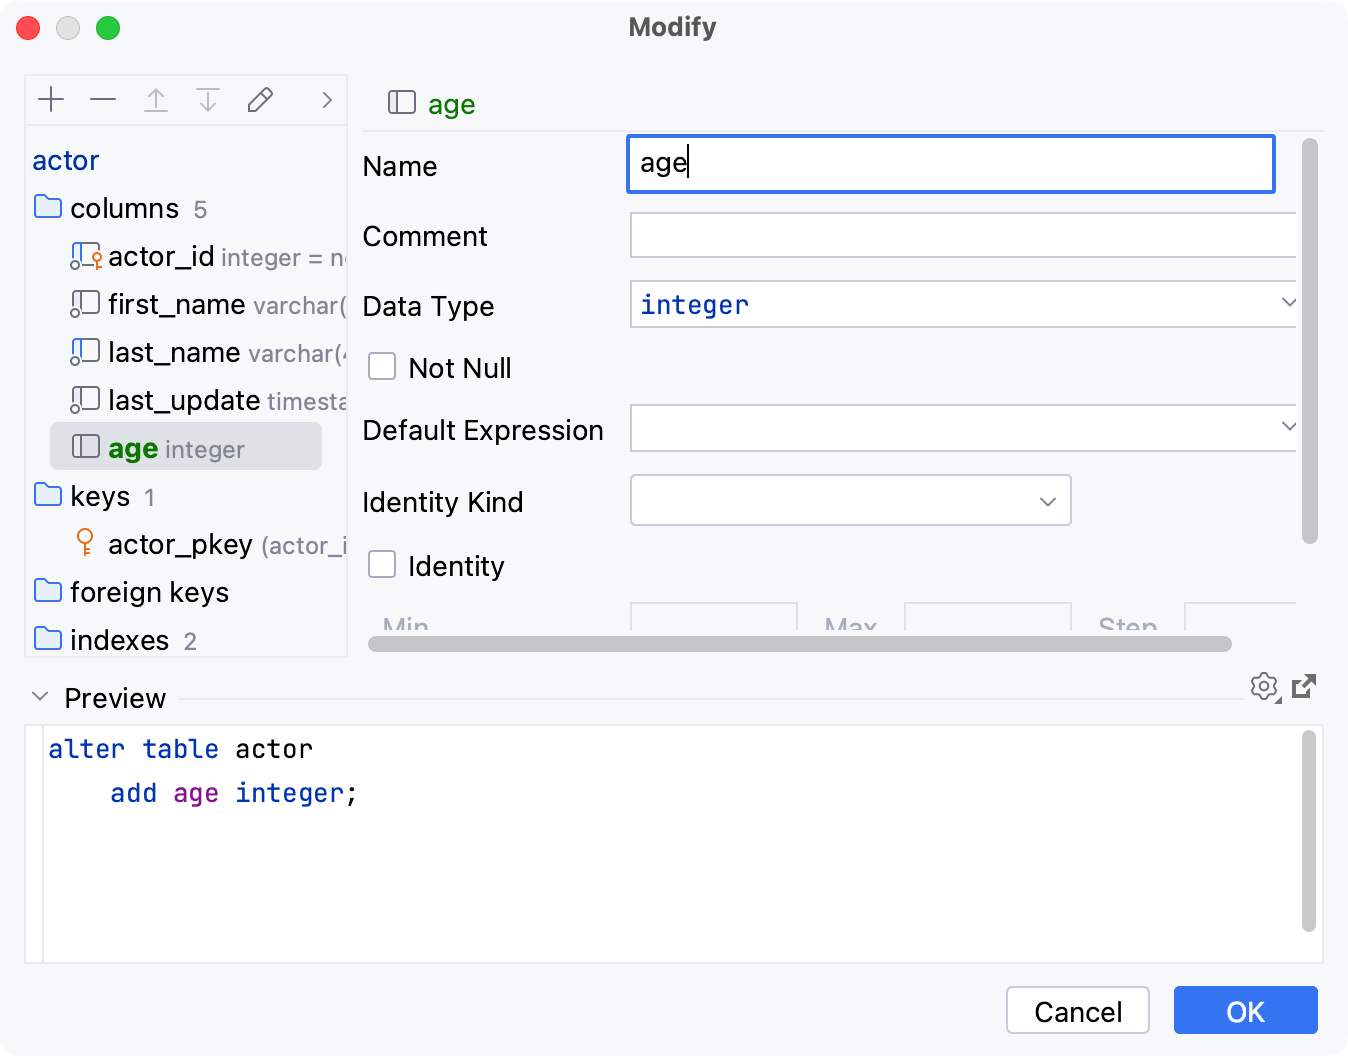
  3. In the Modify dialog that opens, enter the name of your column in the Name field.

  4. In the Preview pane, you can view and change the generated SQL code.

  5. Click OK.

Add a column

Delete a column

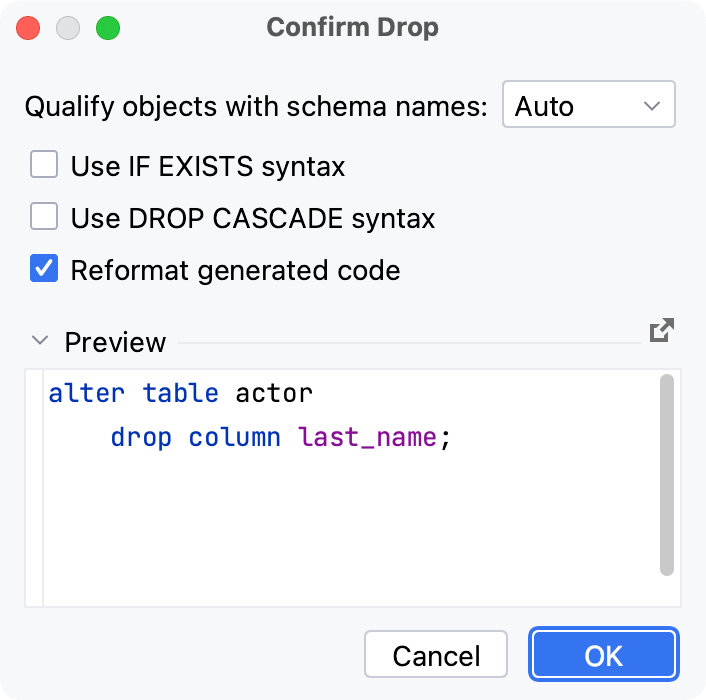
  1. Right-click a column and select Drop…. Alternatively, press Delete.

  2. Click OK.

For more information about the dialog options, refer to Confirm Drop dialog.

Drop a column

Modify a column

Starting with DataGrip 2022.1, you can change database-specific parameters of a column. The IDE generates fields for the Modify dialog automatically according to the properties received during the introspection. For example, by using this dialog in PostgreSQL, you can add and edit column check constraints.

  1. In the Database Explorer ( View | Tool Windows | Database Explorer) , right-click a column and select Modify Column.

  2. In the Modify dialog, specify object settings that you need.

  3. Click OK.

Modify a column

Reorder columns

  • To reorder columns, drag the corresponding cells in the header row.

Hide columns

  • To hide a column, right-click the corresponding header cell and select Hide column.

    Alternatively, you can right-click any of the cells in the header row and select Columns List Control+F12. In the Columns List window, select a column name and press Space. You can hide all columns. To search through the column list, just start typing a column name in the Columns List window.

    Hide a column

Show columns

  1. Right-click any of the cells in the header row and select Columns List. Alternatively, press Control+F12.

  2. Select the hidden column (a strikethrough column name) and press Space.

    Show a column

Reset the table view to the initial state

  • Click the settings icon (the settings icon) and select Reset View. As a result, the data becomes unsorted, the columns appear in the order they were defined initially, and all the columns are shown.

    Restore the initial table view

Inject a language for a column

  • You can assign HTML, CSS, XML, RegExp, or any other formal language for the whole column. So, when you have a piece of code inside the cell that belongs to the column, you can use code generation, code completion, and other IDE features.

    To inject a language for the whole column, right-click the corresponding header cell, and select Set Highlighting Language. In the list of supported languages, select the language that you want to inject.

    Inject a language for a column

Change the column width

  • Place the caret between two columns, so it changes to the resize mode. Drag it to the preferred position.

    Changing the width of a column

Productivity tips

Drag column names to your code

  • In the Database Explorer ( View | Tool Windows | Database Explorer) , select any database objects and drag them to your code.

    Drag column names to your code
Last modified: 27 September 2023