Issue Distribution Report Widgets
note
Before adding this widget to a dashboard, ensure that this widget type is installed, enabled, and up to date. For more information about managing widgets, see Manage Apps.
An Issue Distribution Report widget displays the total number of issues based on one or more fields. Create a report directly in the widget or select from preexisting Issue Distribution Reports.
Use this widget to view an overall picture of how issues are distributed based on your criteria and to view those issue segments in the Issues list.
Click Dashboards in the main navigation menu.
Select a dashboard for the widget.
Click the Add widget button on the dashboard.
From the drop-down list, select Issue Distribution Report.
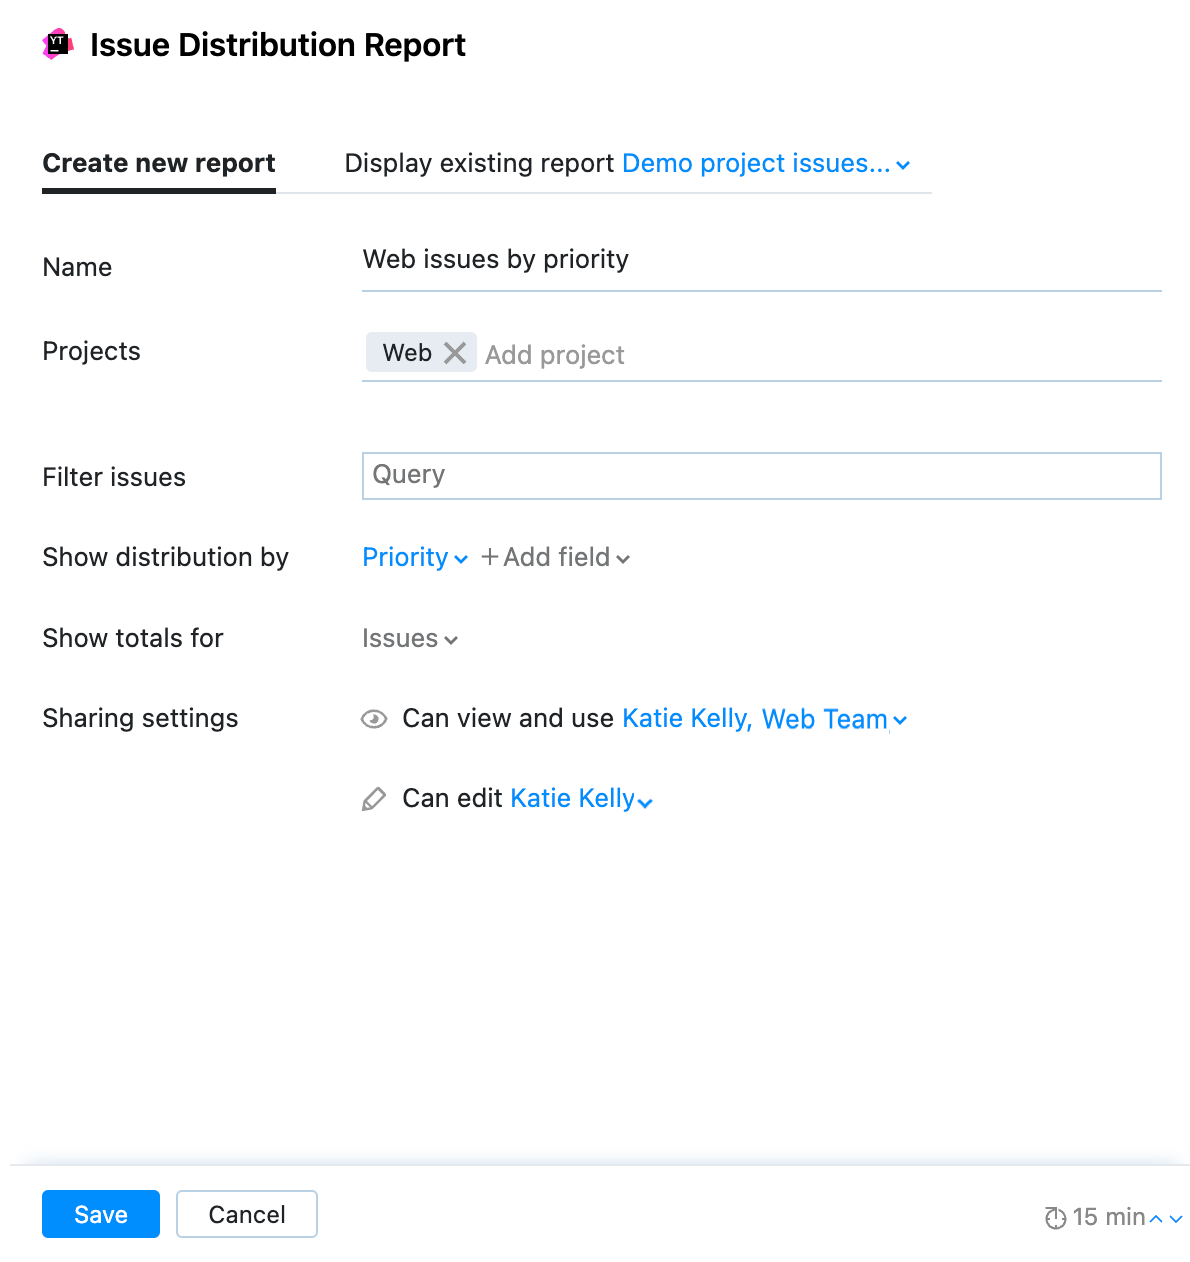
The configuration dialog for the new widget opens.

Select the Create new report tab.
Enter a name for the report.
Select one or more projects.
Optionally, create a filter for issues to include in the distribution list with a query.
Select a field to create a report displaying the distribution of issues based on the values of that field.
Select two fields to create a report that displays the distribution of issues for two field values.
Select to show the total for:
Issues creates a report based on the issues that meet the report criteria.
Votes creates a report based on the issues vote count that meets the report criteria.
Sharing settings:
Select which users and groups can view and use this widget on their dashboard.
Select which users and groups can edit the settings of the widget.
Click Save to save the report and add the widget to the dashboard.
You can also use existing Issue Distribution Reports in this widget.
Click Dashboards in the main navigation menu.
Select a dashboard for the widget.
Click the Add widget button on the dashboard.
From the drop-down list, select Issue Distribution Report.
The configuration dialog for the new widget opens.

Select the Display existing report tab.
Select an existing report from the drop-down menu.
The configuration dialog is auto-completed based on the selected report.
Optionally, make edits to the existing report.
warning
Editing an existing report in the widget also edits the original report.
Click Save to save the changes to the report and add the widget to the dashboard.
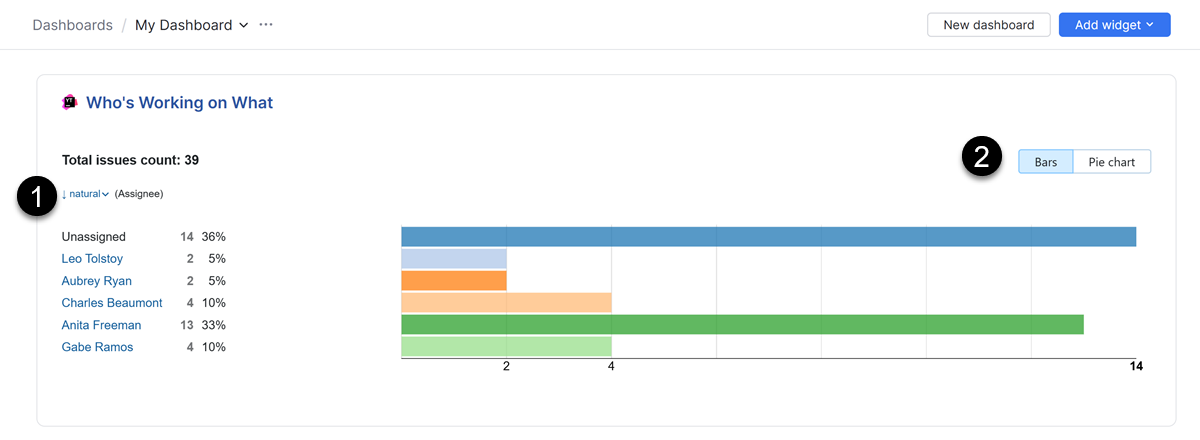
After the Issue Distribution Report widget has been configured and saved, it is displayed in on the dashboard.

- 1. Sort order
By default, issues are sorted ascending by count. You can also sort the results in natural sorting order. The natural order in which values are sorted in the sets of values for the selected custom fields.
- 2. Graphical display
The graphical display has a bar chart for all distribution reports. If the distribution report is created based on a single field, a pie chart is available. If the distribution report is created based on multiple fields, a table is available.
Click the graphical display options to toggle the way the information is presented.
Click a section in the graphical display to open the Issues list with a query for the selected issues.
Click the More menu in the corner of the widget to expand a list of available actions.
Action | Description |
|---|---|
Share link | Opens a dialog with a link that can be copied and shared with teammates.
|
Clone widget | Creates a duplicate of the widget on your dashboard. |
Move to another dashboard... | Opens a dialog with a drop-down menu of available dashboards. Select a new dashboard for the widget and click Move. The widget is removed from the current dashboard and moves to the selected dashboard. |
Edit... | Modify the settings of the widget. |
Remove | Opens a dialog. Click Delete to permanently remove the widget. |
About | Opens a new YouTrack page in the web browser to the details section of the widget in Apps. |
The widget content is refreshed according to the custom refresh rate, when set. Otherwise, the widget is refreshed every 4 minutes.
To manually recalculate a report in a widget, click the refresh icon in the title bar.
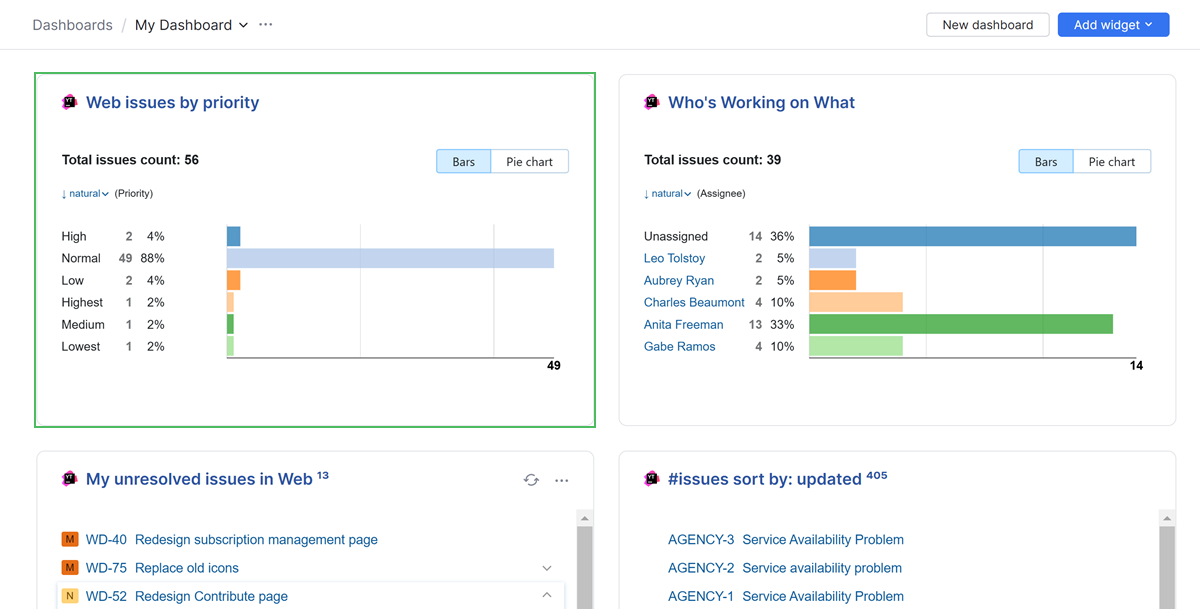
You're a project owner and want to see the distribution of issues in your project by priority. Use the Issue Distribution Report widget to display a distribution chart with that information on your dashboard.
Configure the widget by selecting the name of your project and set Show distribution by to Priority.

The widget is displayed on your dashboard with a report of issues in your project distributed by priority. Click any of the segments in the distribution chart to open up an Issues list for those issues.
