Reformat code
WebStorm lets you reformat your code according to the requirements you've specified in your current code style scheme or the .editorconfig file. If anything is not defined in .editorconfig, it is taken from the project settings.
You can reformat a part of code, the whole file, a group of files, a directory, and a module. You can also exclude part of code or some files from the reformatting.
Reformat a code fragment
In the editor, select a code fragment you want to reformat.
Before reformatting, you can take a look at the code style settings that are applied to the selected code: press Alt+Enter and click Adjust code style settings.
In the main menu, go to or press Ctrl+Alt+L.
Reformat a file
Either open your file in the editor and press Ctrl+Alt+Shift+L or in the Project tool window, right-click the file and select .
In the Reformat File dialog that opens, if you need, select the following reformatting options:
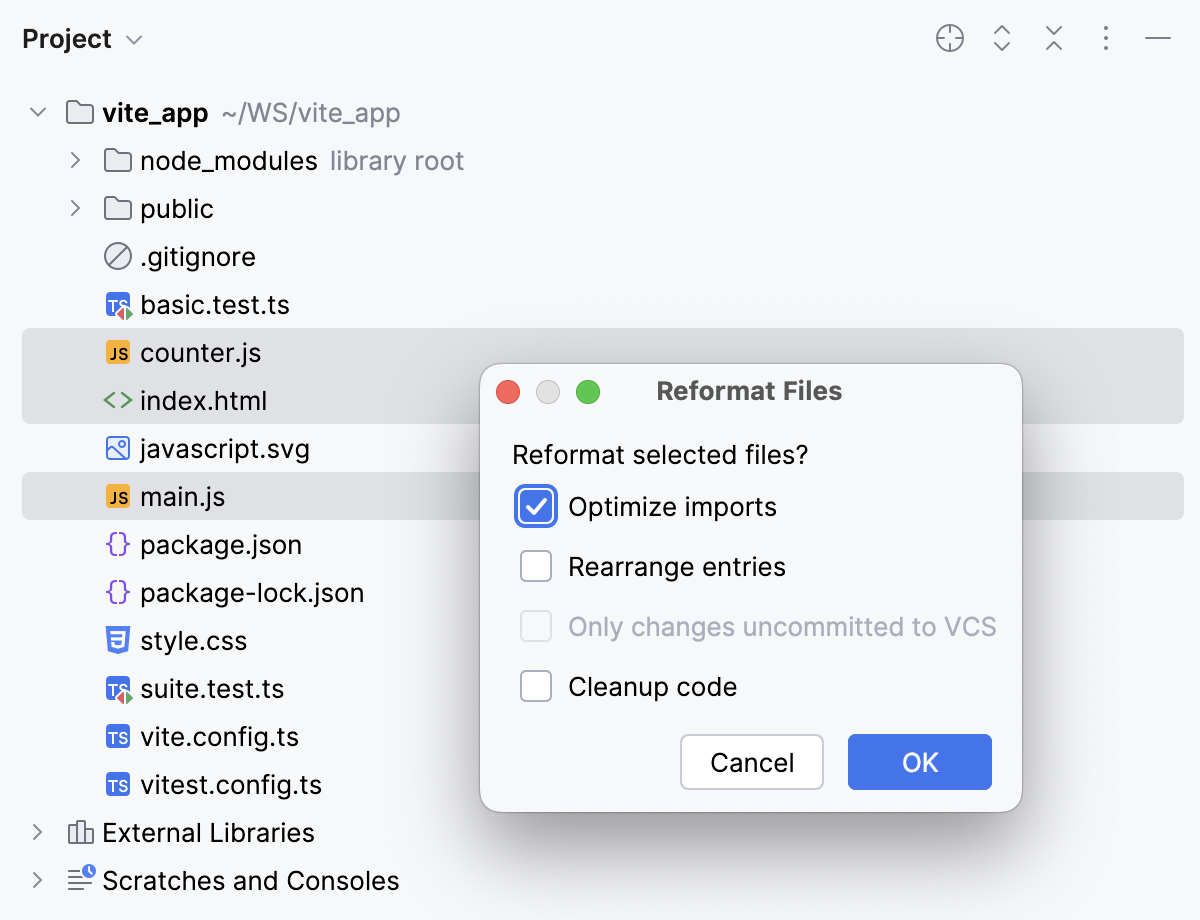
Optimize imports: select this option if you want to remove unused imports, add missing ones, or organize import statements.
For more information, refer to the Optimize imports section.
Rearrange entries: select this option if you need to rearrange your code based on the arrangement rules specified in the code style settings.
Code cleanup: select this option to run the code cleanup inspections.
Do not keep line breaks: reformat line breaks according to the code style settings. This option overrides the setting.
If you want to see the exact changes made to your code during the reformatting, use the Local History feature.
Reformat code in a folder
In the project view, right-click a folder and from the context menu, select Reformat Code or press Ctrl+Alt+L.
In the dialog that opens, specify the necessary options and click OK.
Reformat line indents
You can reformat line indents based on the specified settings.
While in the editor, select the necessary code fragment and press Ctrl+Alt+I.
If you need to adjust indentation settings, in the Settings dialog (Ctrl+Alt+S) , go to . Select the language for which you want to change indentation.
On the Tabs and Indents tab, specify the appropriate indents options and click OK.
Automatically reformat code on save
You can configure the IDE to reformat code in modified files automatically when your changes are saved.
Press Ctrl+Alt+S to open settings and then select .
Enable the Reformat code option.
Additionally, you can configure the way the IDE will reformat your code:
Click Configure scope to specify the patterns of filenames and directories that you want to exclude from reformatting.
From the All file types list, select the types of files in which you want to reformat code.
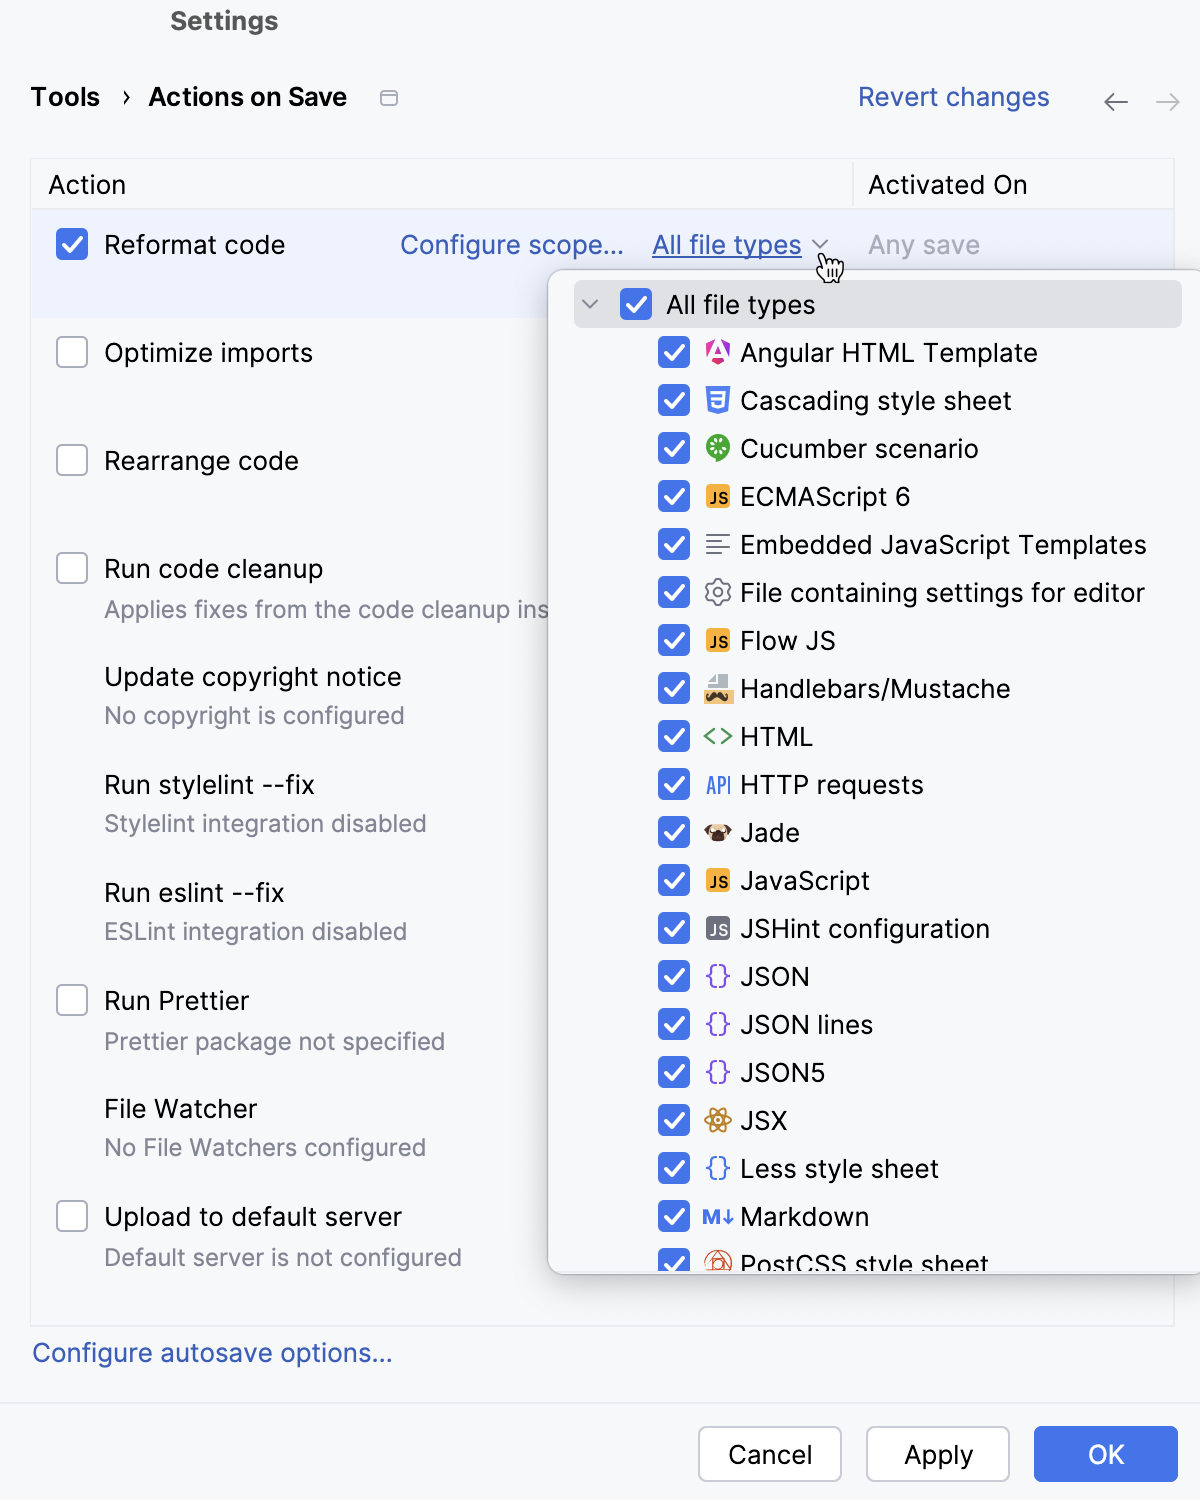
Select Whole file or Changed lines if your project is under version control.
If you select Changed lines, reformatting will apply only to the lines of code that have been changed locally, but not yet checked in to the repository.
Reformat code on commit
You can reformat your code automatically when you commit your changes to the repository if your project is under version control. In this case, only the added or modified code will be reformatted.
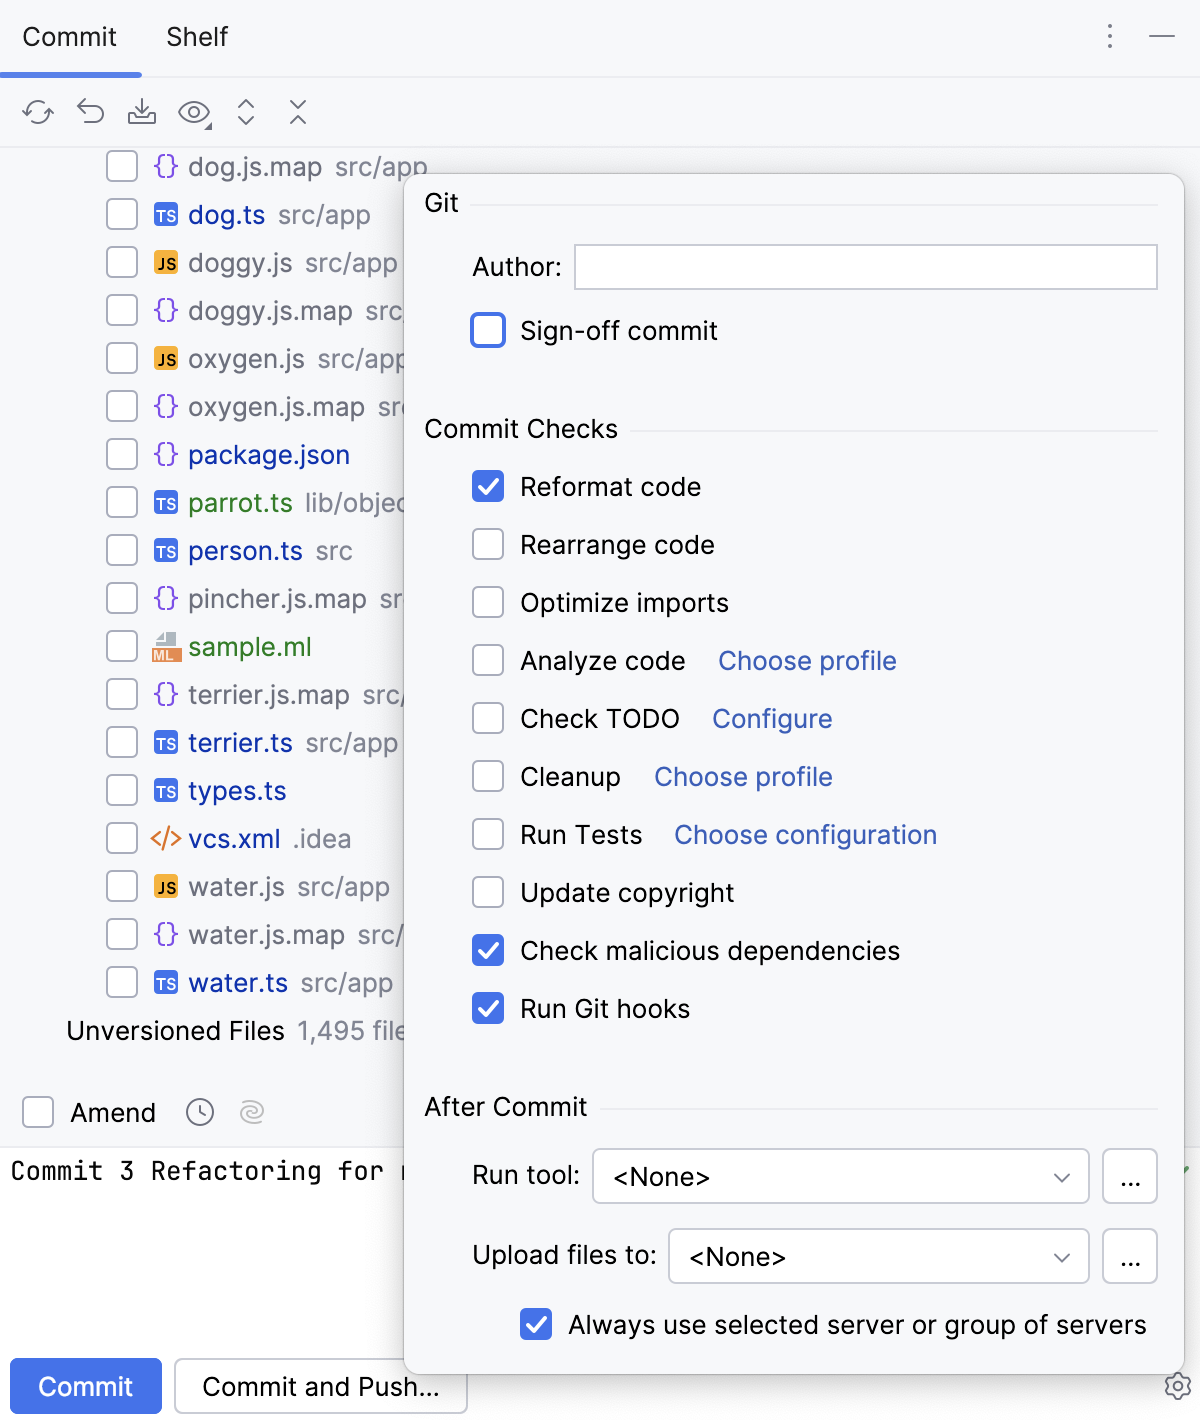
Press Alt+0 to open the Commit tool window and click Show Commit Options
.
Under the Commit Checks menu, enable the Reformat code option.
After you have enabled the option, the added or modified code will be reformatted every time you make a commit.
Exclude files from reformatting
You can exclude a group of files and directories from reformatting, code arrangement, and import optimization.
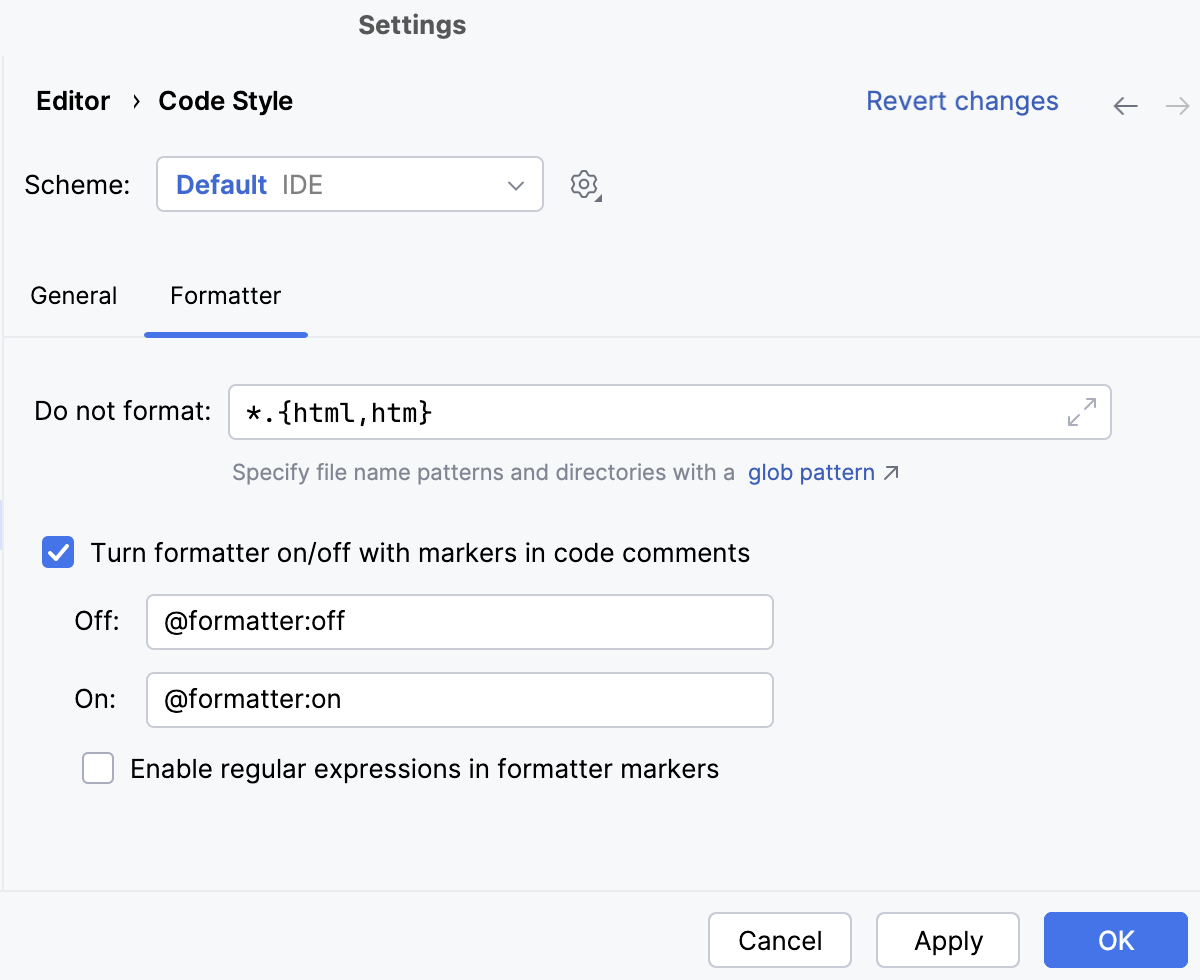
In the Settings dialog (Ctrl+Alt+S) , go to .
Switch to the Formatter tab and in the Do not format field, enter the files and directories that you want to exclude using a glob pattern.
You can specify several glob patterns separated with a semicolon
;. If you click, the field will expand, and each pattern will be shown on a separate line.
Apply the changes and close the dialog.
Exclude code fragments from reformatting in the editor
In the Settings dialog (Ctrl+Alt+S) , go to .
Switch to the Formatter tab and enable the Turn formatter on/off with markers in code comments option.
In the editor, at the beginning of a region that you want to exclude, type
@formatter:off. At the end of the region, type@formatter :on.The code between the markers won't be reformatted.
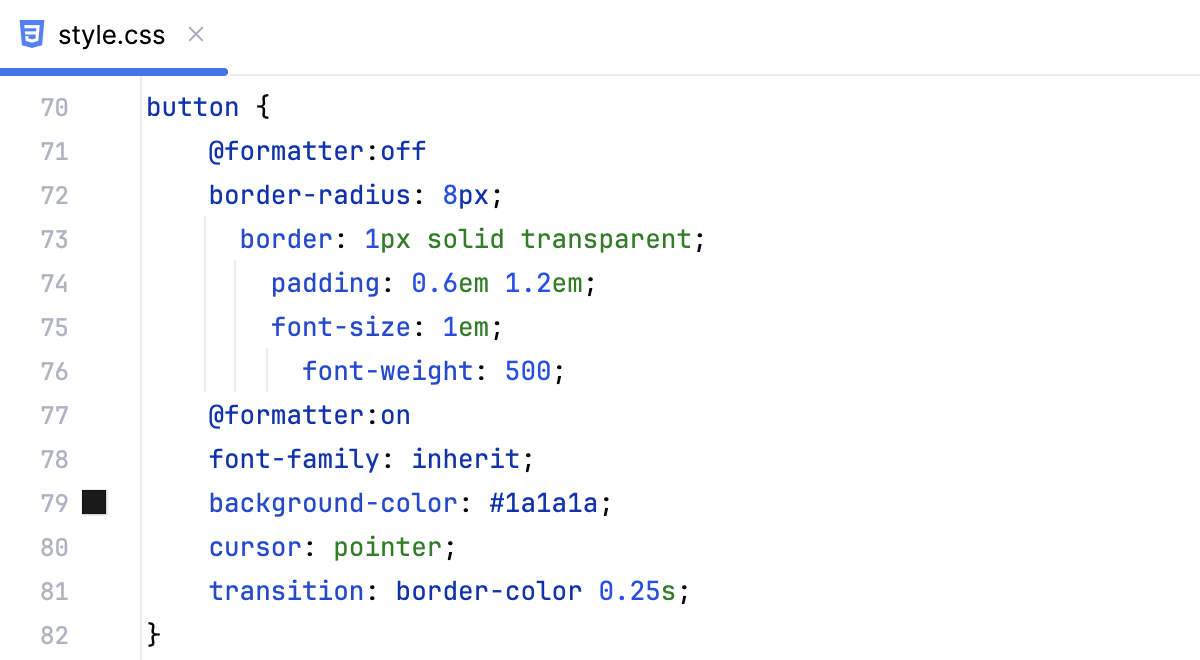
The example shows two code fragments. One of them, line 72 - line 76, is enclosed in the @formatter:off and @formatter:on markers while the other one, line 78 - line 81, is not.
The original formatting:
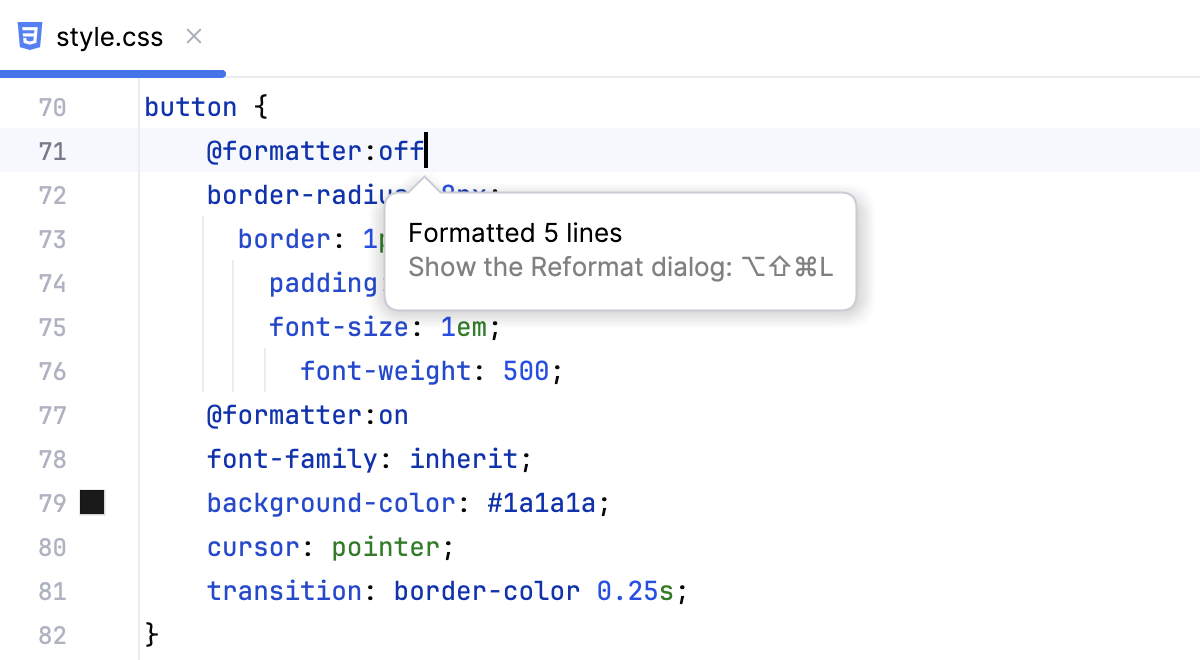
The original formatting of the code inside the markers (line 72 - line 76) is preserved while the code without markers (line 78 - line 81) is reformatted:
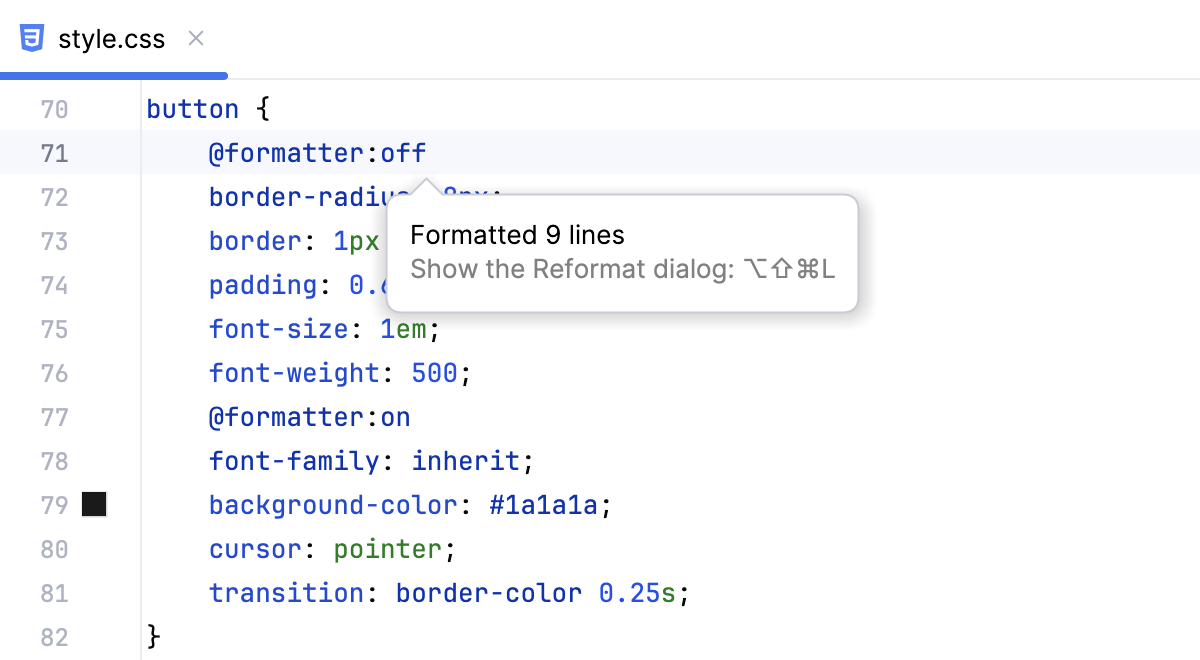
The original formatting is not preserved in either code fragment:
Keep existing formatting
You can select formatting rules which will be ignored when you reformat the code. For example, you can adjust the IDE to keep simple methods and functions in one line, whereas normally they are expanded into multiple lines after code reformatting.
In the main menu, go to , select your programming language, and open the Wrapping and Braces tab.
In the Keep when reformatting section, select the formatting rules which you want to ignore and deselect those which should be applied.
Reformat your code (Ctrl+Alt+L).
WebStorm will reformat your code in accordance with the current style settings, keeping existing formatting for the rules which you've selected.
Rearrange code
You can rearrange your code according to the arrangement rules set on the Code Style page of the Settings dialog.
Rearrange code entries
In the Settings dialog (Ctrl+Alt+S) , go to .
Select a language for which you want to create arrangement rules.
On the Arrangement tab, specify the appropriate options such as grouping and matching rules.
Click OK to save the changes.
In the editor, select the code entries you want to rearrange and go to in the main menu.
Automatically rearrange code on save
You can configure the IDE to rearrange code elements in modified files automatically when your changes are saved.
Press Ctrl+Alt+S to open settings and then select .
Enable the Rearrange code option.
Additionally, you can click Configure arrangement rules to specify the rules for reordering code elements for the selected language.