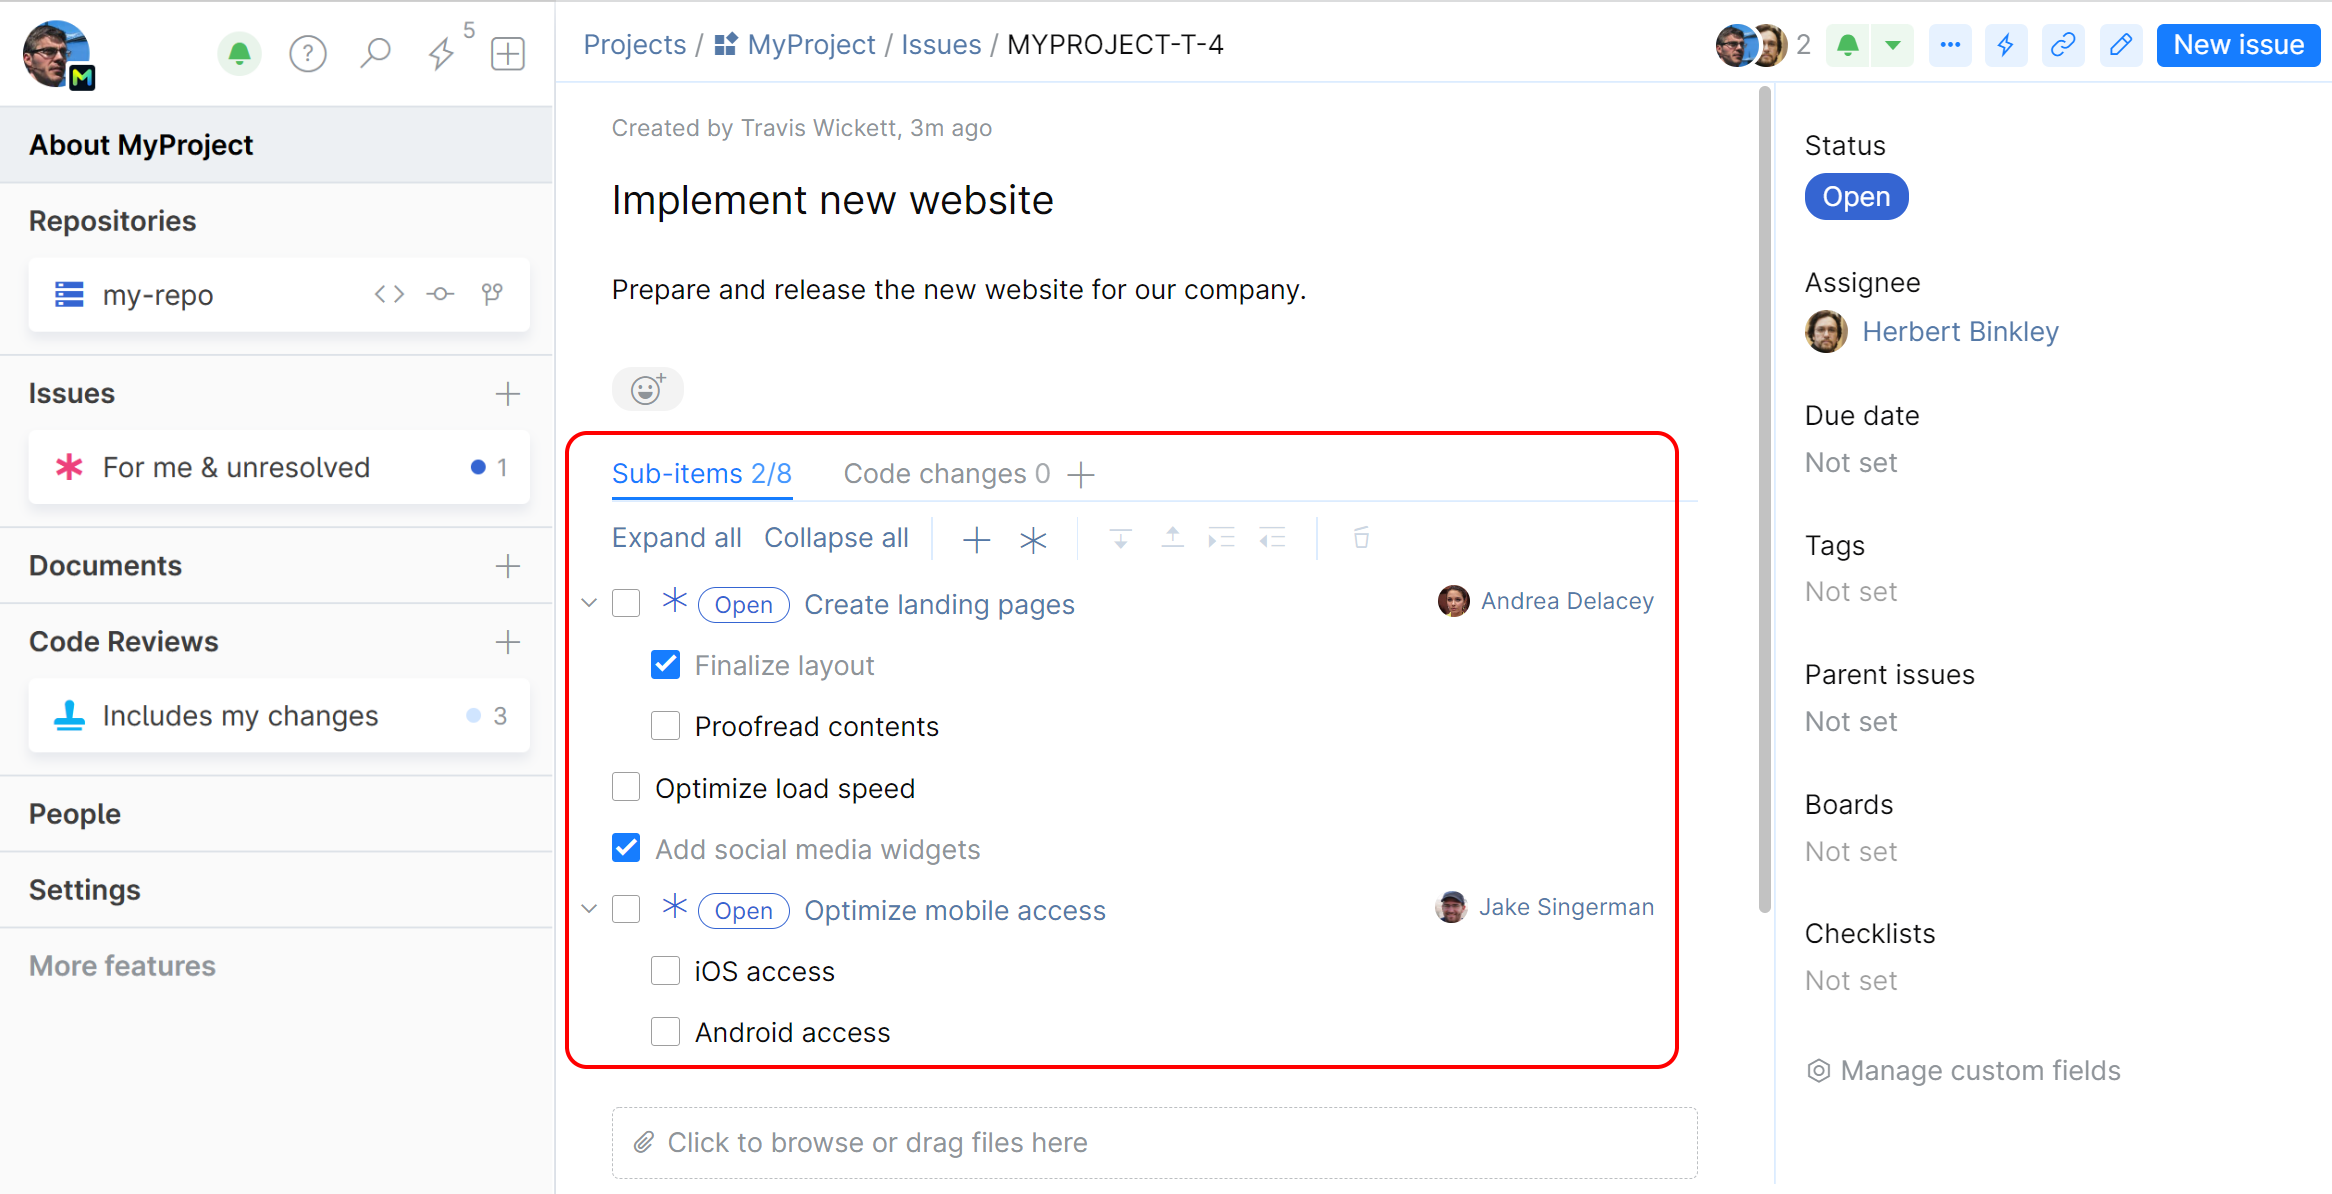
Sub-items in an Issue
You can use sub-items to:
Break down complex issues into smaller tasks by creating sub-issues.
List requirements, DoDs, To-Dos, and other information relevant to the issue.
Just like checklists, sub-items can have a nested structure, and you can check them off once they are completed:

Open the issue.
Select the Sub-items tab and click Add new item.
To add more items, click
 on the sub-items toolbar.
To insert an item between existing items, select an item under which you want to place the new one before clicking
 .
.A sub-items list can have a nested structure. You can expand and collapse it by clicking the respective buttons.
To make a nested list, highlight the item that should be indented and press Tab, or use the horizontal arrows on the toolbar.
To move an item up or down the list, highlight the item and use the vertical arrows on the toolbar:
note
Your issue will become the parent issue to all issues added to its sub-items list. An issue can have several parents if added to their sub-items lists.


