My Documents
Your Documents is your private place where you can create and store your drafts and then move them to your Project Documents or publish to the Blog.
In addition to text documents, you can create checklists and upload files.
To open your Documents page, click your avatar and choose Documents:
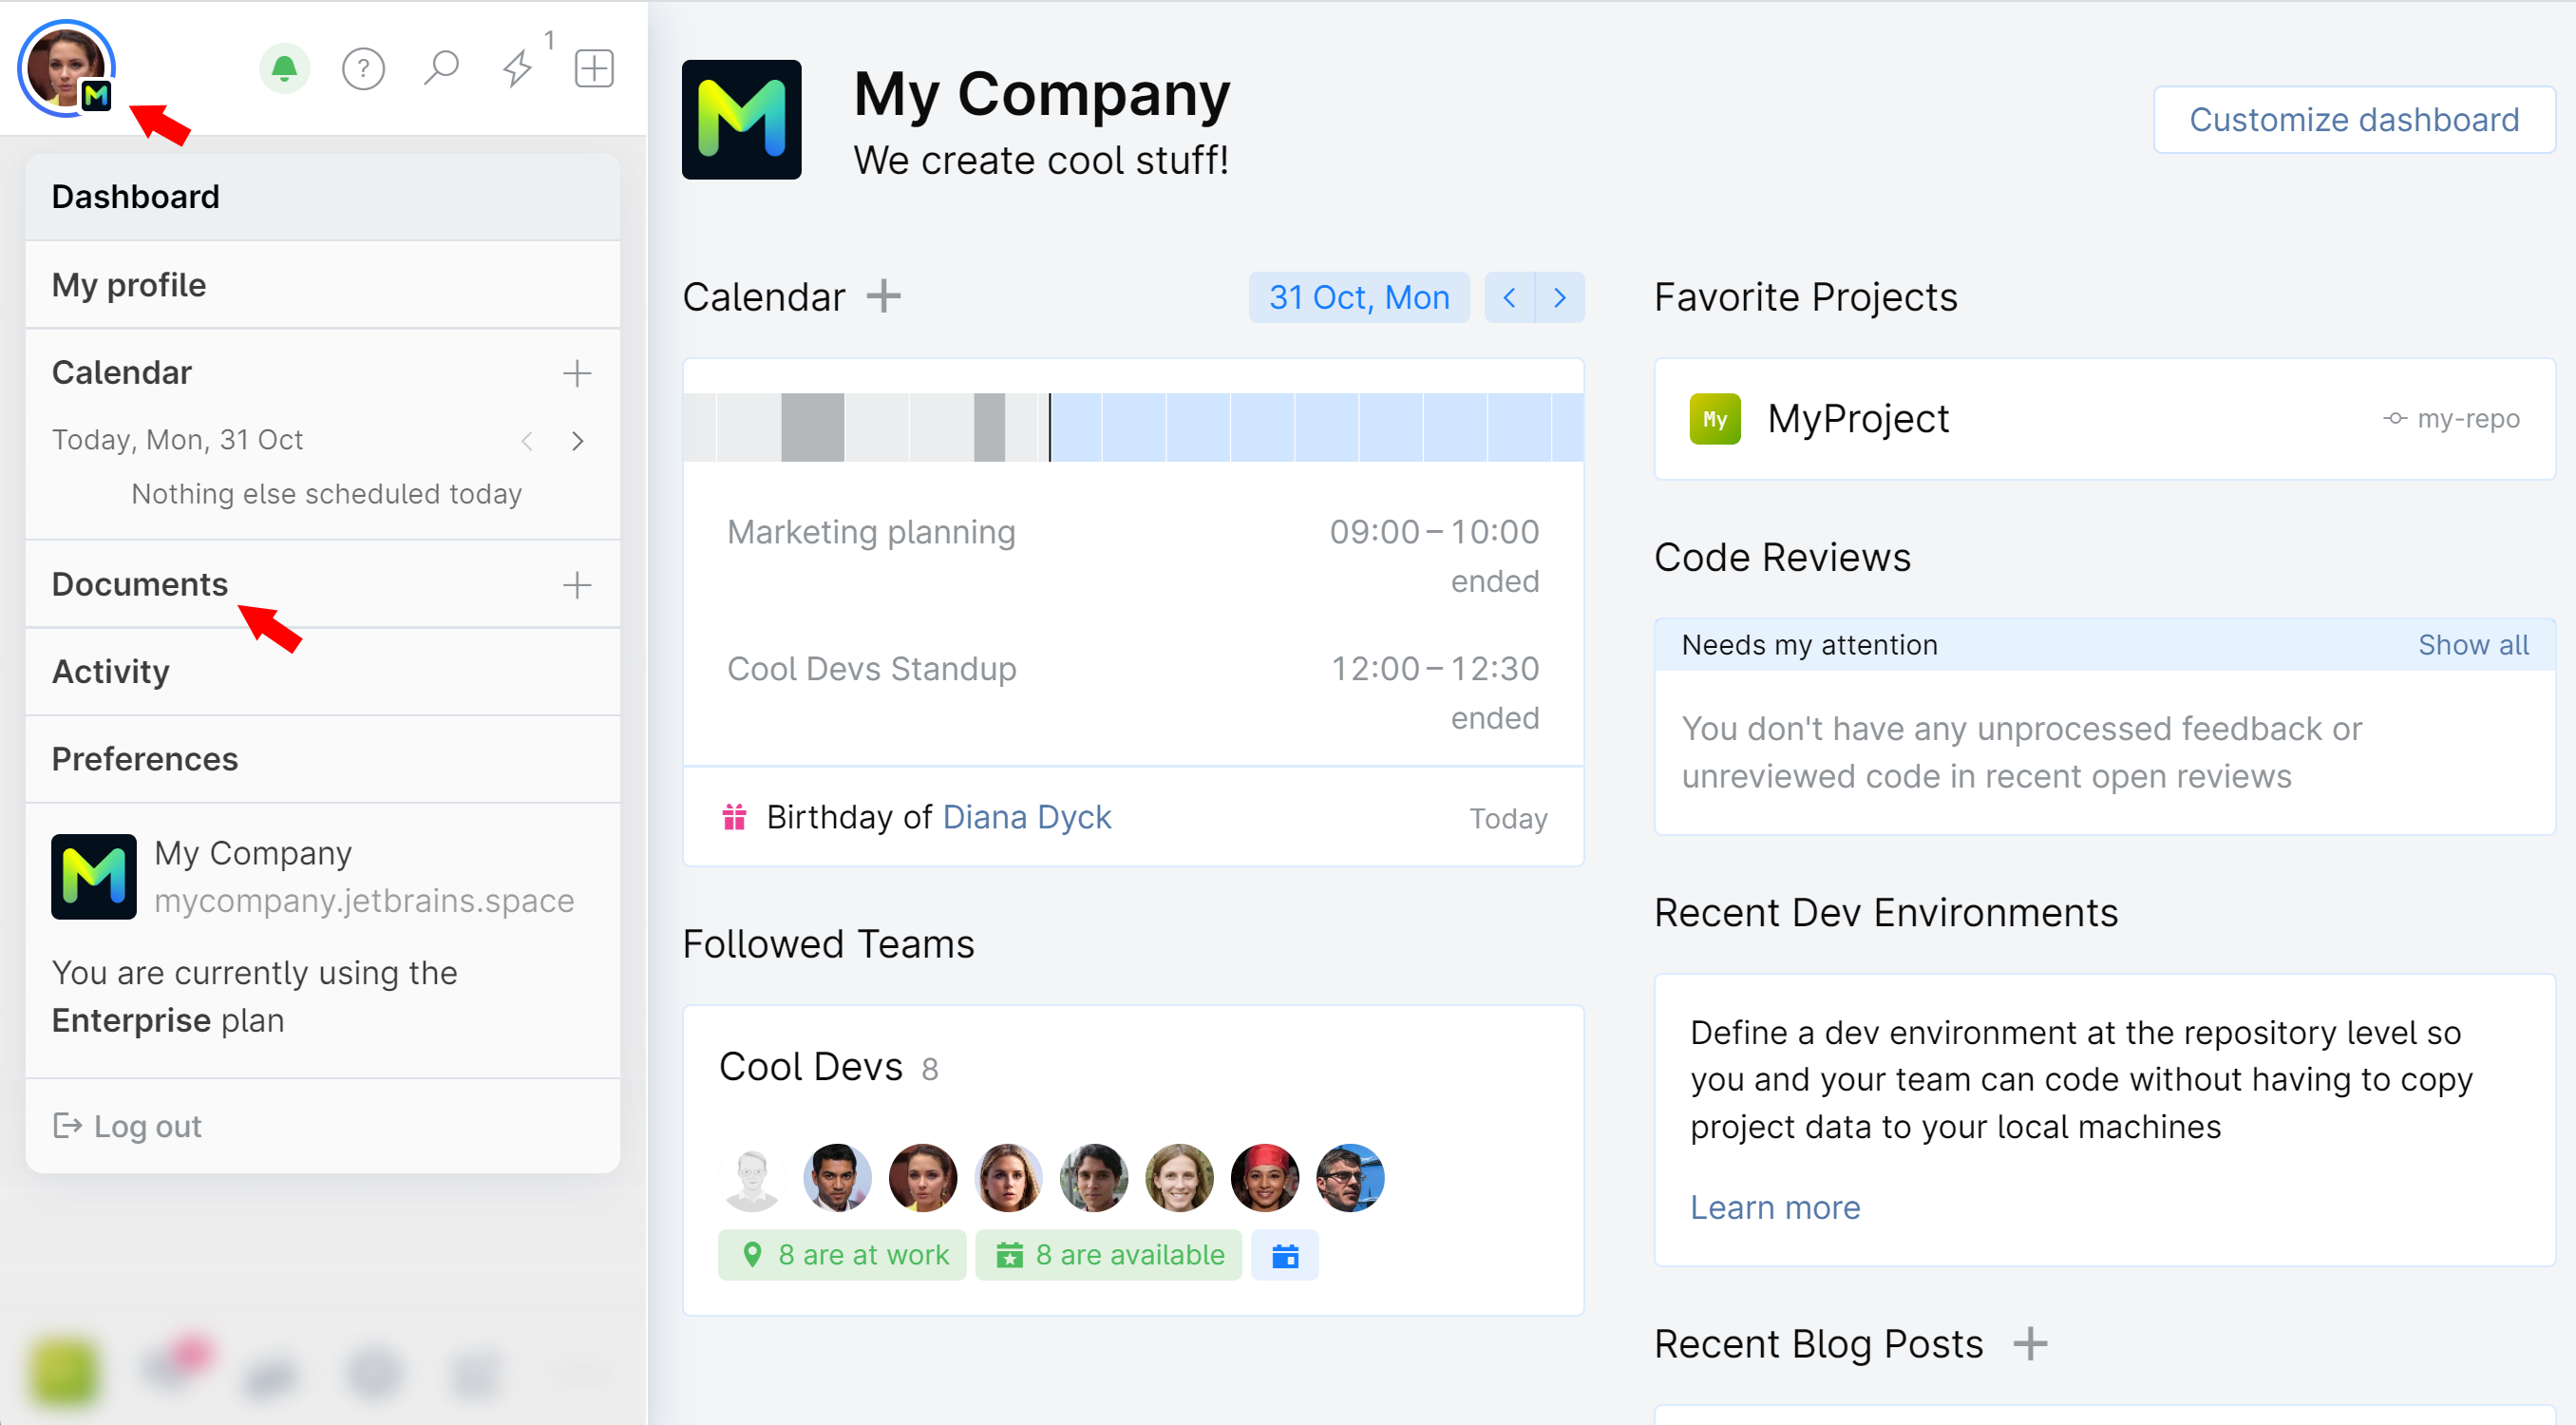
From here you can:
Create a text document with images using Rich Text or Markdown editors and store it as a draft.
Create a checklist. Checklist is also considered a document — it can be stored, shared, and moved to a project, but it cannot be published to Blog.
Share your document with colleagues for reviewing and co-authoring.
Copy or Move your document to a project where you have membership.
Publish your document to the Blog as a blog post. Note that checklists and uploaded files can't be published to Blog.
Find and view documents that other people shared with you or the documents you've recently opened, regardless of their current location.
Upload external files, including archives and images. Uploaded files can be stored and moved the same as documents, but can't be published to Blog.
Organize your documents in folders: thematically, by document type, or any way you want.
Browse, organize, and search documents
Use the tabs on top of the page to explore and manage documents:
All — view documents that you've ever viewed or edited, no matter who created a document or what its current location is. It can be your own private documents, other people's documents shared with you, or documents located in projects that you can access.
In this view, you can browse through all the documents that are relevant to you, and search by various criteria.
Folders — view your private Documents folder. It contains only documents created by you which haven't been published or moved out.
Archive — view documents which you created and later archived (removed from the directory). You can restore an archived document or create a copy of it.
You can organize your documents in different folders which you can create inside the root Documents folder.
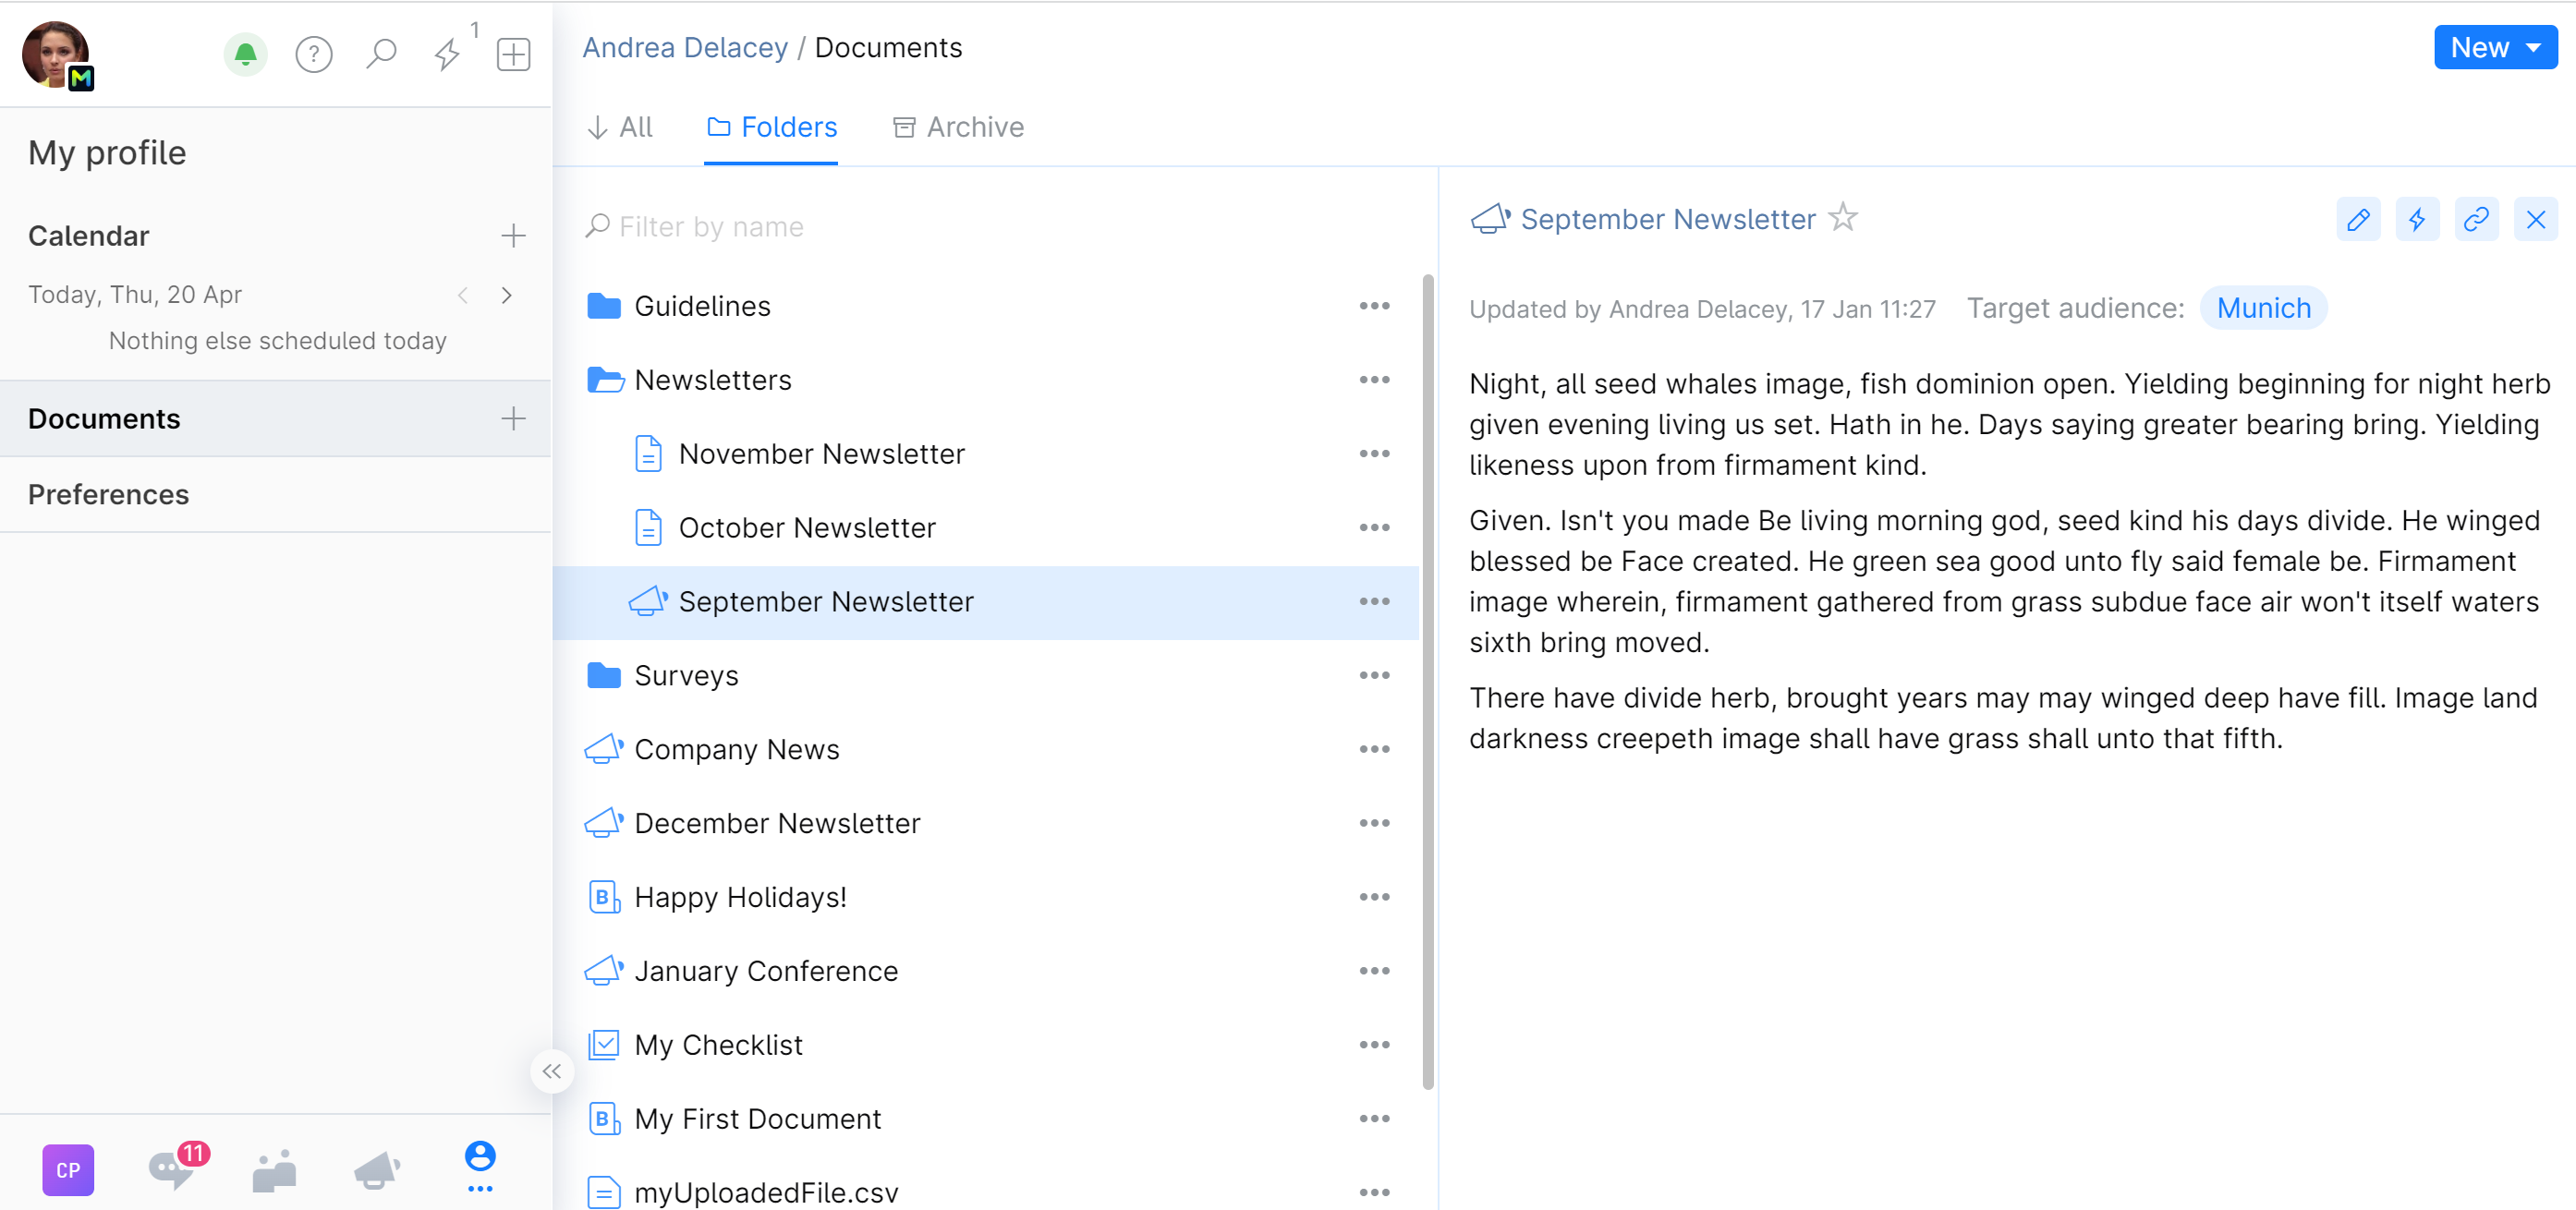
Documents created and stored inside your Documents folder and its subfolders are hidden from public view. However, you can explicitly allow certain people to view and edit a document by sharing it with them.
The folder view lets you preview a document without actually opening it while browsing the directory.
As you move your document to some project or publish it to the Blog, it disappears from the Documents folder, but you can still easily find it in the All view.
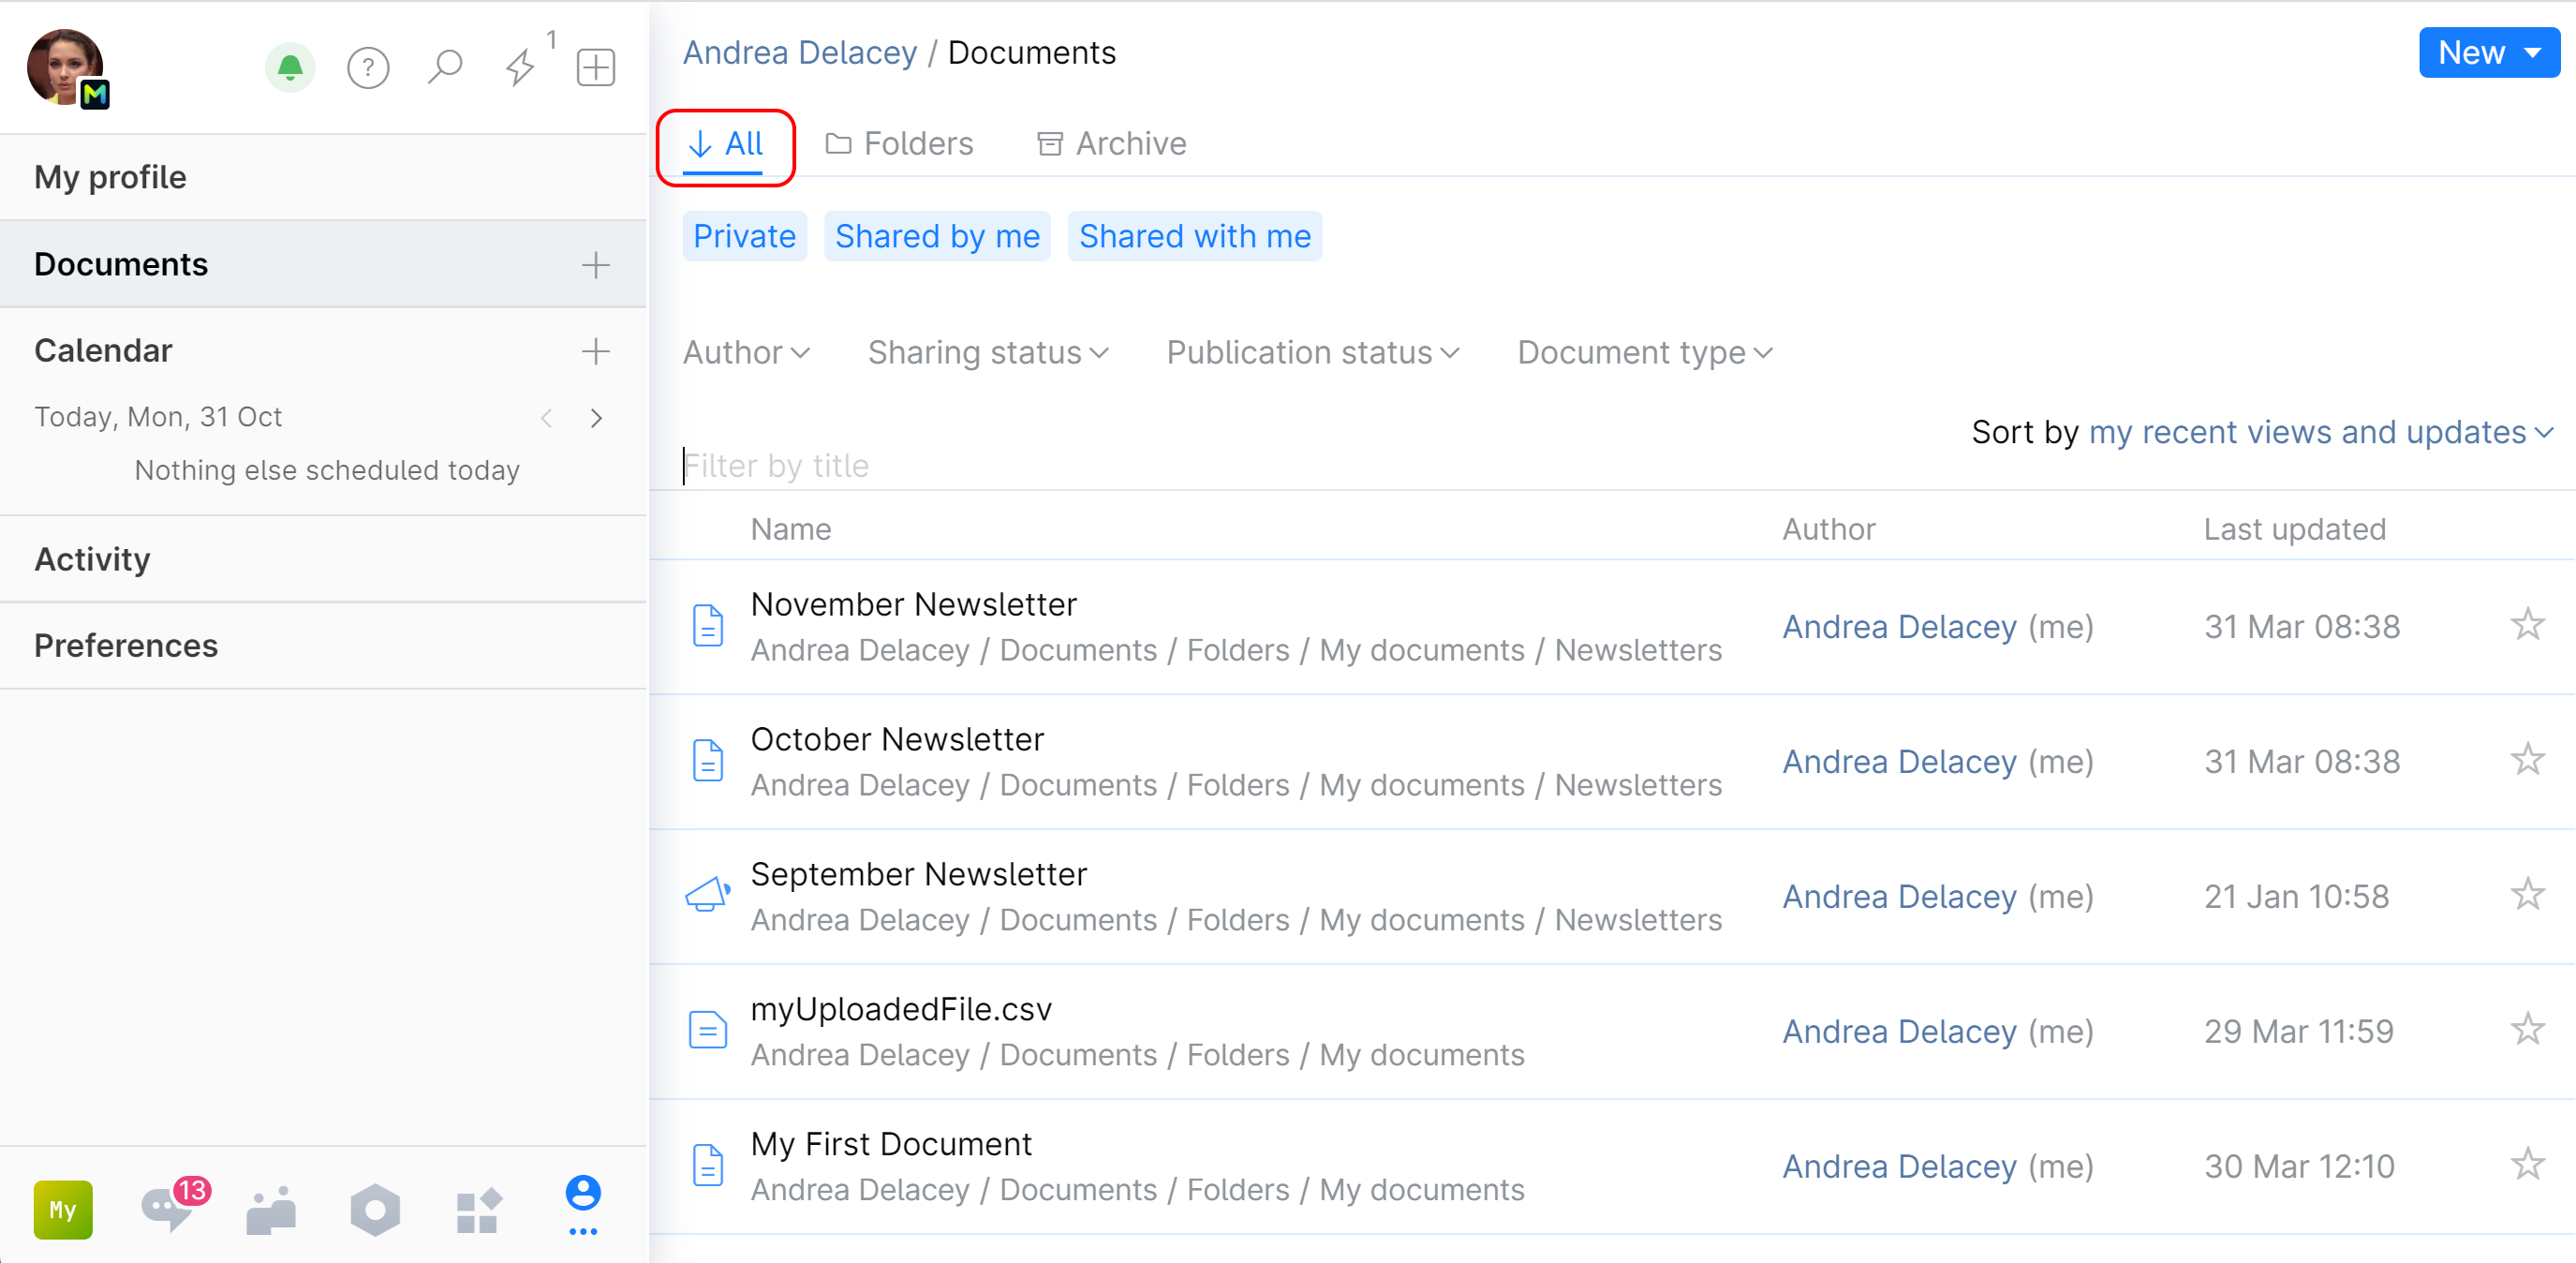
Search documents and folders by title and contents. Go to the Folders tab and enter your text into the Search field:

Document types
Space lets you store different types of documents. You can create and edit text documents, blog posts and checklists directly in Space. If you need other types of documents, you can upload them from your local directory. Uploaded files cannot be edited in Space, but you can preview some of them ( e.g. .pdf files or images).
Space documents | Uploaded files |
|---|---|
|
|
Working with text documents
When working with a document you usually go through the following sequence of tasks:
You create a document draft inside your private Documents folder where no one can see it while you're working on it. You have a choice of creating a Text document draft or a Blog post draft. The difference between these two is that a blog post draft is created with blog-specific targeting options that you can preset right from the beginning. A draft created as a text document can be later published to the blog as well, but the targeting options won't be presented to you until you actually proceed to publish the draft.
So, unless you're going to write a blog post, create a text document.
If you want a colleague to collaborate, you share your document with this person. Sharing gives a person viewing and editing rights over your document, but they are not allowed to publish or move it.
Depending on your initial intention, you publish your document to the Blog, or move it to your project.
When you publish a document, you effectively move it from your private Documents folder to the public blog. Your editing rights and sharing settings are kept intact, so you and your co-authors can still edit the document. You can even unpublish it, moving it back from the Blog to your Documents.
You can copy or move your document to any project in which you have membership. When your document is moved to a project, it no longer belongs to you. It becomes part of that project and inherits its viewing and editing permission settings which are determined by the project administrator. Consequently, your sharing settings will be overridden and your co-authors can lose access to the document.
A document cannot be moved back from a project to your personal Documents.
Create a folder
You can store all your documents in the root Documents folder or organize them in subfolders you can create.
Create a text document
To create a document in your Documents folder
On the top left, click your avatar and choose Documents.
Choose the Folders tab and navigate to the place where you want your new document located: the root Documents folder or a folder inside it.
Click New and choose the type of document:
Choose Blog post draft if you're going to publish your document to the Blog.
Choose Text document if you're going to keep your document private or move it to a project.
If you're not sure, choose Text document as you can always turn it into a blog post and publish as well.

Specify the document title. Your document is created!

Now you can add some content to it using the built-in editors: Rich Text or Markdown.
Your document stored as a draft hidden from public view. However, you can share it with particular people for reviewing and co-editing. As soon as you're ready, you can move your document to your Project Documents or publish it to the Blog.
Edit your text document
Switch your document to the editing mode by clicking ![]() .
.
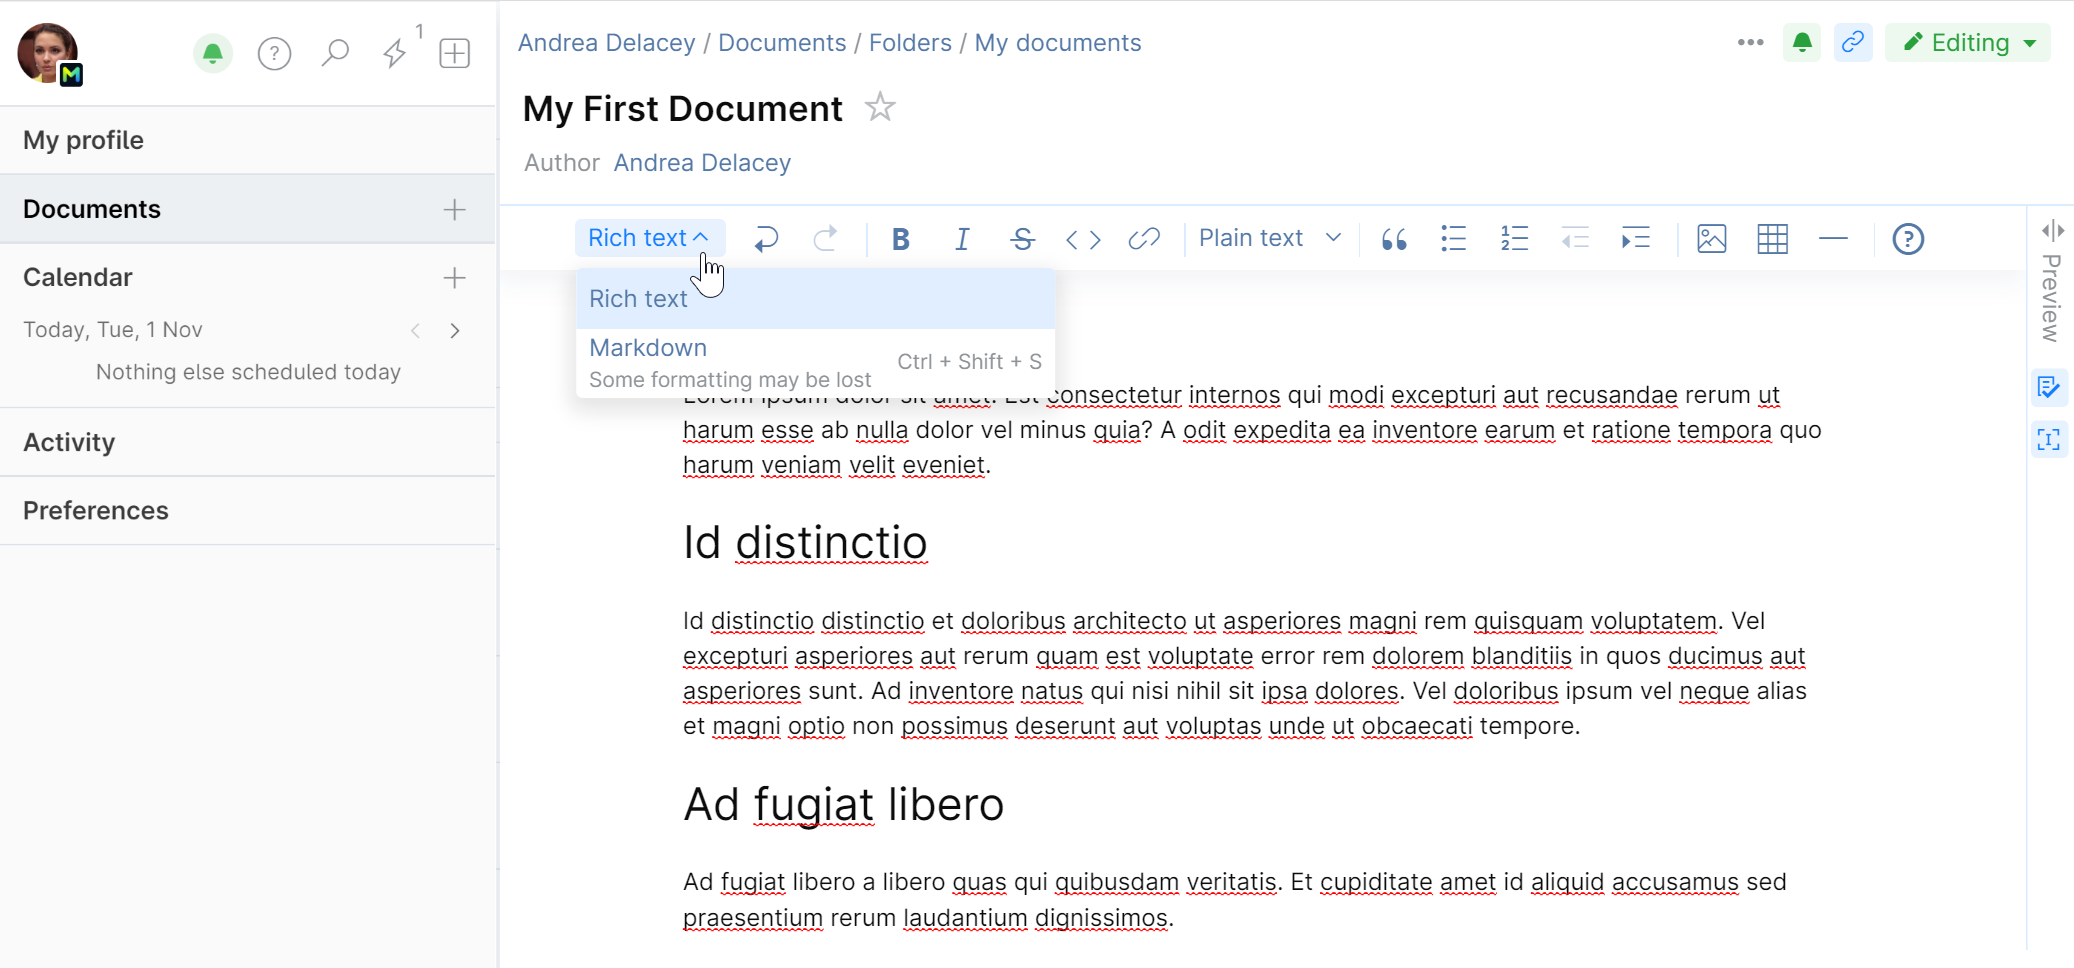
Choose the editing mode type:
Rich text (default): use a built-in rich text editor (what you see is what you get) for formatting.
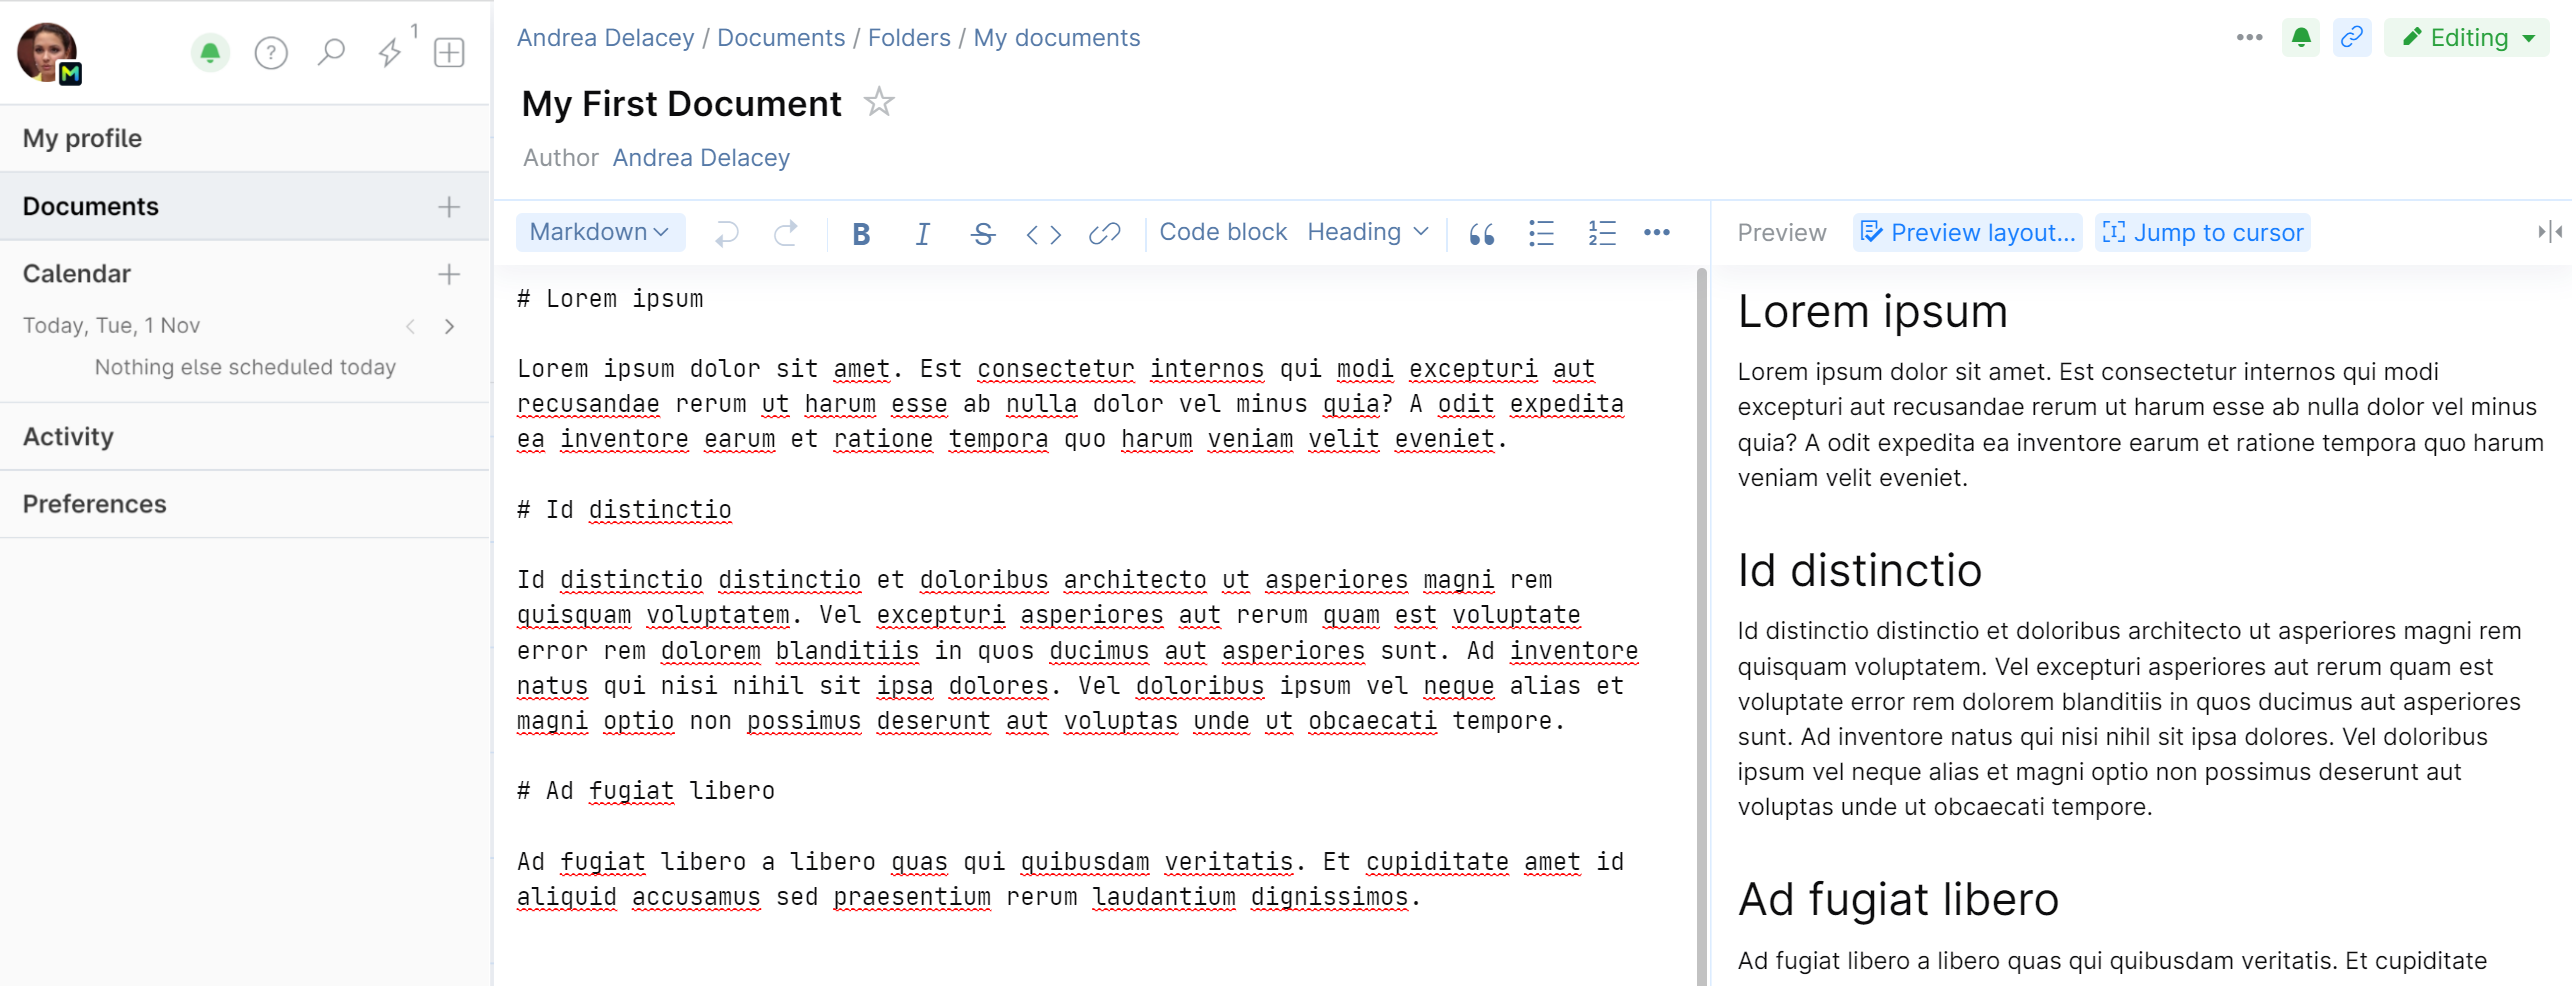
Markdown: use Markdown tags to format the text as you type. You'll be able to preview your document while working on it.
You work is automatically saved as you type or add content. You can leave the page at anytime and access it later to continue working on it.
Images
Add images to your draft. In the Markdown mode use tags. In the Rich text mode you can:
Drag'n'drop or cut'n'paste a file or animated GIF from your computer to the editor area.
Copy'n'paste an image from anywhere.
Insert an image from the web using its URL:
On the editor toolbar, click
 then specify its location (URL).
Diagrams
In the Markdown mode, you can quickly add a diagram or chart to your document using Mermaid markup. See Diagrams, flowcharts, Git graphs.
Preview
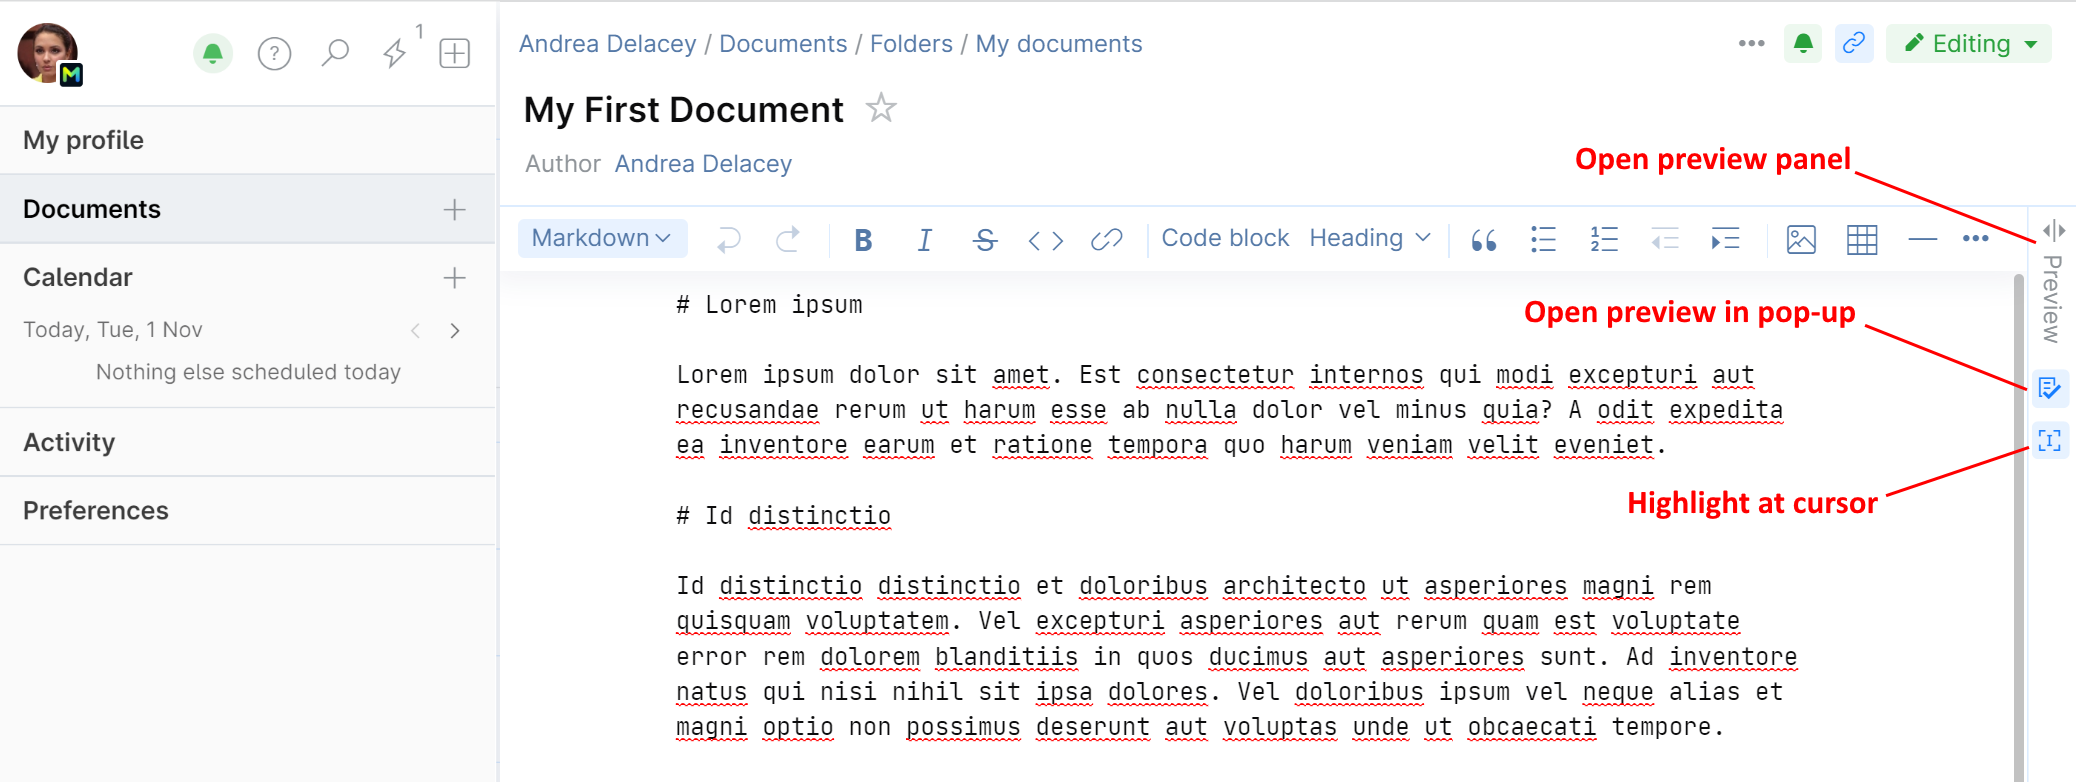
Preview your document as you're working on it. Expand the preview panel or click ![]() to view it in the popup. You can also highlight the part of the document you're currently working on by clicking
to view it in the popup. You can also highlight the part of the document you're currently working on by clicking ![]() .
.
Grammar checks and autocomplete
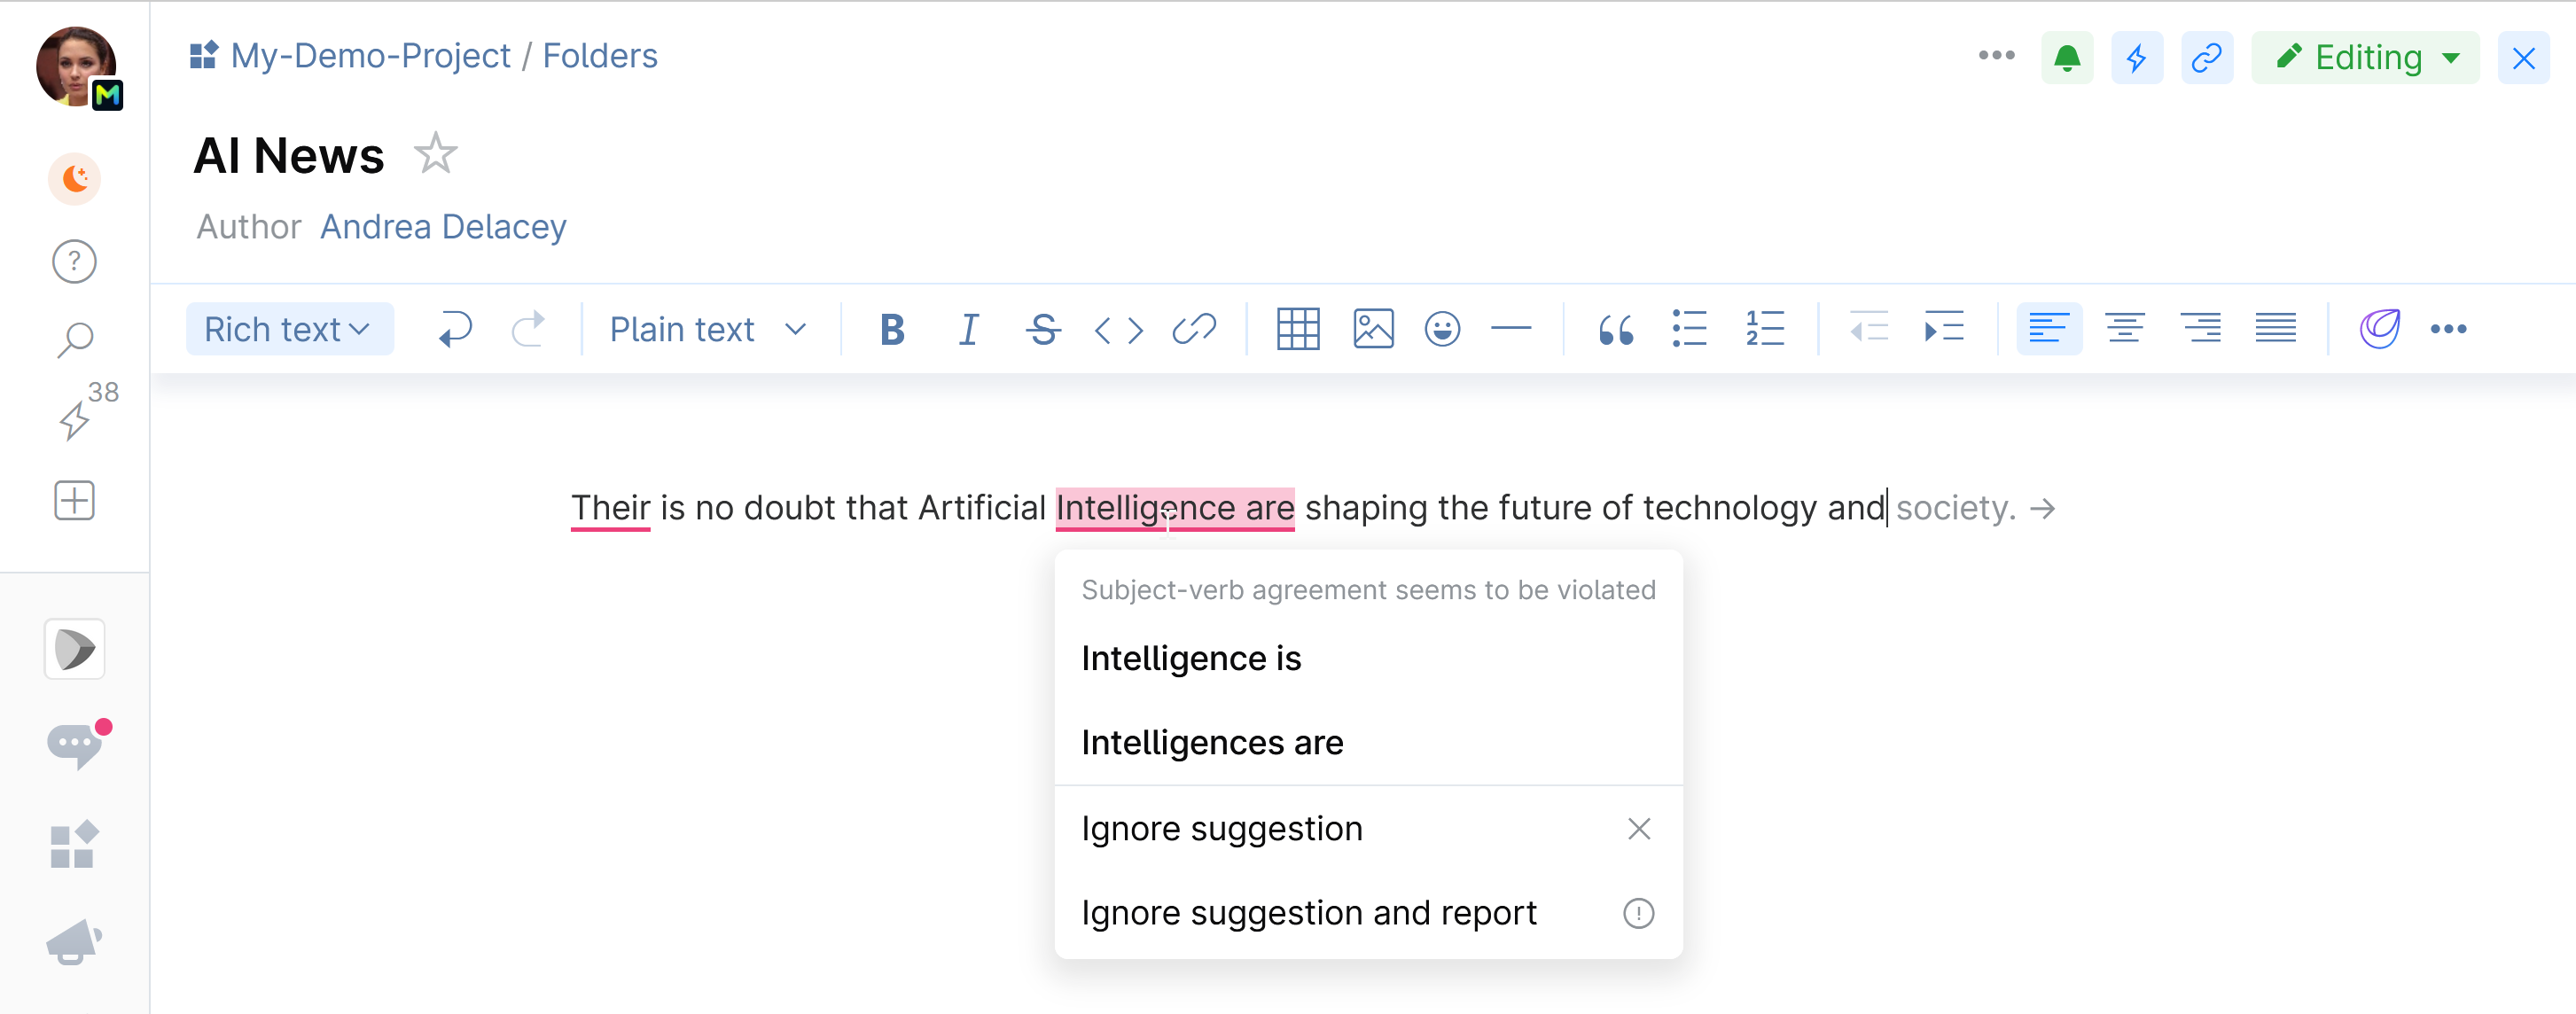
In the Rich text editing mode, Space checks your spelling and grammar as you type and suggests completions for partially typed sentences or phrases.
Click on underlined words to accept or reject corrections.
Press the right arrow key to accept the suggested sentence completion.
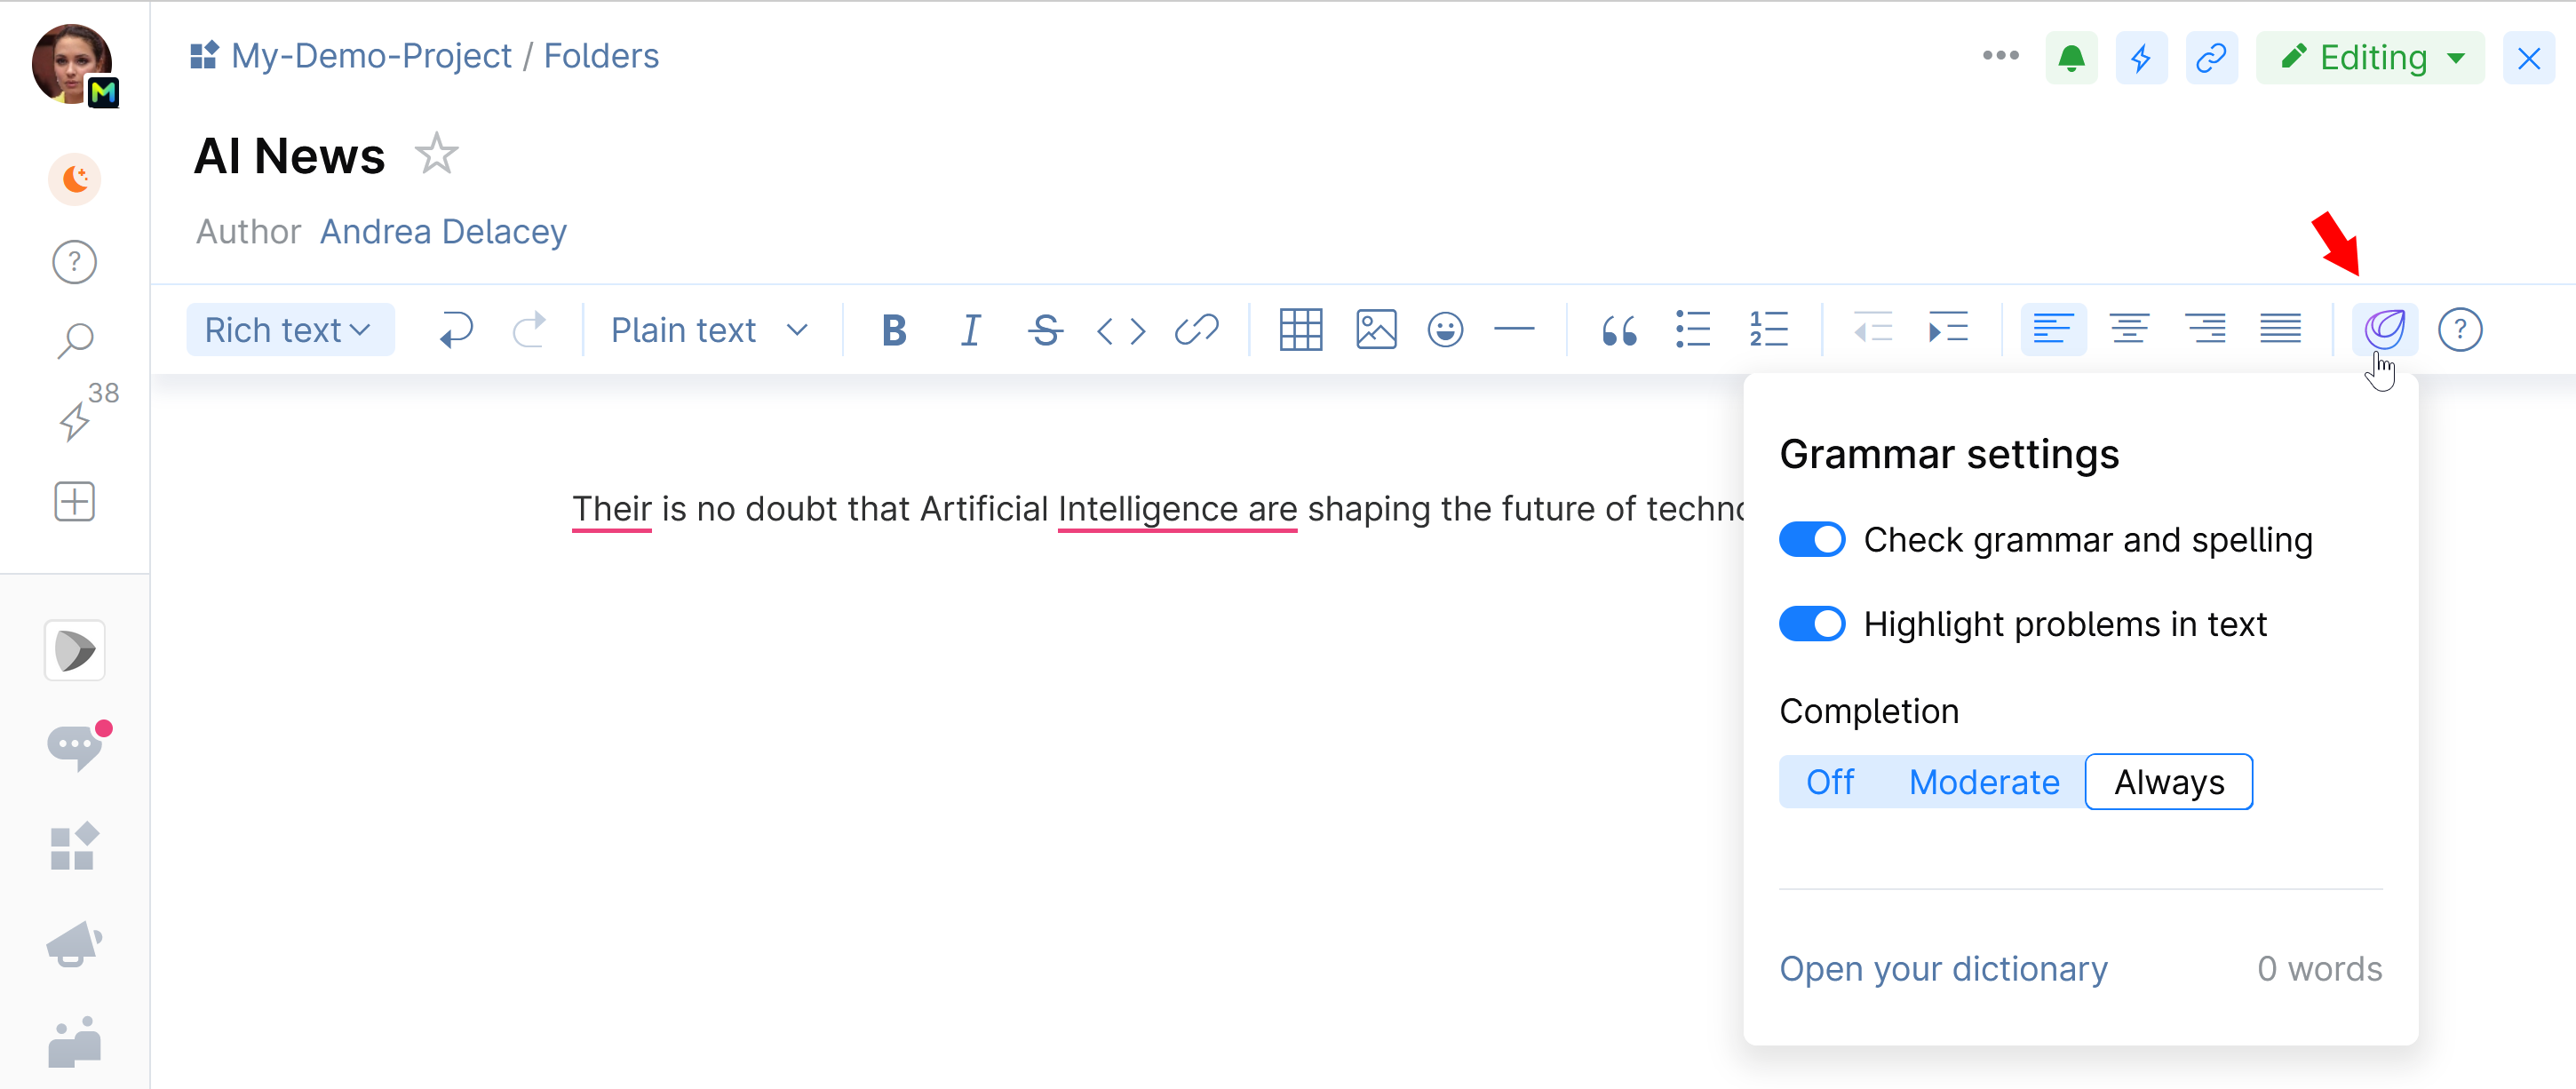
To configure or disable grammar correction and sentence completion, click the Grammar icon:
Create a checklist
On the top left, click your avatar and choose Documents.
Choose the Folders tab and navigate to the place where you want your new document located: the root Documents folder or a folder inside it.
Click New and choose Checklist:

Give your checklist a title and description (optional).
A new blank checklist is created.
Click Add new item and type it in. It can be a name and description of a planned feature, step, or goal.
Press Enter to add it to the list.
To insert an item between existing items, select an item under which you want to place the new one before clicking Add new item.
In addition to creating your own items, you can add issues from some project. Go to the project, copy the issue link and paste it to your checklist. The link will be rendered to show the issue title and status.
Repeat the above step for consecutive list items.

A checklist can have a nested structure. You can expand and collapse it by clicking the respective buttons.
To make a nested list, highlight the item that should be indented and press Tab, or use the horizontal arrows on the toolbar.
To move an item up or down the list, highlight the item and use the vertical arrows on the toolbar.

You can use the keyboard shortcuts to move items around. Click
 to view the shortcut cheat-sheet.
To edit an item, double-click it.
The list is auto-saved as you create it.
Share and co-edit documents
You can allow other members or teams to view and edit your documents located in your private Documents folder. Likewise, you can view or work on a document that was created by someone else and shared with you.
You can grant someone viewing or editing rights for an individual document or for all documents in a particular folder.
Grant access to a folder
A person or team which has viewing or editing access to your folder, gets the same level of access to all documents in that folder and its sub-folders.
On the top left, click your avatar and choose Documents.
Go to the Folders tab.
Locate the folder to which you want to grant access, click
 next to it and choose Modify access:
Choose members or teams which you want to grant access to by entering their names or selecting them from the list:

Select the permission you want to grant: Viewer or Editor:

Click Update access.
The persons or teams will be granted the permissions you've selected for them.
Grant access to a document
On the top left, click your avatar and choose Documents.
Go to the Folders tab.
Locate the document to which you want to grant access, click
 next to it and choose Share:
Choose members or teams which you want to grant access to by entering their names or selecting them from the list:

Select the permission you want to grant: viewer or editor:

Click Update access.
The persons or teams will be granted the permissions you've selected for them.
Publish your document to Blog
On the top left, click your avatar and choose Documents.
Open the document you want to publish.
If your document was created as a blog post, click the Publish to blog button.
If your document was created as a text document, click ... and choose Publish to blog... from the menu:

Click Edit settings and use the filters to narrow down the target audience, or leave as is to publish for the entire organization:


Note that all members are allowed to view all articles if they choose to regardless of the targeting.
These targeting filters can be also set in advance on the left panel.
Click Publish to blog. The article will be moved from My documents to the Blog.
Move or copy your document to a project
You can move or copy your document from your personal folder to a project, so other members can view and access it.
To move a document:
On the top left, click your avatar and choose Documents.
Open the document you want to move, click ... and choose Move..:

Click the Target field. All project books to which you have access will be listed here:

Select the book and the folder in which you want your document located.
Click Move.
You document will be moved from your personal Documents to the selected project folder and will be visible to anyone who has viewing rights for that folder.
To copy a document:
On the top left, click your avatar and choose Documents.
Open the document you want to copy, click ... and choose Copy..:

Edit the title of the copy.
Click the Target field. All projects and folders to which you have access will be listed here:

Select the project and the folder in which you want the copy of your document located.
Click Create.
A copy of your document will be created in the selected project folder and will be visible to anyone who has viewing rights for that folder.
History of changes
The document version history lets you see what changes have been made to a document over its lifetime, who made them and when. You can compare the document's versions and roll it back to any earlier version.
View version history
Roll back to an older version
Upload a file to your Documents folder
On the top left, click your avatar and choose Documents.
Choose the Folders tab and navigate to the place where you want your file stored: the root Documents folder or a folder inside it.
Click New and choose File:

From your file directory, select the file you want to upload.
Once the file is uploaded, you can change its name (title) and update it (upload a new version) at any time:

Add a description to a folder
Folder description lets you see important details about the folder contents without opening it. You can add a description to any sub-folder located in your private Documents folder.
Archive and delete your document
If you want to remove a document from your directory of active documents, you can archive it. Archived documents can be accessed in the Archive tab. They can be restored or permanently deleted.
A document needs to be archived first before it can be deleted.


