Add files to a local Mercurial repository
After a Mercurial repository for a project is initialized, you need to add the project data to it:
If you have specified enabled Mercurial for your project, IntelliJ IDEA suggests putting each new file under Mercurial control during the file creation.
You can add all unversioned files to Mercurial control or select files to add.
Add all unversioned files to Mercurial
Open the Commit tool window Alt+0.
Right-click the Unversioned Files node and choose from the context menu.
Click Commit or press Ctrl+K.
Add specific file(s) to Mercurial
Open the Commit tool window Alt+0.
Expand the Unversioned Files node, select the files to be added. From the context menu, choose .
Click Commit or press Ctrl+K.
Specify the commit options
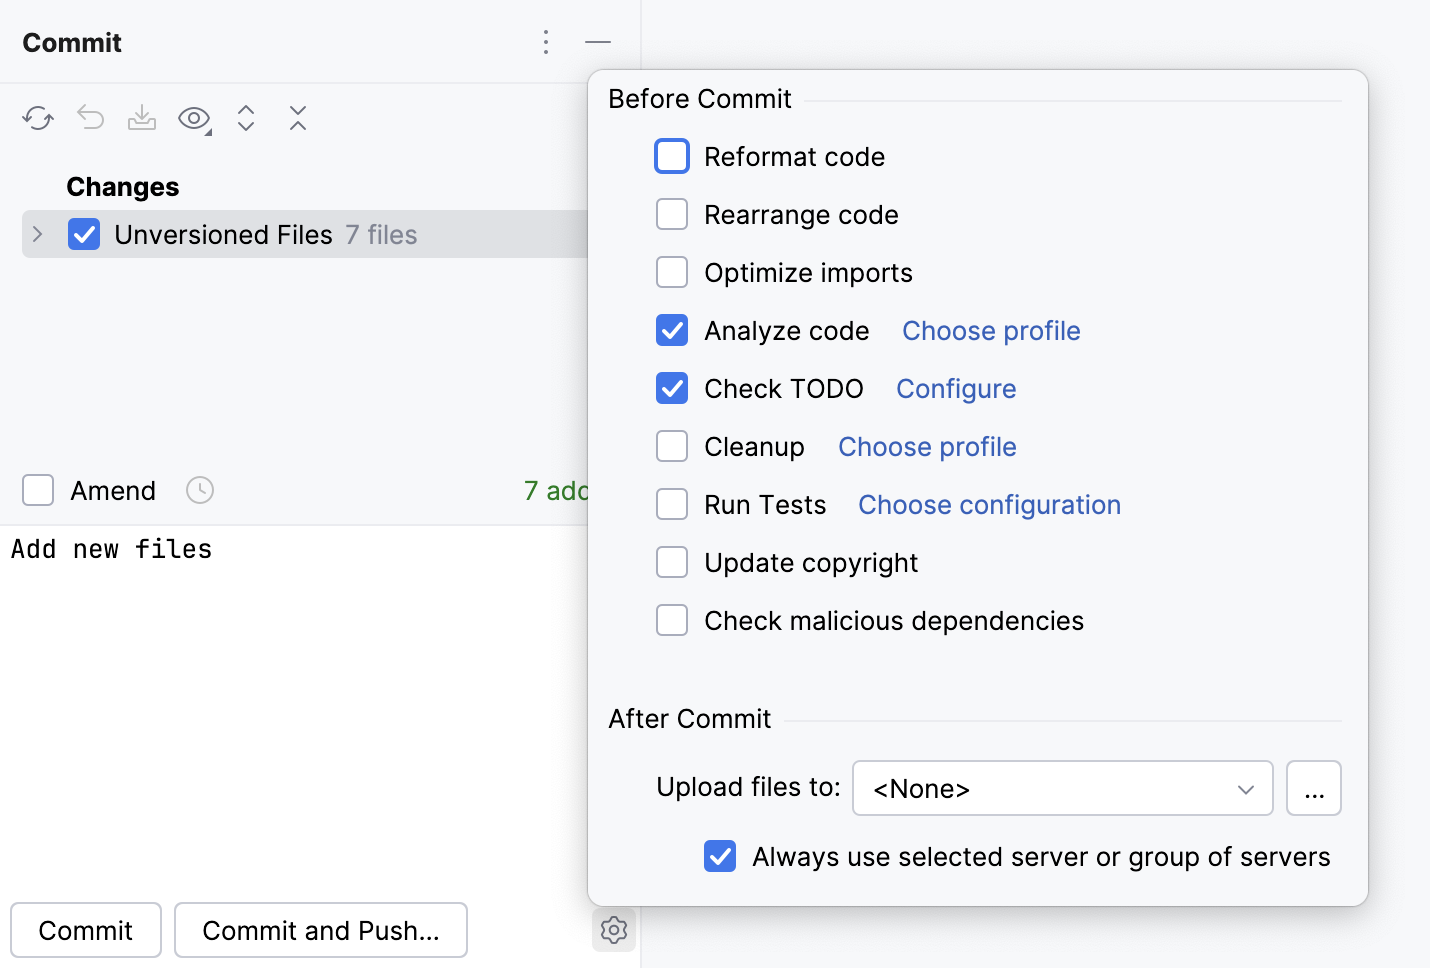
In IntelliJ IDEA, you can run commit checks, upload files to a server after the commit, or commit with advanced options.
Open the Commit tool window Alt+0 and click
in the bottom-right corner.
Select the necessary options:

In the Before Commit area, select the actions you want IntelliJ IDEA to perform before committing the selected files to the local repository.
The following options are available:
Reformat code: perform code formatting according to the Project Code Style settings.
Rearrange code: rearrange your code according to the arrangement rules preferences.
Optimize imports: remove redundant import statements.
Cleanup: batch-apply quick-fixes from code cleanup inspections. Click Choose profile to select a profile from which the IDE will run inspections.
Update copyright: add or update a copyright notice according to the selected copyright profile - scope combination.
Check malicious dependencies: search for malicious NPM and PyPI dependencies that might be declared in your project.
In the Advanced Commit Checks area, the following options are available:
Run advanced checks after a commit is done: enable this option to run the selected advanced commit checks after a commit is done.
With this option enabled, if some of the advanced commit checks fail, the changes will be committed anyway.
Analyze code: analyze modified files while committing them. Click Choose profile to select an inspection profile from which the IDE will run inspections.
Check TODO: Review the TODO items matching the specified filter. Click Configure to choose an existing TODO filter, or open the TODO settings page and define a new filter to be applied.
Run Tests: run tests as commit checks. Click Choose configuration near Run Tests and select which configuration you want to run.
In the After Commit area, you can select the server access configuration or a server group to use for uploading the committed files to a local or remote host, a mounted disk, or a directory. For more information, refer to Deployment.
The following options are available:
Upload files to: select the server access configuration or a server group to use for uploading the committed files to a local or remote host, a mounted disk, or a directory.
To suppress uploading, choose None.
To add a server configuration to the list, click
and fill in the required fields in the Deployment dialog that opens.
The list is only available if the FTP/SFTP/WebDAV Connectivity plugin is enabled.
Always use selected server or group of servers: always upload files to the selected server or a server group.
The checkbox is only available if the FTP/SFTP/WebDAV Connectivity plugin is enabled.