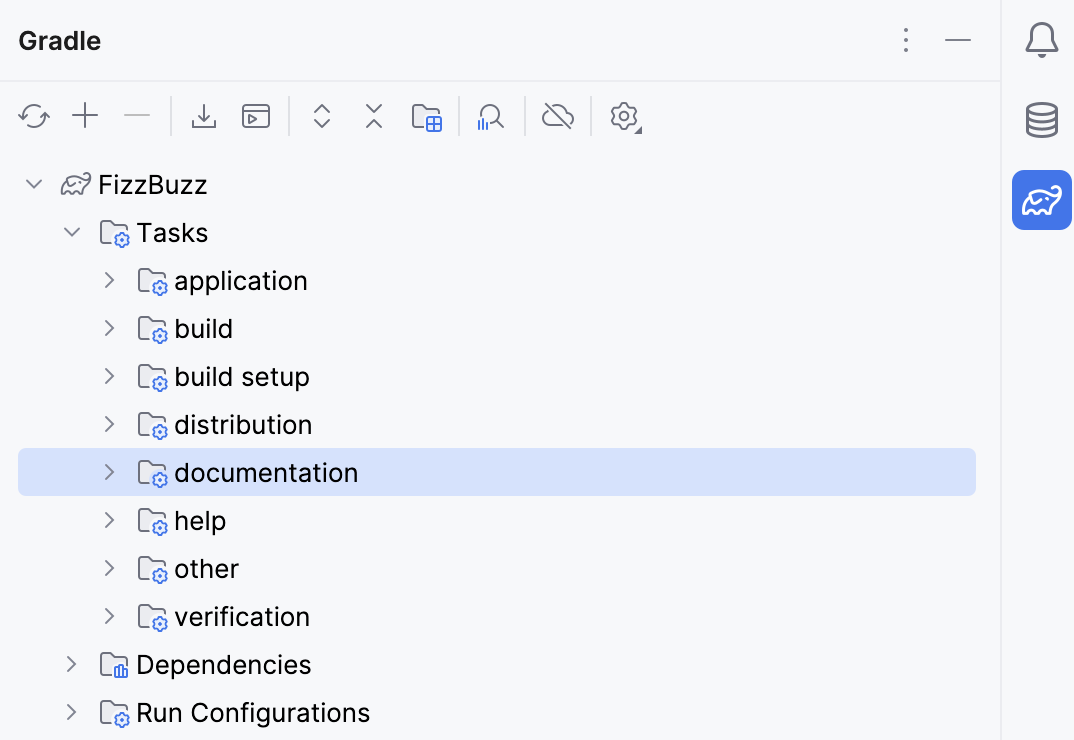
Gradle tool window
Last modified: 28 June 2024Required plugins: Gradle, Gradle Extension (installed and enabled by default)
Access: View | Tool Windows | Gradle
The Gradle tool window is enabled automatically when you create or open your Gradle project. Click Gradle on the right sidebar to open the tool window. The tool window displays the Gradle linked projects, their tasks, dependencies, and all changes made to the underlying build.gradle file.

note
If you removed the Gradle tool window from the sidebar, select View | Tool Windows | Gradle from the main menu to reopen it.
Gradle
Item | Shortcut | Description |
|---|---|---|
Click this button to open the menu for configuring the current view and changing the tool window viewing modes. The menu items are options that you can turn on or off. An active item contains a check mark on the left side of its name. The available options in the menu are as follows:
| ||
Hide the tool window . To hide all the tool windows, press . |
Gradle Tasks
Item | Description |
|---|---|
Run Configurations | This area contains a list of the last executed tasks and command types under which these tasks were executed. |
Tasks | This area contains a list of all available tasks. |
Dependencies | This area contains a list of project dependencies. |
Toolbar
Item | Description |
|---|---|
Click this button to re-import all registered Gradle projects after changes have been made to a Gradle script. | |
Click this button to link a Gradle project. | |
Click this button to detach an external Gradle project. | |
Click this button to manually download sources for the project dependencies that were not downloaded on the initial project sync. If you want to always download these sources for the project, use the Download sources option in Build Tools. Gradle. | |
Use this button to execute a Gradle task. When you click this icon, the Run Anything window opens. Enter a name of the task that you want to execute. To execute several tasks, enter task names using space to separate each new task. | |
| Use these buttons to expand or collapse all the nodes. |
Click this button to import a module or data to your Gradle project via Project Data to Import dialog. It might be useful for the multi-module projects. | |
Click this button to work with Gradle projects in the offline mode. In this case, Gradle will use dependencies from the cache. Gradle will not attempt to access the network to perform dependency resolution. If the required dependencies are not present in the cache, build execution will fail. Also, if the offline mode is enabled, the opening and syncing of your project might fail. | |
Click this icon to open the Dependency analyzer window. | |
Click this icon to generate the Gradle dependencies. | |
Use this icon to access the following settings:
|
Gradle Project Data To Import dialog
This dialog appears when you click on the toolbar in the Gradle tool window. Use this dialog to add an external module to a project. It might be helpful for multi-module projects.
Item | Description |
|---|---|
Please select the modules/data to include in the project | Use this area to view the list of available external modules or data for your current project. |
Select all the modules from the list. | |
Clear the list of selected modules. | |
See only the selected modules. | |
| If you click this icon, IntelliJ IDEA selects the appropriate modules in case you are unsure about dependencies between the modules. |
Context Menu
Item | Description |
|---|---|
Select this option or use a shortcut to open build.gradle file. | |
Select this option to re-import the project. | |
Select this option to detach an external project. | |
Ignore Gradle project | Select this option to ignore/unignore the selected project. |
Refresh Gradle dependencies | Select this option to refresh dependencies for the project. |
Show Dependencies / Show Dependencies popup | Use these options to generate the Gradle dependencies diagram. |
Tasks Activation | Select this option to add, edit or remove an activation phase for your task. It might be useful for working with the Gradle multi-module projects. |
Context Menu Commands for Gradle Tasks
Command | Description |
|---|---|
Run <task> | Choose this command to run the selected task with the task-specific run/debug configuration. |
Debug <task> | Choose this command to debug the selected task with the task-specific run/debug configuration. |
Create <task> | Choose this command to create run/debug configuration for the selected Gradle task. |
Select <task> | Choose this command to activate the configuration for the selected Gradle task. If there is no existing configuration for the selected task, this option is disabled and replaced with the Create option. |
Execute before Sync, Execute after Sync | Choose these commands to set the respective flags for the selected task. In this case, Before Sync and After Sync comments appear next to the name of the node. |
Execute before Build, Execute after Build | Choose these commands to set the respective flags for the selected task. In this case, Before Build and After Build comments appear next to the name of the node. |
Execute before Rebuild, Execute after Rebuild | Choose these commands to set the respective flags for the selected task. In this case, Before Rebuild and After Rebuild comments appear next to the name of the node. |
Assign Shortcut | Choose this command to associate the selected phase with a keyboard shortcut. In this case, the comment with the shortcut appears next to the name of the node. |