XSLT run configurations
Last modified: 31 July 2024You can run XSLT Scripts by creating a permanent Run Configuration or by choosing Run to instantly run the selected XSLT script.
Before you start
Enable the XPathView + XSLT plugin
This functionality relies on the XPathView + XSLT plugin, which is bundled and enabled in IntelliJ IDEA by default. If the relevant features aren't available, make sure that you didn't disable the plugin.
note
The XPathView + XSLT plugin is available by default only in IntelliJ IDEA Ultimate. For IntelliJ IDEA Community Edition, you need to install the XPathView + XSLT plugin as described in Install plugins.
Press to open settings and then select Plugins.
Open the Installed tab, find the XPathView + XSLT plugin, and select the checkbox next to the plugin name.
Create run configurations
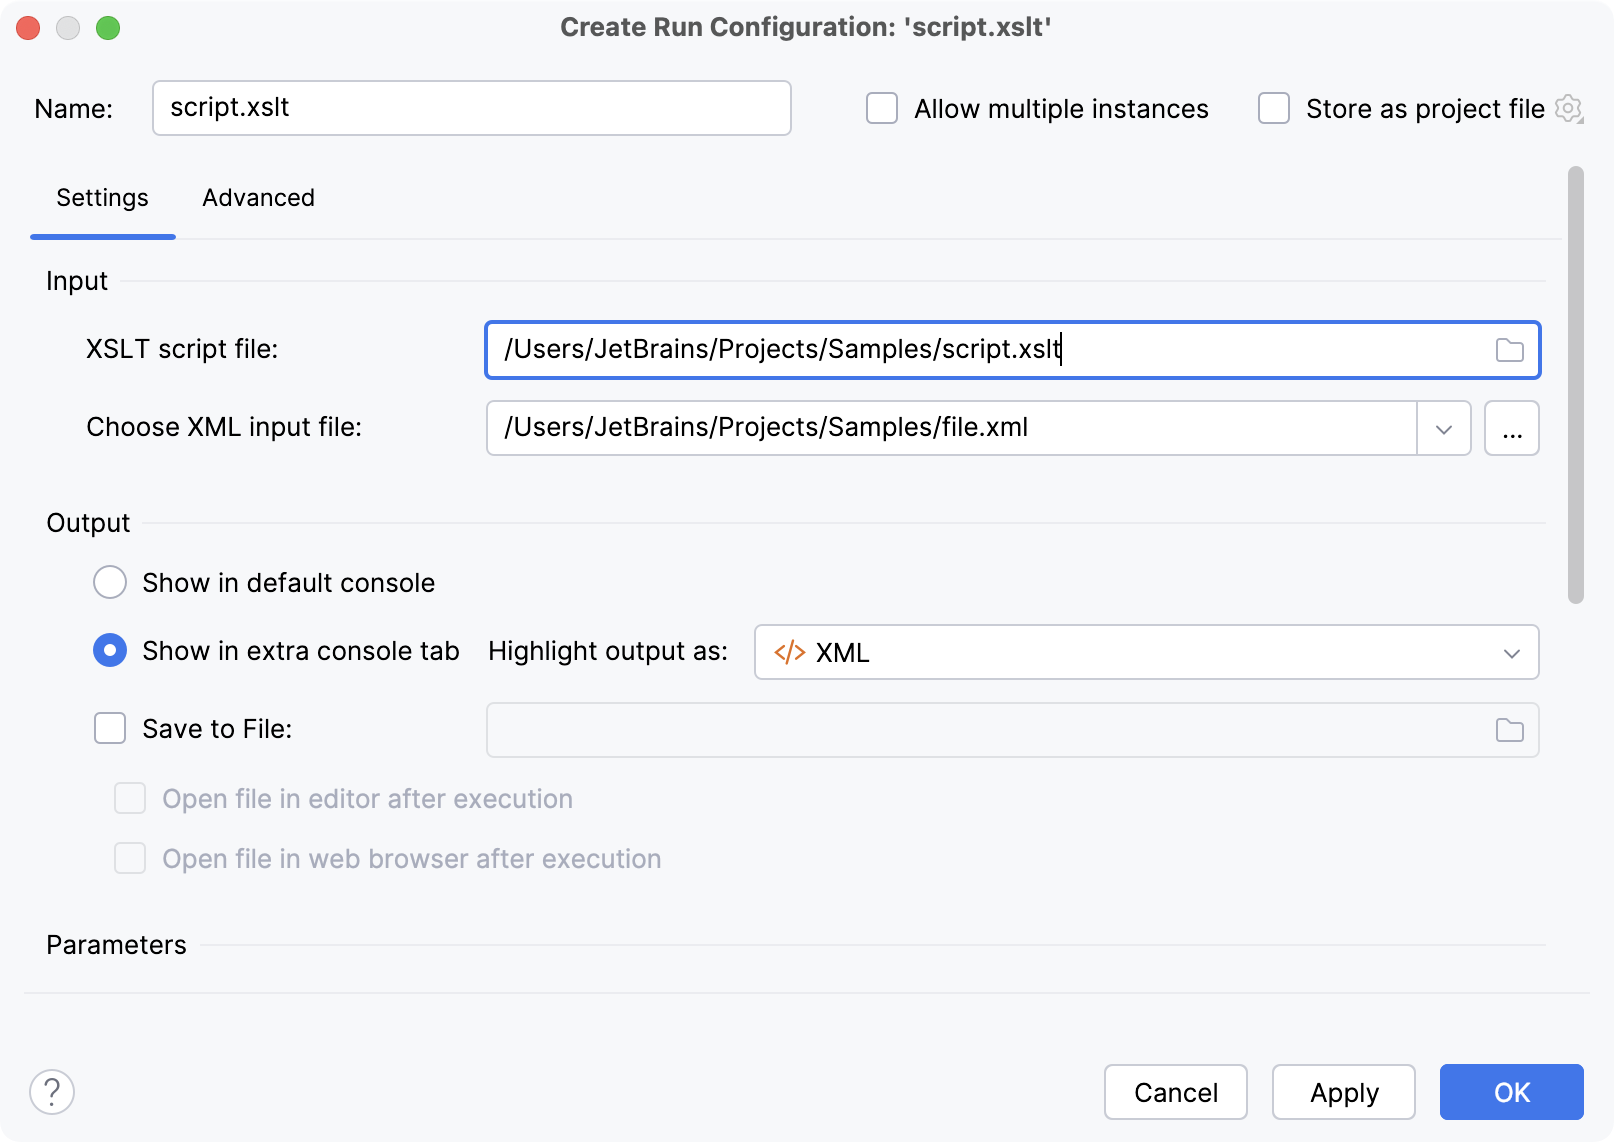
Permanent Run Configurations can be created through Run | Edit Configurations in the main manu. You'll find an additional tab named XSLT to add run configurations for XSLT scripts.

A run configuration can also be created by using the Create "<name>" action from the context menu.
In that case, the name of the configuration will be taken from the Style Sheet file name and its path will already be filled into the XSLT script file text field. If the Style Sheet defines parameters, those will be filled into the Parameters table with empty values. Parameters that are highlighted in blue don't have a value assigned yet and will not be passed to the Style Sheet during execution. It's not required that you delete those automatically created parameter values if nothing should be passed to the Style Sheet.
Run configuration settings

Input
An XSLT Run Configuration has various settings that can be adjusted. The most important ones are the location of the XSLT script file and the XML input file that should be transformed. Those are mandatory, and the specified files must exist, otherwise the configuration cannot be executed.
The XML input file field lists all XML files that have been associated with the chosen Style Sheet via the File Associations functionality.
Output
There are three different choices about how the output of the script should be handled. The first is Show in default console. When this is selected, the output will appear in the normal run console, together with any warnings and error messages from the XSLT transformer, as well as messages generated by the script, for example, by xsl:message.
By default, the Show in extra console tab option is selected. It shows the output in an extra tab named XSLT Output. This option has the ability to highlight the produced output according to different file types that are available in IntelliJ IDEA. However, this is kind of an experimental feature, so it can be turned off completely by selecting the Disabled option. The output will then be written into a temp file that is displayed by the normal Log Viewer.
The last option, Save to file can be used to directly write the output to a file. The field must not be empty and can refer to any existing or non-existing file. Enable Open file in editor after execution to open the file in IntelliJ IDEA after the script ends normally. The Open file in web browser option can be checked to open the generated file in the configured web browser after execution has finished.
warning
The specified output file will be overwritten without confirmation.
Parameters
The Parameters table is used to specify the parameter names and their values that should be passed to the script. Click the Add and Remove buttons to modify the list. A newly added parameter will not have any value assigned by default and will not be passed to the script if the value isn't edited.
Advanced options
This tab allows you to control some options that are not needed for usual run configurations.
Smart error handling
Clear this checkbox to see full error messages including their complete stack traces when an error occurs during execution. When the checkbox is selected, those stack traces will be suppressed and only the relevant information about errors will be displayed in the console.
VM arguments
Allows you to pass arbitrary VM arguments to the VM that is used for running the XSLT script.
Working directory
The working directory to use. When left empty, the working directory will be the directory the XSLT script file is located in.
Classpath and JDK
Allows you to choose the environment to run the script under. The default setting is the Module the XSLT script file belongs to. The option From module will also include the full classpath of the chosen module. This can be needed if the script makes use of custom XSLT Extension Functions.
The option Use JDK allows you to select the JDK without including anything module- or project-related into the classpath. It can be useful to explicitly choose a specific JDK to test the script with.