Intention actions
Open settings by pressing CtrlAlt0S and navigate to Editor | Intentions.
Examples of intention actions at youtube.com: Expand a wildcard and Qualify identifier.
As you work in the editor, DataGrip analyzes your code, searches for ways to optimize it, and detects potential and actual problems.
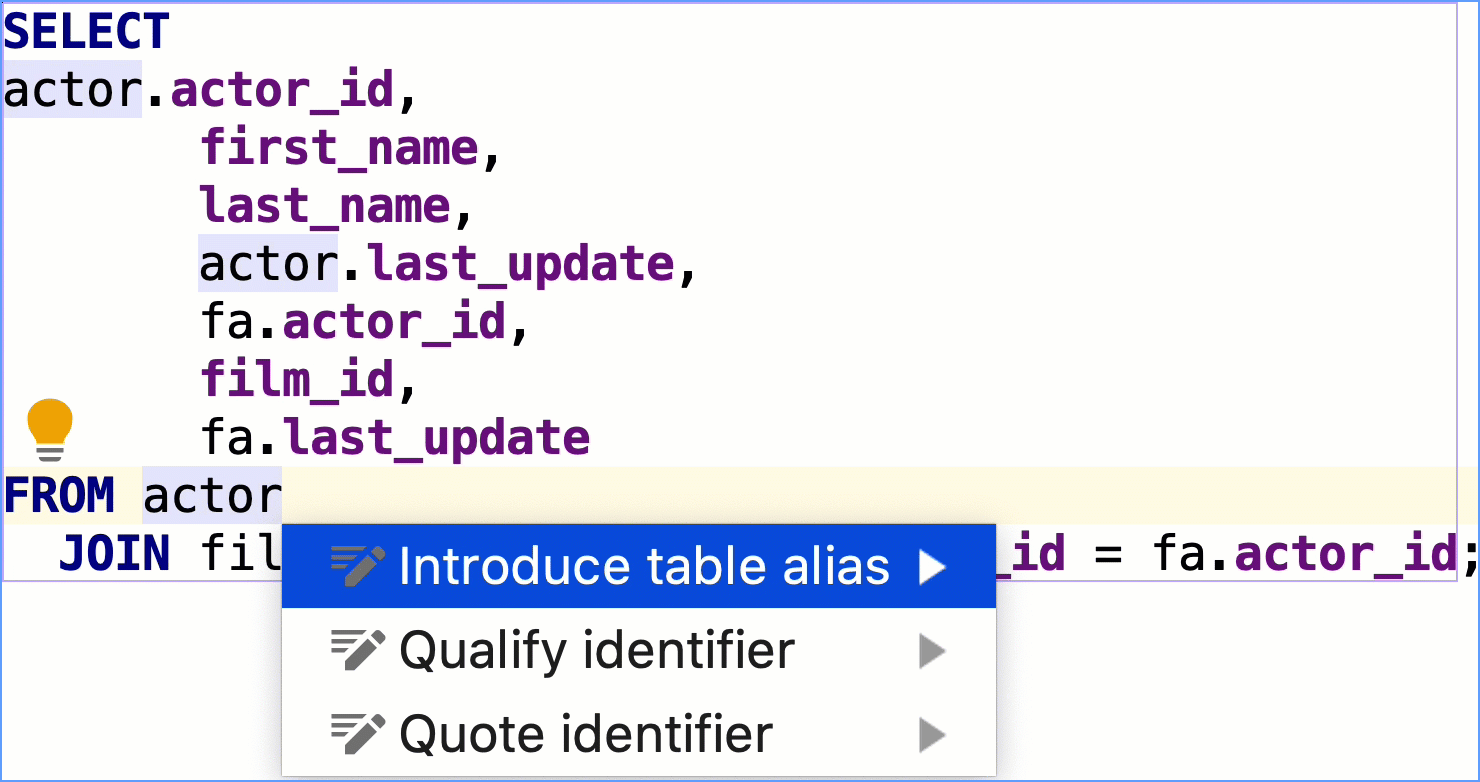
As soon as the IDE finds a way to alter your code, it displays a yellow bulb icon in the editor next to the current line. By clicking this icon, you can view intention actions available in the current context. Intention actions cover a wide range of situations from warnings to optimization suggestions. You can view the full list of intentions and customize them in the Settings dialog CtrlAlt0S.
A red bulb with an exclamation mark indicates that DataGrip has detected a problem, and prompts you to select an associated fix — a quick-fix. Quick-fixes and intention actions together are called context actions.
Place the caret at the code element that you want to modify. Then click the light bulb icon (or press AltEnter) to open the list of suggestions.
Intention preview opens automatically. If an intention is complex, and the preview cannot be generated, you will see the intention description. hover over available intentions on the suggestion list to preview them.
Press Enter or click an intention on the list to apply it.
You can toggle the preview off and on by pressing Ctrl0Q or by enabling Show preview for intention actions when available in Settings (CtrlAlt0S) | Editor | General | Appearance.
If you want to apply intention actions quicker, you can assign shortcuts to them. Currently, you cannot assign shortcuts to fixes that belong to code inspections.
In the editor, place the caret at the code that triggers the intention action for which you want to assign a shortcut, and click the bulb icon or press AltEnter.
A list of available suggestions opens.
In the list, click
next to the necessary intention action and from the menu that opens, select Assign shortcut….

When the Keyboard Shortcut dialog opens, press the shortcut that you want to use for this action and click OK.
After that you won't need to open the list of suggestions to apply this intention action in the editor; you will be able to do it right away by pressing the configured shortcut.
You can find all your custom intention action shortcuts in settings: press CtrlAlt0S, click Keymap, and locate the Intentions category.
You can view the full list of available intention actions, and disable actions that you don't need at the moment. To open the list of intention actions:
Press CtrlAlt0S to open the IDE settings and then select Editor | Intentions.
For each intention action, you can see a description and an example. To disable an intention, clear the checkbox next to it.
Click Apply to save the changes and close the dialog.

Place the caret at the code element that you want to modify. Then click the light bulb icon (or press AltEnter) to open the list of suggestions.
Select the action you want to disable, click the right arrow next to it, and then click Disable <intention action name>.

You can disable the intention action icon and the quick-fix icon
in the editor.
Press CtrlAlt0S to open the IDE settings and then select Editor | General | Appearance.
Disable the Show intention bulb option, apply the changes, and close the dialog.
Place a caret after the table name for which you want to create an alias.
Press AltEnter.
Select Introduce table alias.
Type the alias name.

if DataGrip knows how to fix the problem, you will know about it by just hovering over the warning. To fix the problem just click the link at the lower left corner of the tooltip. Alternatively, press AltEnter and apply a corresponding action.

You can convert GROUP BY to DISTINCT if all the columns of the SELECT clause are presented in the GROUP BY clause. To convert the GROUP BY statement, place the caret at GROUP BY, press AltEnter, and select Replace GROUP BY with DISTINCT.

Thanks for your feedback!