Upsource UI overview
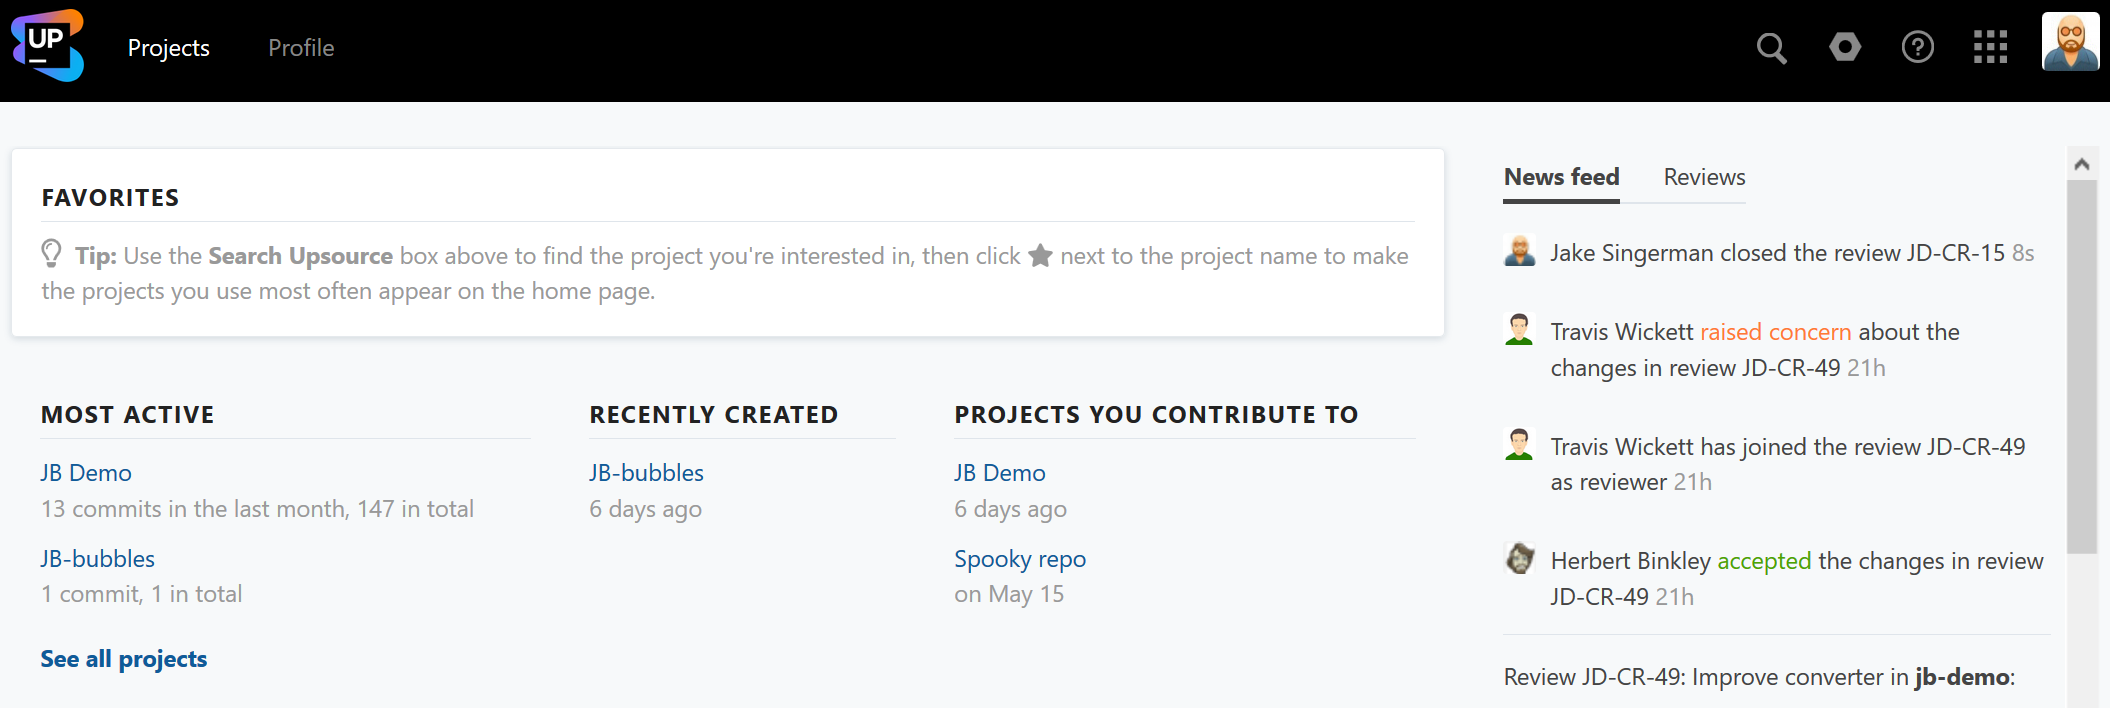
When you open up and log into Upsource you'll see a general entry page. It displays your company (or team) projects in a convenient order and lets you quickly navigate to the project you need. Each project corresponds to a specific VCS repository.
If you have any projects previously marked as favorite, they'll be at the very top, each accompanied by a heartbeat graph (hover over the graph to see details).
Listed below are the most active projects, recently added projects, and the projects you've recently contributed to.
If you still can't find the specific project:
search for it using the search box in the top-right corner (click
 ), or
), orclick See all projects at the bottom, to display all configured projects in alphabetical order.

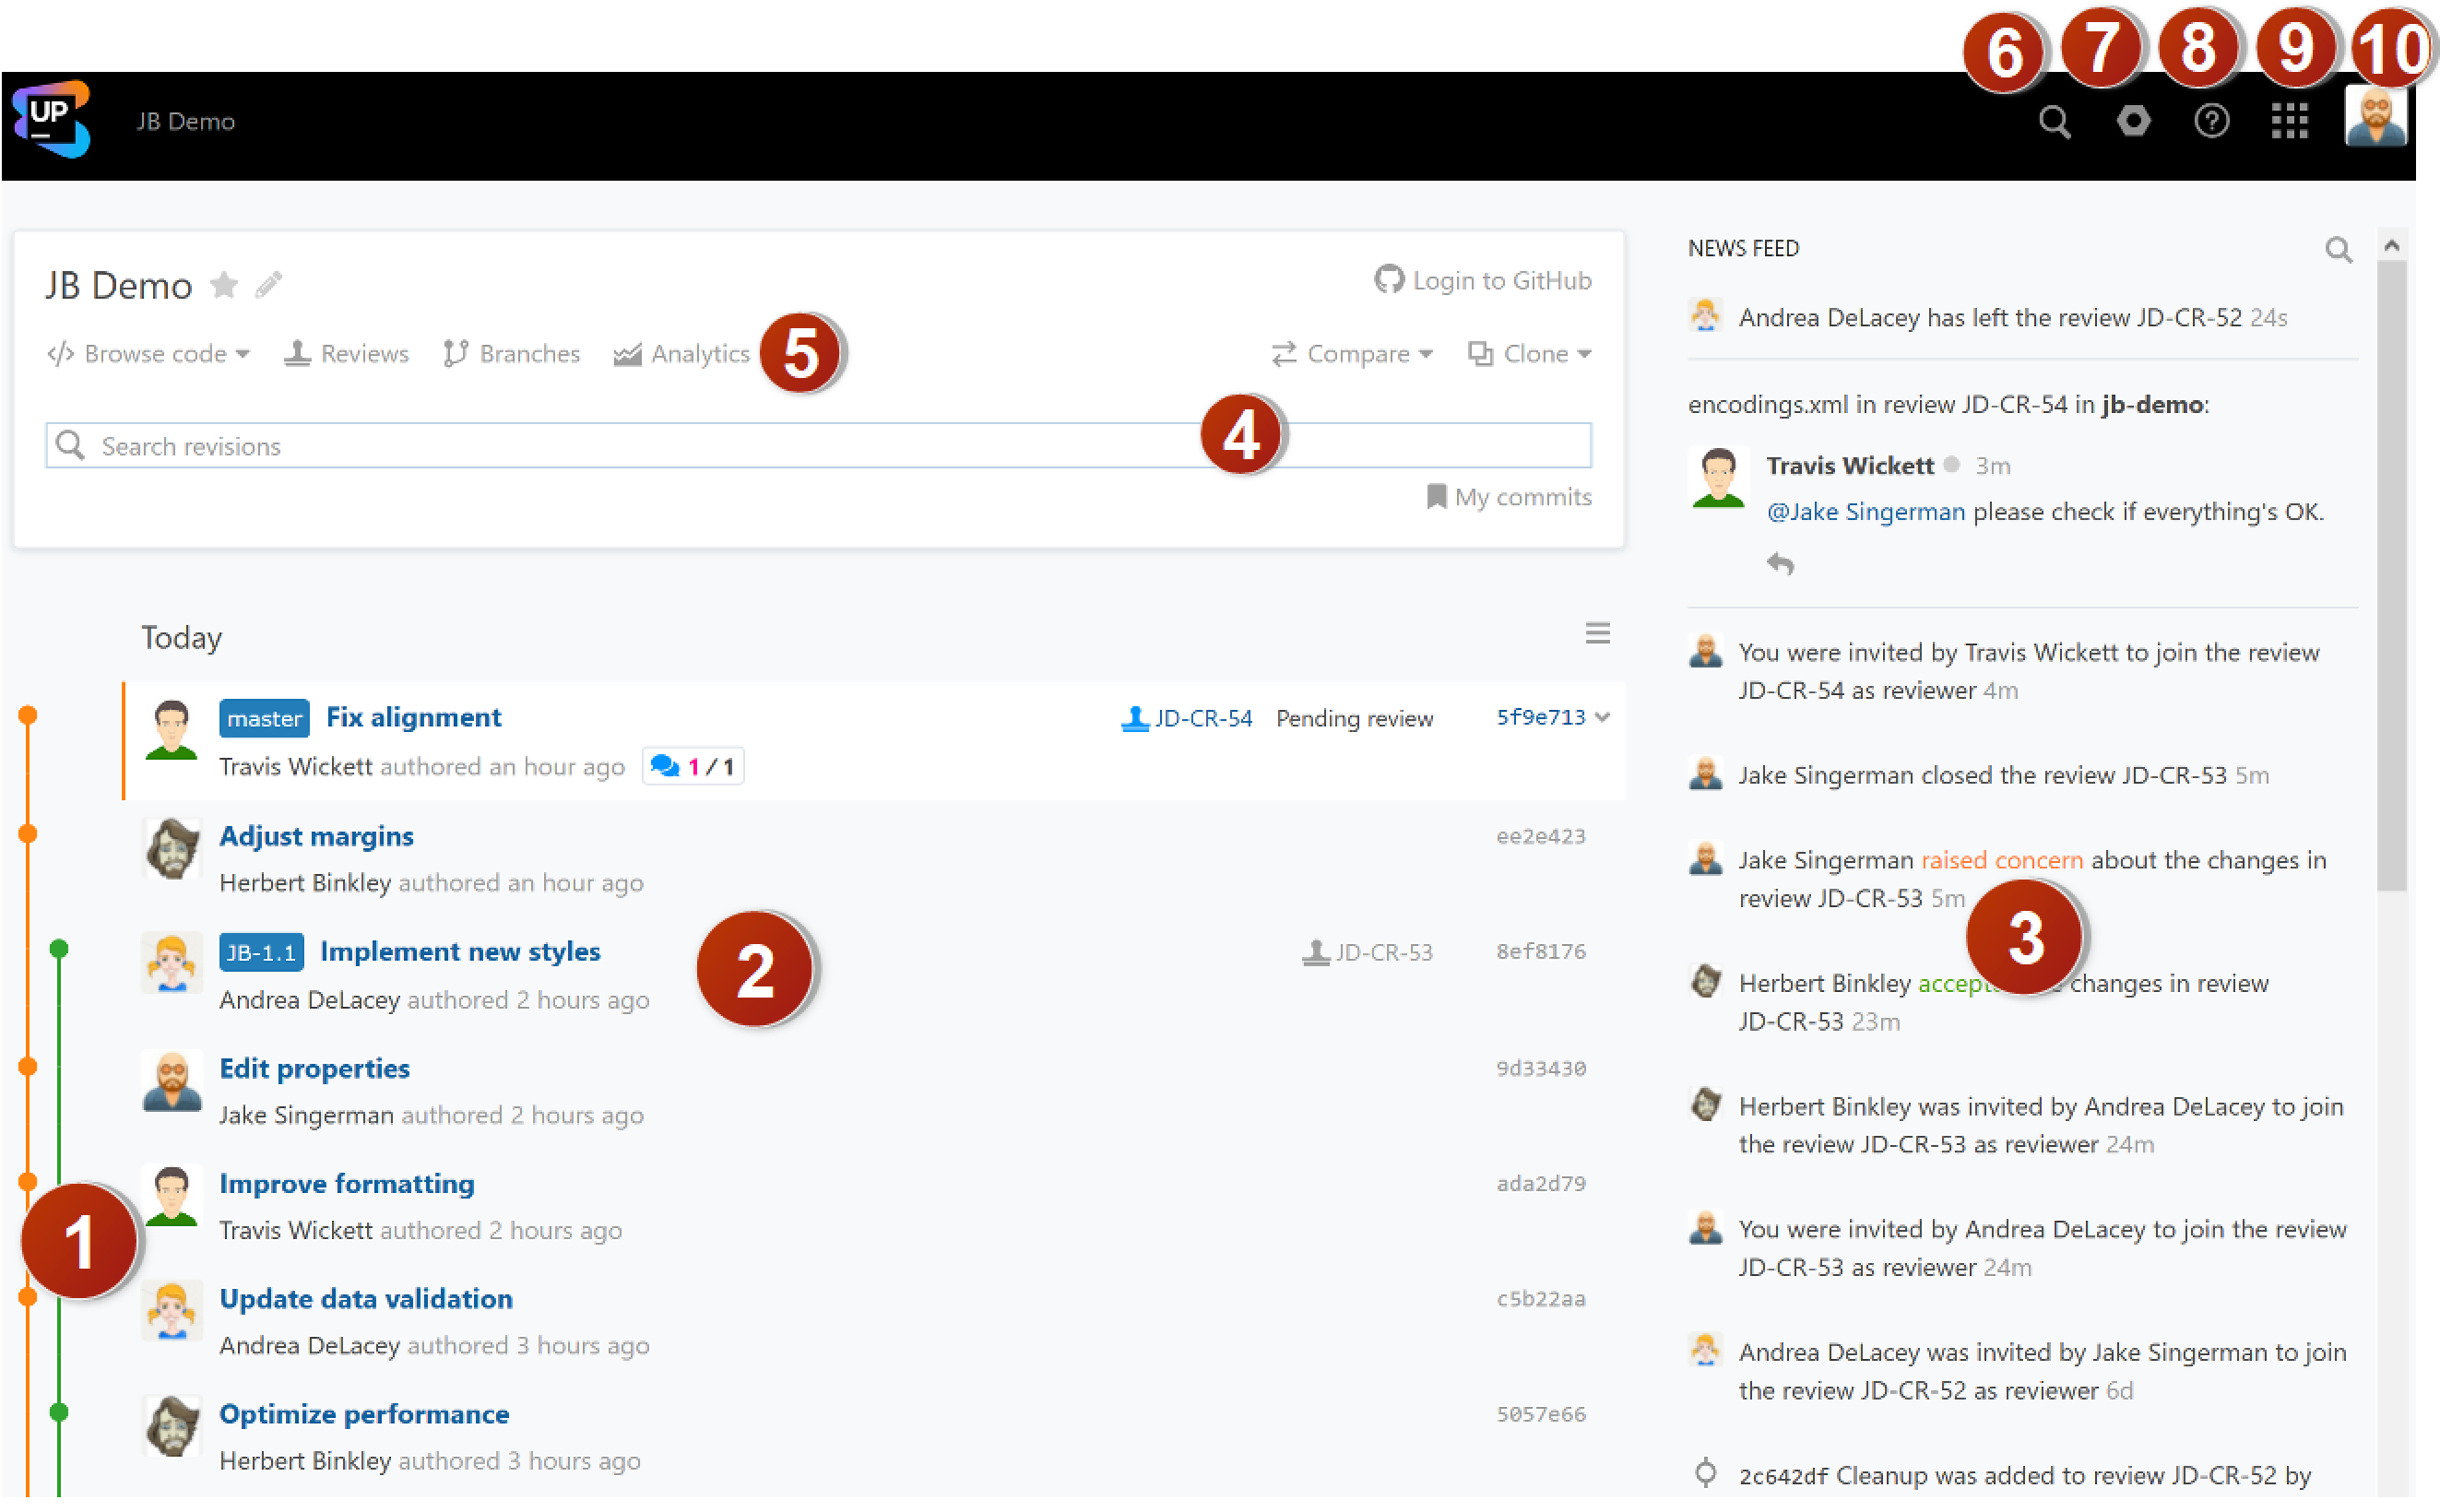
To open a particular project, just click its name. You'll be redirected to the project home view:

Commit graph visualizes the history of commits, branches, and merges
Revision list displays recent revisions in chronological order. Each entry includes:
committer userpic (if any)
committer username
commit message
revision ID
commit timestamp (hover your mouse over it to see the exact date and time of a commit)
review icon
 and ID linking to the review (if this revision is included in a review)
News feed pane: displays recent events that apply to you
Search for revisions by authors, time spans, branches etc.
Links to the other Upsource features:
Browse code: browse your project's directory tree and view the files
Reviews: view the reviews that are relevant to you, or search for any review
Branches: monitor activity across branches; search and compare
Analytics: view repository and review statistics in graphs and diagrams
Compare: view the differences between the specified revisions, branches, and tags
 : view the project's repository URL and copy it to clipboard
Search for users, files, and text
Admin settings: switch to administration mode (shown only if you have administrative permissions)
Help: click to view Upsource documentation (Hey, you're already viewing it!)
Show services: displays services integrated or associated with Upsource
User icon: click to
log out
go to your Profile page
go to your User settings where you can configure your personal preferences for viewing code
go to the Notifications page where you can turn ON/OFF and configure you automatic e-mail and browser notification preferences