Print files
The Print option allows you to print hard copies of the selected files or specific code fragments and save them as PDF documents.
Print your code
In the main menu, go to .
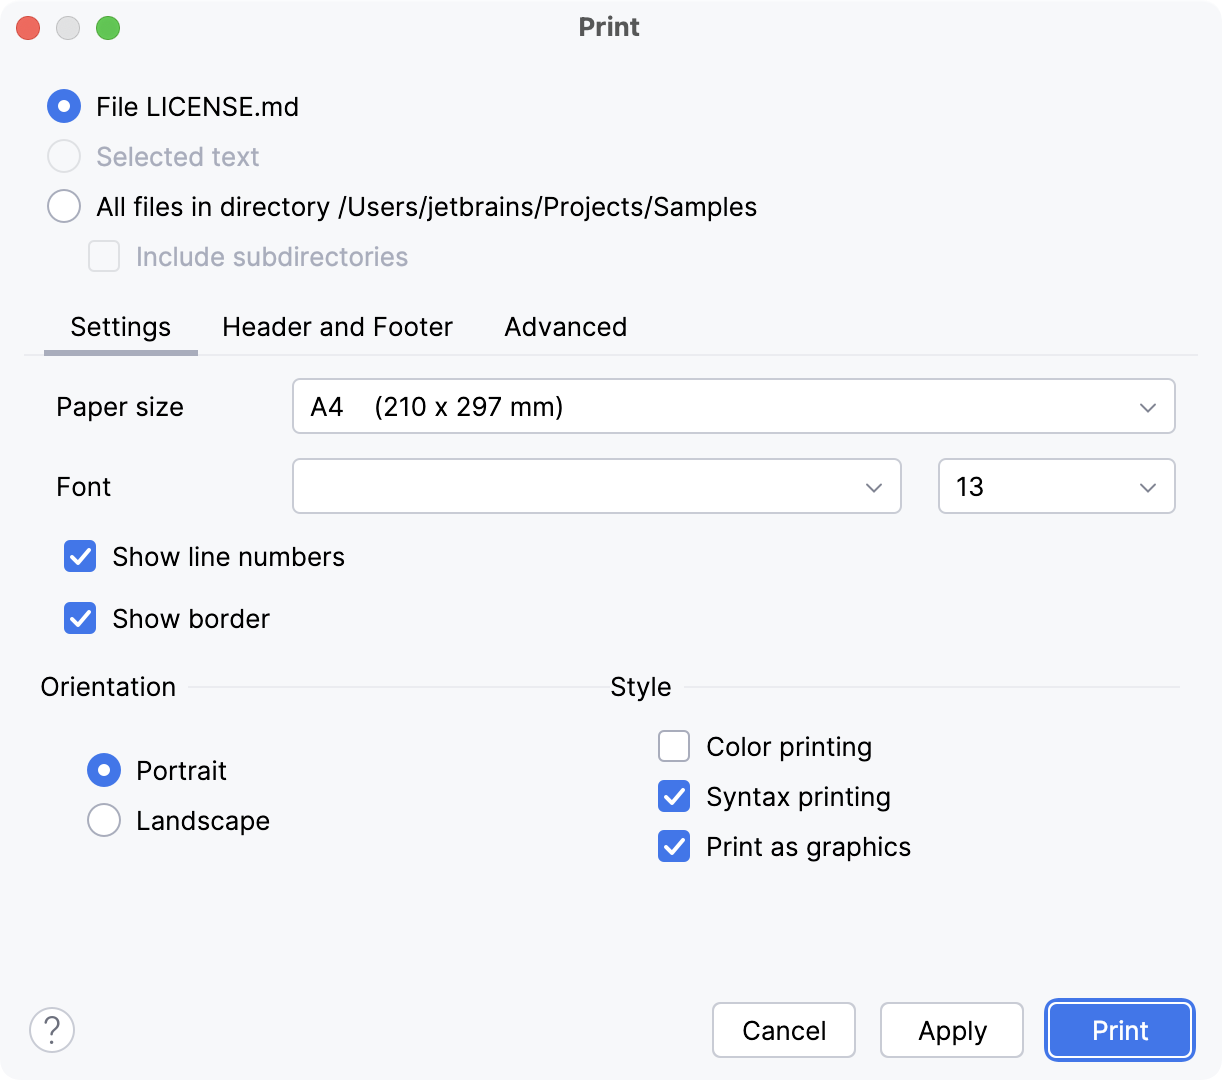
In the dialog that opens, select what you want to print:
File <name>: print the file, which is currently selected in the Project tool window or opened in the editor.
Selected text: print the code selected in the editor.
All files in directory: print all files in the directory that is selected in the Project tool window. Additionally, you can enable the Include subdirectories option to print files located in subdirectories.
If necessary, configure options on the Settings, Header and Footer, and Advanced tabs.

Click Print.
You will see the system Print dialog where you can select the printer you want to use.
From this dialog, you can save the selected code as a PDF file.
Settings
In this tab, specify the basic print layout settings.
Item | Description |
|---|---|
Paper size | Select a paper size. |
Font | Select a font style and size. |
Show line numbers | Print line numbers. |
Show border | Print the border. |
Orientation | Specify the paper orientation. The available options are:
|
Style | Specify the style of the printout by selecting the relevant checkboxes. The available options are:
|
Header and Footer
In this tab, specify the contents and placement of the header and footer.
Item | Description |
|---|---|
Text line | Specify the contents of the header or footer. If necessary, combine plain text with print keywords. By default, RubyMine suggests printing the name of a file The following print keywords are recognized:
|
Placement | Specify whether the above line will be printed in the header or in the footer. |
Alignment | Select an alignment. |
Font | Specify a font style and size to print the header and footer text. |
Advanced
Item | Description |
|---|---|
Wrapping | Configure text wrapping. The available options are:
|
Margins (inches) | Specify the margins in inches. |